
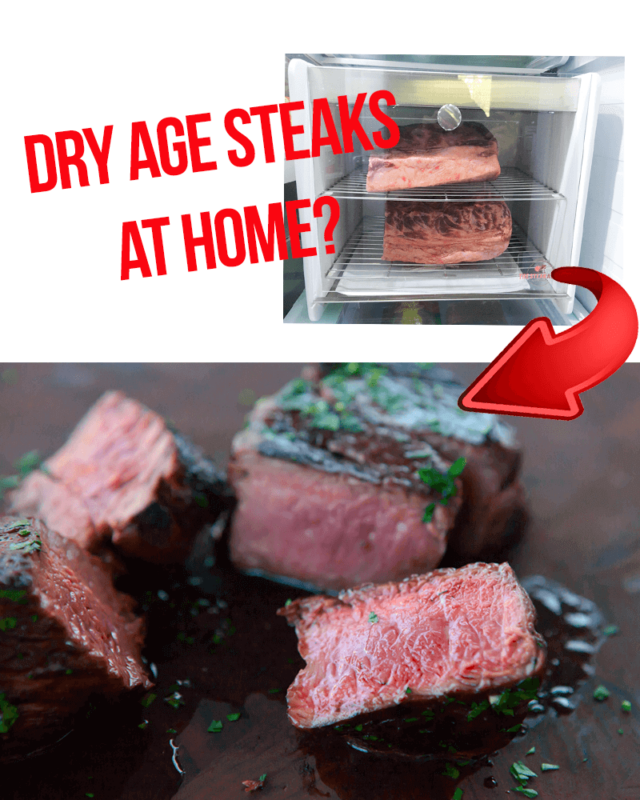
After 3 weeks of testing, this is a very detailed Steakager Review with lots of how-to photos, including PROs and CONs. Can you make high-end steakhouse-quality dry aged steaks, right in your own refrigerator, at a fraction of the cost?
Steakager Review
There are only 2 prime steakhouses, in recent memory, serving dry-aged prime steak that can leave me speechless. The first one is a dinner with Craig “Meathead” Goldwyn in his hometown of Chicago. He treated me to a fine meal at David Burke Prime. The second is our local favorite here in Las Vegas, BLT Steakhouse.
Scott and I used to dry-age our own steaks at home with the Dry Bag UMAI system that allows moisture to evaporate – read our review here and here. Pair UMAI bags with a $100 Sous Vide Immersion Circulator and a $12 searing hot cast iron pan, we can get restaurant-quality dry-aged steak at home, any time that we want.
Why Dry Age Steaks?
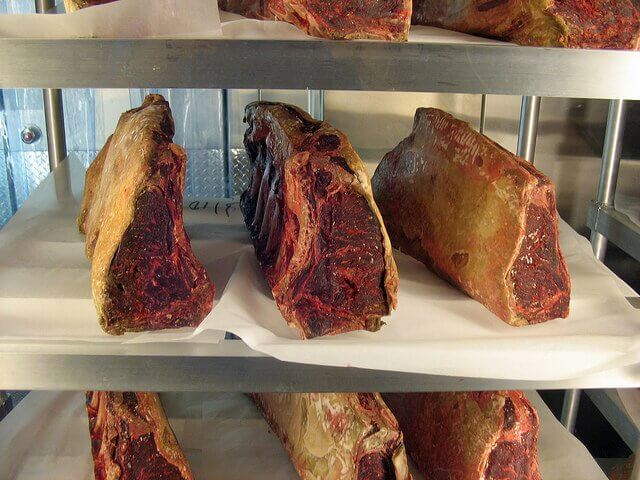
Restaurant Dry Aging Steaks
Dry aging steaks improves the flavor and tenderness of steaks. It is, “The process of placing an unpackaged wholesale cut in a refrigerated room for a period of time while controlling temperature, relative humidity and air velocity to enhance tenderness and flavor. Although dry aging provides a unique flavor that no other aging method can achieve, it results in loss of yield from shrinkage and excessive trim.” (source: US Meat Export Federation)
The reason why dry aged steaks are 3-4x more expensive than regular steaks is because:
- Dry aging takes time, anywhere from 14 days to 3 months
- Dry aging takes a lot of space – air needs to circulate freely around the meat, on all sides
- Dry aging requires constant monitoring for optimal, stable conditions – 32°F-38°F at 80% humidity with air flow (otherwise, microbial growth results in spoilage)
- Dry aging decreases yield by 30% (some from moisture loss, but mostly from trimming)
The aging process produces enzymes which breaks down the connective tissue of the meat (more tender steak), increases juiciness and creates intense beefy, earthy, roasted, nutty, cheesy flavors that cannot be reproduced with any other method!
Wet aged is NOT dry aged
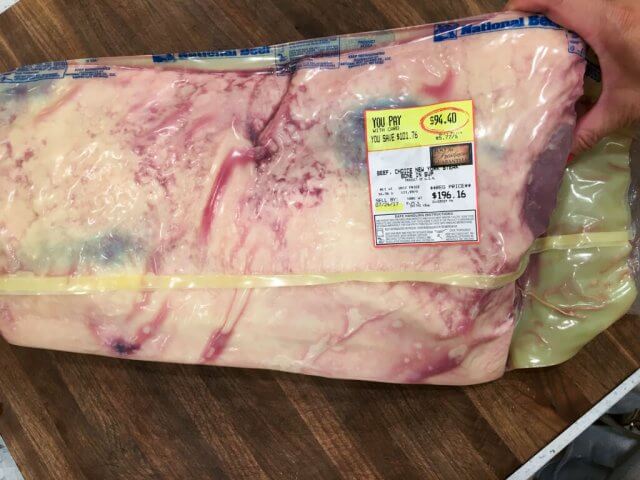
Sub-primal cut from Smith’s supermarket. I had to call butcher ahead of time to reserve it. This is not the beef you’ll see later in the photos of this review. But this beef is currently in my refrigerator, dry aging in the SteakAger.
If you shop at big membership clubs, like Costco, you probably are familiar with “sub-primals” (uncut slabs of steak) packaged in a cryovac bags. This is how meat is sold to butchers and supermarkets. The aging process occurs in the bag, usually 1-14 days while in transit from supplier to supermarket.
Wet aging does improve the flavor and tenderness of steak through microbial action and enzymes, but the flavors are different. Instead of earthy, nutty, cheesy (deep, complex flavors), wet aged beef is described as “tangy” and “fresh.” This is because the beef ages in the sealed bag with blood. I know it sounds gross, but if you do enjoy most steak that you buy, then I guess you also like wet-aging. In fact, studies show that wet-aged beef is more tender than dry-aged beef….a conclusion that I am not quite ready to admit to personally, but will meditate on it 🙂
Wet aging is great for smaller or flatter cuts of beef, like flat iron, skirt steak or tenderloin, because the dry aging process dehydrates (and making inedible) the outer layer of the beef. After trimming, you wouldn’t be left with much edible steak.
Why can’t I just shove a steak in my refrigerator to dry age?
Well, in a word: safety.
Your refrigerator does not have the adequate air flow or humidity control for safe dry aging. Exposed, raw steak in your refrigerator is prone to contamination by accidental touching and cross-contamination from other foodstuff in the refrigerator (the wrong type of bacteria). In addition, exposed meat in refrigerator tends to pick up flavors of whatever else you have in the refrigerator. Annnndd….aging meat smells kinda funky…a strong funky that will fill your nostrils every time you open the refrigerator.
The UMAI bags form somewhat a barrier between the meat and anything else in your refrigerator. But there’s still the issue of air circulation. In addition, I’ve always freaked out about one of my kids not closing the refrigerator door completely, which would increase temperature….which would spoil the entire slab of meat.
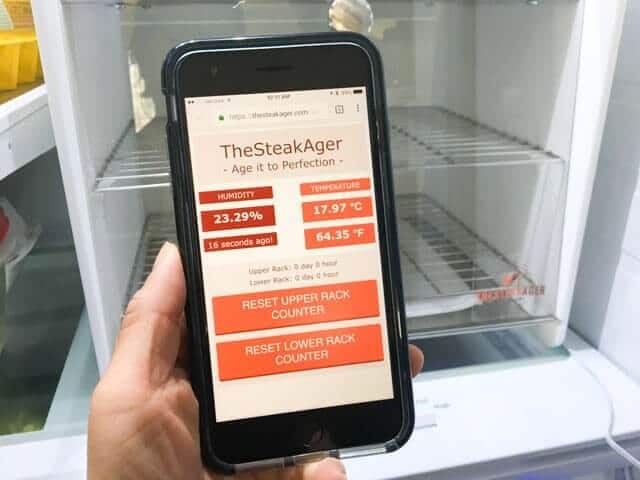
What is SteakAger?

The SteakAger “lets you turn grocery store beef into restaurant quality steak easily and safely.”
- The box is 12″x 12″x 13.5″ and fits in any refrigerator, beef protected on all sides
- Dry ages up to 22 pounds of beef
- Air circulation fan for air flow
- UVC Germicidal Light to retard microbial spoilage
- Wifi enabled to monitor conditions
- Made in USA
To connect to the SteakAger, it can be a tedious process if you run into trouble and need to reset the device. I won’t bore you with details, but if you do buy the device, the end of post will detail our problem/solution.
Whew! Finally connection!
We decided to put the SteakAger in our kitchen refrigerator. It’s summer here in Las Vegas, Nevada, and our garage refrigerator temperature fluctuates depending on the temperatures outside. Right now, it’s 106°F outside and hot in our garage as well. Our poor refrigerator can’t keep up!
The SteakAger fits nicely when we remove a shelf. Our shelves are split, so that makes it easy.

The door opens upwards, so I recommend putting the meat into the SteakAger first…before putting the device in the refrigerator if you have limited room. Our top shelf retracts, so we were fine. (the bottom tray includes salt in a burlap baggie.)
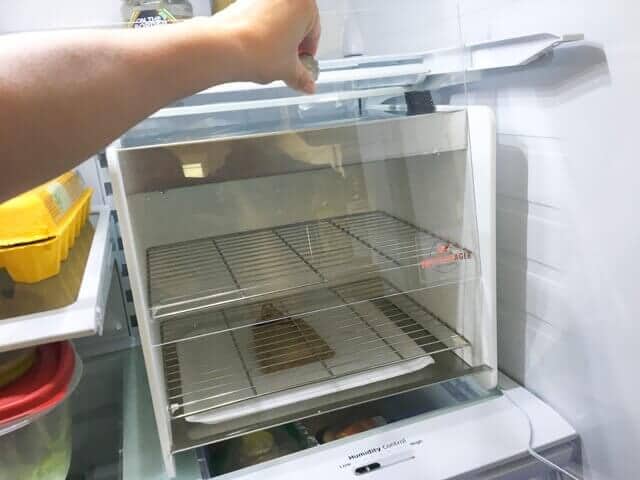
The power cord is a skinny cord, so it easily and discreetly snakes out of the refrigerator door rubber.

Dry Aging our Steak with SteakAger
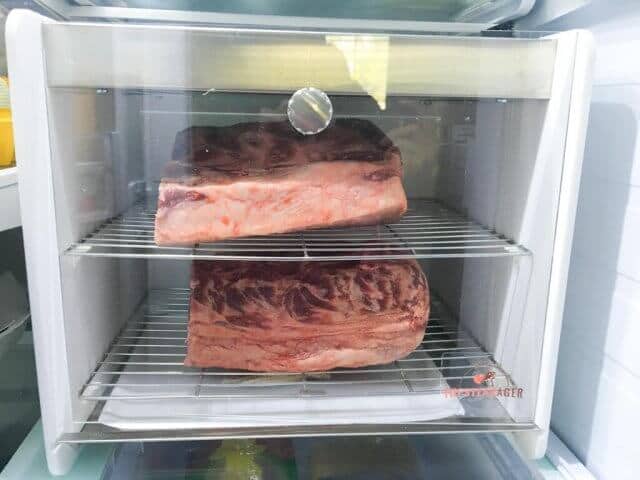
Our local Sam’s Club had a nice USDA Choice Boneless Strip Loin (NY Strip).
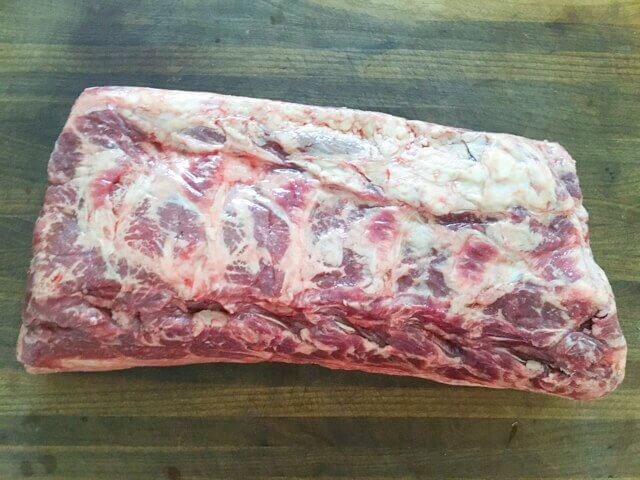
It’s too wide to fit into the SteakAger, so we cut it in half.
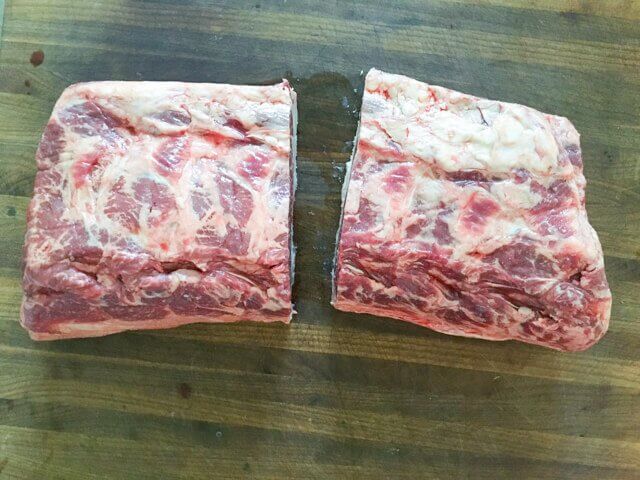
One on each rack. At the bottom is a disposable drip tray and a bag of salt. The salt is to “add flavor and aid in drying,” though I’m not clear on how it aids in flavor.
And now for the wait….
Dramatic changes happen in the first 3 days. After that, the steak pretty much looks the same until you take it out, 14-21 days later (or longer, if you wish.)
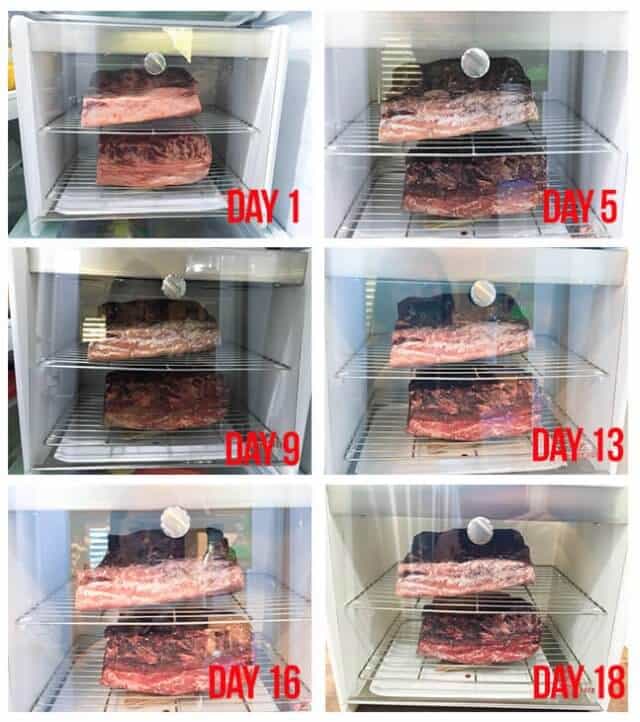
I know, it doesn’t look all the pretty right now. But just you wait!
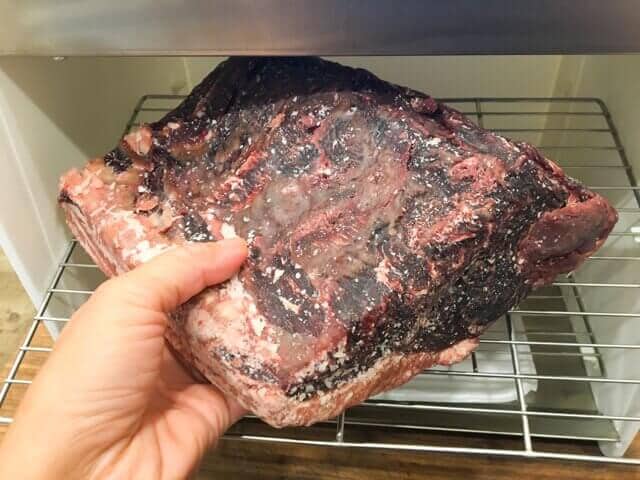
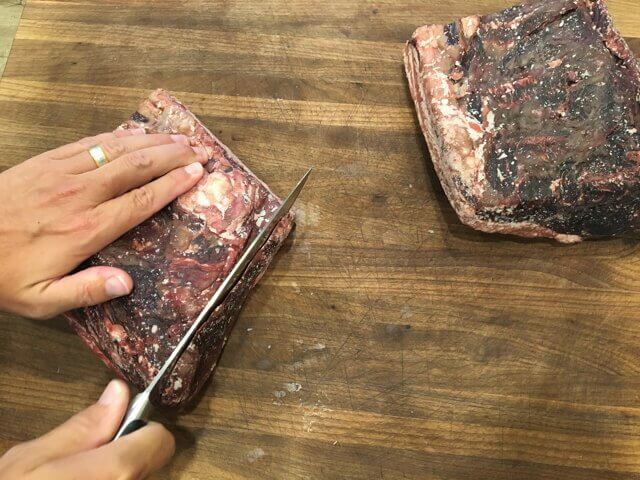
You’ll need a very sharp chef’s knife to cut through that dehydrated, tough, outer layer that’s called the bark. We’ll cut off the 2 faces (the ends) of the steak first.
Oh, look at that!
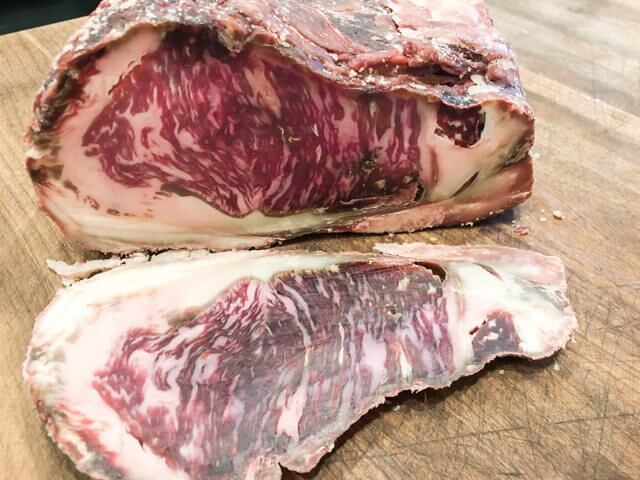
Take care not to trim too much off the face, or you’ll be wasting good steak. The bark is actually pretty thin.
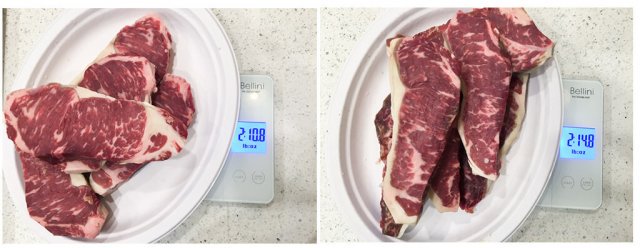
After the two faces are trimmed off, hold off on trimming the sides until later. Slice into thick steaks (we recommend 1-3/4″ to 2″).
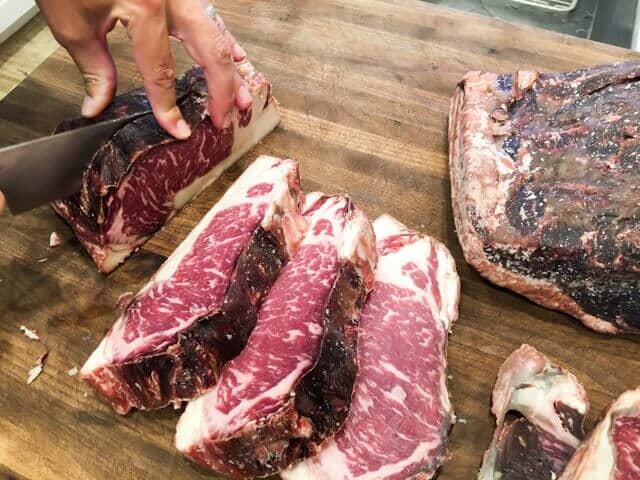
We got 5 thick steaks. To the right, are the two tough faces/bark that you’ll discard.
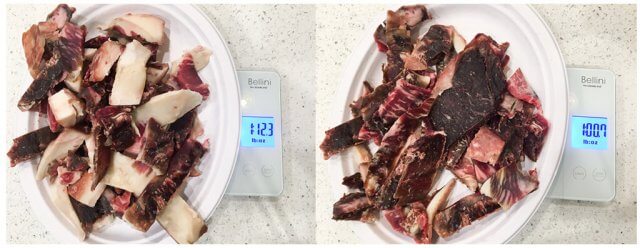
Now it’s time to trim some of the fat and the bark on the sides of the steak. Its much easier to do this steak-by-steak, instead of wrestling with the whole slab. Leave some fat on! It’s great flavor.
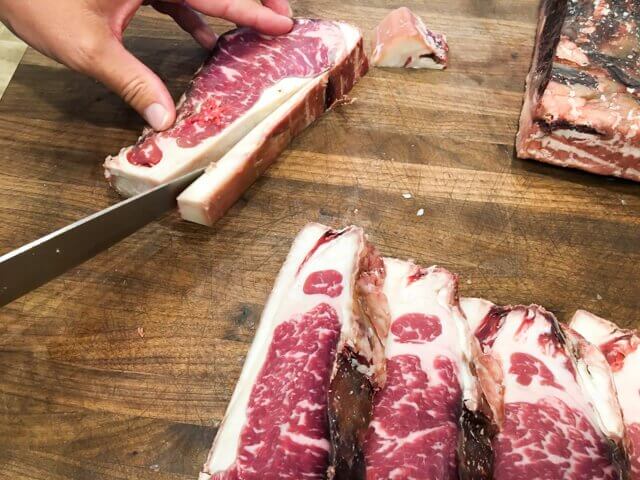
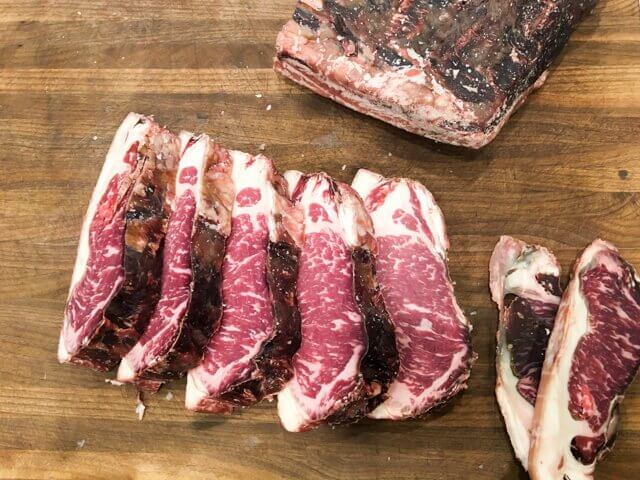
Trim the bark.

From the two halves, we got 4.25 pounds of dry aged steak.
Trimmings came to 2.13 pounds.
Our original sub primal was 8 pounds. Let’s calculate yield from dry-aging.
Original 8 pounds
Trimming 2.13 pounds
Steak 4.25 pounds
However…see all that fat in the trimmings pile? I don’t want to count that in as waste, as a result of dry-aging. What I’m looking for is what is my yield due to dry aging?
The yield should be Original Weight – (Moisture Loss + Trimming).
Fat would still be on the steaks whether or not I dry-aged or just cooked it straight from market.
We estimated that if we had left more fat on the steaks, we probably would have yielded 4.5 pounds of dry-aged steak. That comes out 56% yield, or a loss of 43%.
The original price of our strip loin was $105.00. So, our dry-aged steak ended up costing $23 per pound, which is an amazing price for dry-aged steaks.
- Chicago Steak Company sells USDA Prime Dry-Aged Strip for $47/lb
- Meyer Natural Angus sells USDA Choice Dry-Aged Boneless Strip for $45/lb
- Debragga sells Dry Aged Boneless Kansas City Strip Steak for $56/lb
- Allen Brothers sells USDA Prime Dry-Aged Boneless Strip for $58/lb
Dry Age USDA Prime or Choice?
We’ve dry-aged USDA Prime and USDA Choice beef. I personally think dry-aging Prime is not worth the extra dollars. Dry-aged Choice yielded just as flavorful steaks! I think your senses are so overwhelmed (in a good way) but the amazing, intense flavor of dry-aged meat that the small difference in tenderness between the two was nearly indistinguishable.
But if you’re up for some detailed, scientific (but interesting) reading on dry aging beef, check out this article put out by Beef Checkoff (USA organization funded by beef producers for research and marketing)
In fact, research shows that Prime steaks wet-aged were better tasting than dry-aged Prime steaks. “….wet-aged U.S. Prime steaks had signifcantly higher flavor desirability and overall acceptability scores than dry-aged Prime steaks.” Research by Sitz, B. m., Calkins, C. r., Feuz, d. m., Umberger, W. J., & eskridge, K. m. (2006). Consumer sensory acceptance and value of wet-aged and dry-aged beef steaks. Journal of Animal Science, 84, 1221-1226. (Dry Aging of Beef by Beef Checkoff, page 5)
How did we cook Dry Aged Steaks?
The only way we cook steaks, dry-aged or not, is with a Sous Vide immersion circulator and a cast-iron skillet. Here’s why:
- Sous Vide guarantees my steak will ALWAYS be perfectly cooked. You set the temperature, and the circulator keeps that temperature steady.
- I prefer cast-iron skillet over a BBQ grill because I can control the heat much better on the stove, I can get the pan rippin’ hot and I get 100% contact between pan and surface of the steak. I want my steak seared until I get a thin, crispy, salty crust. The only way to do that in my home is direct contact with rip roarin’ crazy hot cast iron pan. I don’t care about grill marks!
If you’re not familiar with Immersion Circulators, read the review on one I recommend the most, Joule.
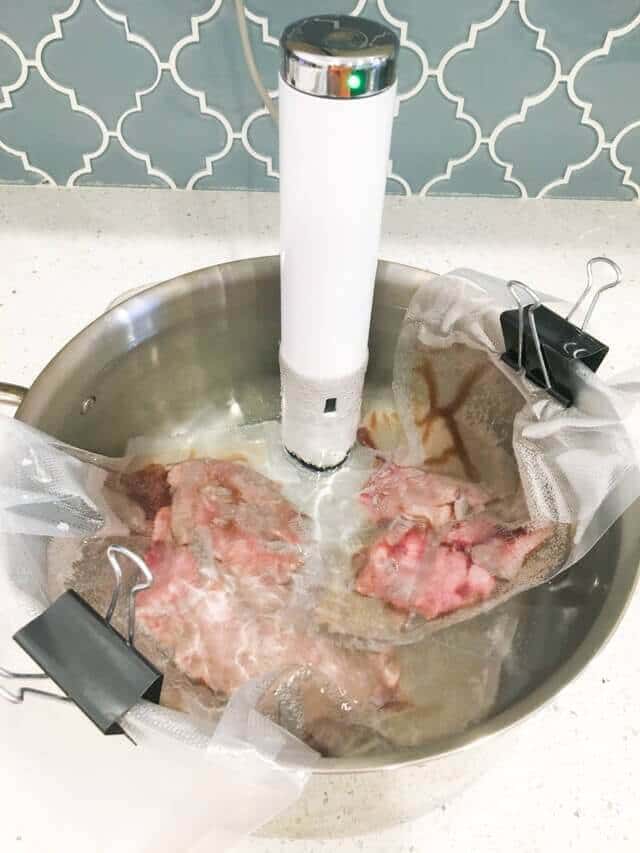
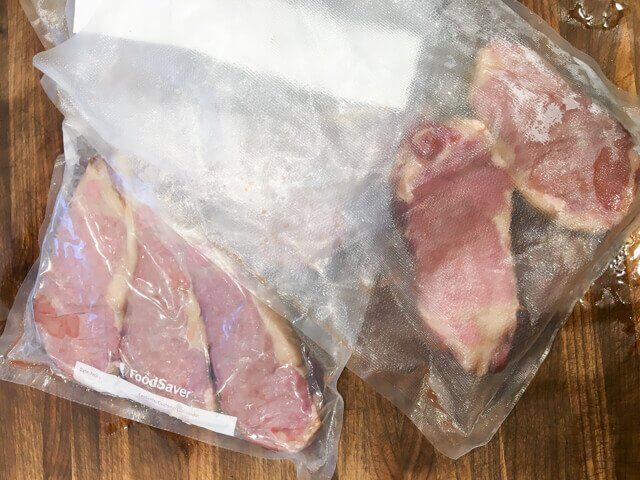
First, we put the steaks into a thick bag, one that’s either made for sous vide/vacuum sealing, or a gallon freezer bag. Make sure there is space between steaks, and that the steaks are single layer.
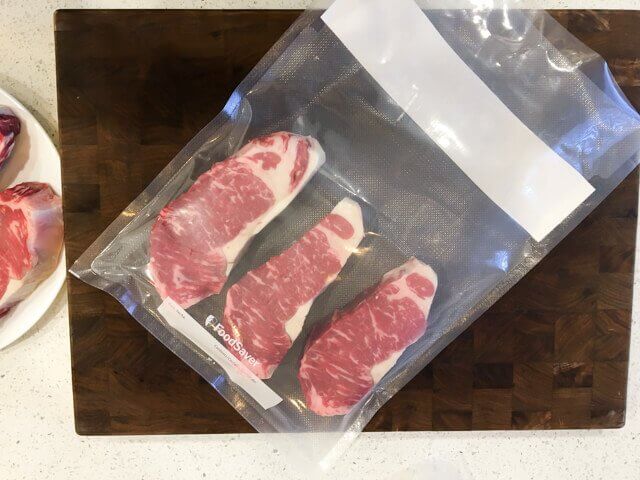
Set the steaks inside your immersion circulator, keeping the open edge out. Push down to submerge the steaks and to remove all of the air in the bag. (This is my Oliso Immersion Circulator. We sous vide at least 3-4x a week, so this big machine fits our family’s needs)
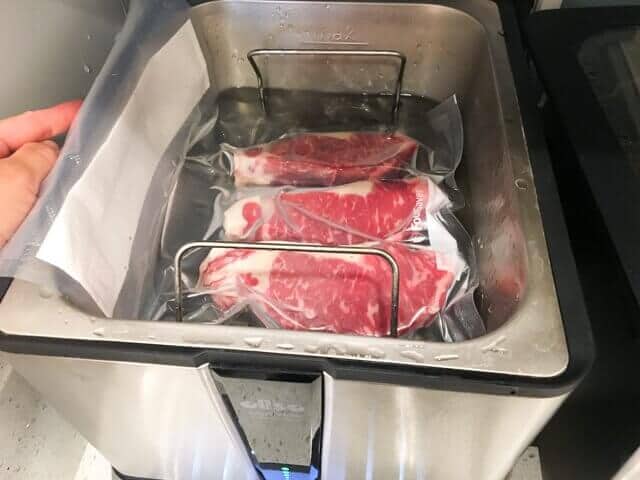
The sous vide is set at 127°F for about 90 minutes-ish. Medium rare is 130°F, but we’ll be finishing the steak in the cast iron pan, which will result in perfect medium-rare when done.
We also have our lovely Joule Sous Vide going too. Big party tonight, it’s my Mom’s birthday!
After sous vide, the steak is 127°F top to bottom.
Pat very dry. No moisture! I know, the steak looks so sad right now. Don’t worry, we’ll get it seared up.
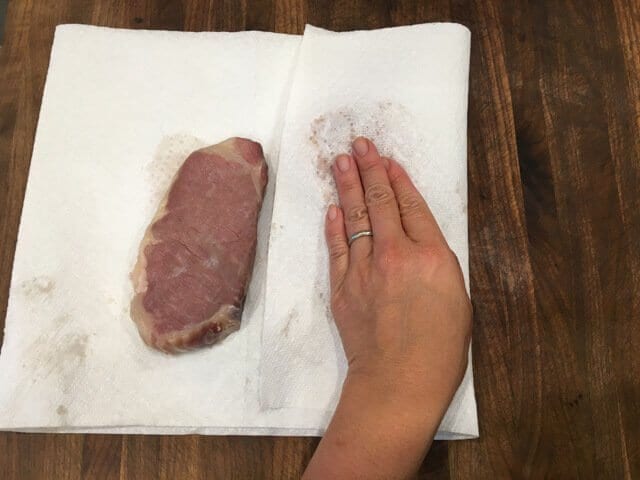
Personally, I like to salt my steak after the sear. I want the surface of my steak bone-dry, so that it can get that blacked sear very quickly. Salting the steak now will start the process of releasing moisture on surface of steak. I really don’t want that.
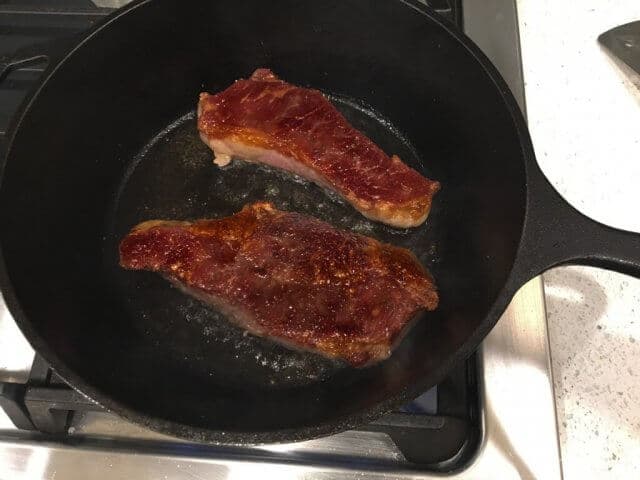
After searing, season with sea salt, top with a bit of garlic herb butter, and just let it rest for a bit.
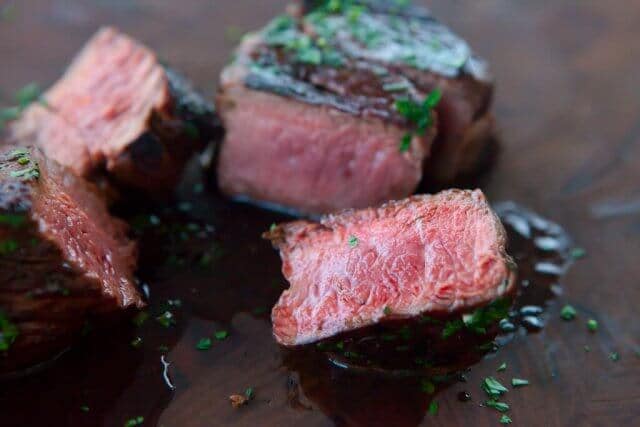
Of course, the steak was everything a dry-aged steak should be. Nutty, complex, earthy, umami. The steak was incredibly juicy. I keep going back the the words, “complex” and “deeply savory” to describe the flavor.
Our thoughts about The SteakAger
Once we got over the installation/connection hump, the rest of the process of dry aging was so incredibly effortless. The current price of the SteakAger is $249.99 with free shipping. I think the product needs fine-tuning. On my wish-list:
- Display and control panel on the SteakAger itself (current photos on their site show a unit with an LCD display)
- A dedicated app that alerts me if the temperature or humidity is off. Right now, the only way that I know if my SteakAger is doing well, is if I actively log onto the site and check.
- Better documentation/troubleshooting and easier to understand instructions
The SteakAger is pretty big, I recommend using your second refrigerator, or even buying small mini dorm-room refrigerator that’s just dedicated to dry aging.
Despite all these nit-picky details, I love the SteakAger. In fact, we’ve got another strip loin aging right now, this time for 21 days. Here’s why we love it:
- The SteakAger protects the meat completely
- The UV light kills unwanted microbes
- The fan circulates air, important to dry aging
- Made in USA!
- I love supporting new companies with great ideas. This one will change the way you and I enjoy steaks, forever.
As promised, here’s the trouble we had with connection, and how we fixed it: At first, we connected just fine. When we logged back into the website, SteakAger’s servers must have lost our device. Since the SteakAger itself doesn’t have a display or control unit, there was no easy way to reconnect. After an hour of searching online for an answer, we found others with similar issue on Facebook and spotted the solution. We fixed issue by turning off our router for 5 minutes. The SteakAger lost connection to our router, and reset itself. Only then could we reconnect to the SteakAger. We recommend writing down the 12-digit SteakAger ID number (you’ll find this after logging into My SteakAger Dashboard). In case the servers lose your device number, you can always do a search and reconnect again.
Research Sources:
Beef Checkoff – Dry Aging of Beef for National Cattlemen’s Beef Association’s Center for Research & Knowledge Management
The Atlantic – Dry vs. Wet: A Butcher’s Guide to Aging Meat
Beef Checkoff – The Chemistry of Beef Flavor
The Food Lab – Dry Aging Beef at Home
SteakAger Giveaway


0 Comments