These Pork Belly Buns comprise of slow-cooked pork belly is sliced and simmered in a sweet-savory Vietnamese caramel sauce and sandwiched between soft, pillowy steamed buns. But it doesn’t stop there – a hit of spice comes from kimchi and flash-fry of fresh chilies and green onions.

Why This Pork Buns Recipe Is So Good
- Step by step photos – how to make caramelized pork belly
- How to make Chinese steamed buns – plus a bonus cheater bun recipe using Pillsbury refrigerated dough (a secret ingredient!)
- Top the pork belly with spicy fresh chilies, kimchi and a slather of sweet, sticky hoisin glaze
Ingredients
For the Pork Belly
- Pork belly
- Cooking oil
- Garlic cloves, ginger, chili pepper
- Green onion
- Brown sugar
- Rice vinegar, Asian fish sauce, soy sauce
- Water
For the Buns
- Steamed bun flour, all purpose flour
- Parchment paper
For the Chili Sauce
- Green onion
- Chili
- Rice vinegar
- Salt
- Cooking oil
- Hoisin sauce
- Kimchi (optional)
How To Make This Pork Buns Recipe – Step By Step
Caramel Braised Pork Belly
Ladies, gents, meet pork belly. It looks like bacon. Asian markets with a fresh meat counter will have pork belly. Otherwise you might have to request it from your meat man/woman.
Buy a nice slab of it – this recipe calls for 2 pounds – which will give you enough pork belly left over to enjoy with some ramen.

Season with salt and pepper on both sides. Not too much – just a nice sprinkle.

Wrap it up in 2 layers of tin foil. Wrap it nice and tight. You don’t want any of the juices or fat escaping.

Roast slow ‘n low: 275F for 2 hours. Do not open the package. You’ll lose all that precious liquid.
Then let it rest on the counter until cool enough to refrigerate (but remember, don’t open it yet! no peeking!) Refrigerate for a couple of hours or overnight.
Only after it’s fully chilled, then you can open it. This method will ensure that 1) the pork belly keeps its shape 2) no juices escape, which is important because that’s good flavor!
This is what it looks like after refrigeration:

When you slice it, you’ll see what I mean about keeping its shape.

Slice into 1/2″ thick.

Heat up a saute pan or wok swirl in a bit of oil and fry each slice on both sides until browned and the edges start to crisp up. Remove from pan.

Keep all that fat in the pan and you’ll use the fat to saute garlic, ginger, green onion (and fresh chilies if you want). Take care not to burn these aromatics!

Now it’s time to make the caramel braising sauce. Whisk together fish sauce, soy sauce, sugar, rice vinegar, green onion, garlic, ginger and fresh chilies.


Add the pork belly pieces back into the pan.

Let it simmer on low for about 20 minutes, covered.

Resist the urge to just devour the entire thing.

After that, you can just turn off the heat and let the pork belly hang out in the sauce until you’re ready to serve.

How to make the steamed buns
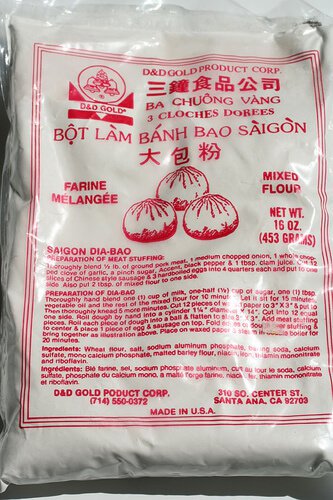
I always start with a package of pre-mixed flour*. All you need to do is add sugar, milk and a bit of cooking oil. Easy. If you’re looking to make these buns from scratch, without a four mix, here’s my Mom’s recipe for Chinese Steamed Buns.
Cheater bun recipe is at the bottom of the post – which are just as amazing as these buns.
*Here’s another photo of different brand of mixed flour.

In a big bowl (you’ll need a big bowl!) Pour in the ingredients except for the flour. While mixing with a wooden spoon, pour in the flour mixture.

Stir! Stir! And Stir!

Keep stirring until it comes together like dough.

Now use your hands to knead the dough for a few minutes in the bowl. Push with the palm of your hand towards the side of the bowl, lift dough, rotate and push again.
pssst…..yes, I give you permission to use a mixer + dough hook.

Once the dough becomes smooth, cover and let rise for 20 minutes.

It will rise and look like this:

Dust work surface with flour. Sprinkle a bit of flour on the dough.

Cut into 8 pieces.

And then cut those pieces in half, so you have 16 total.

Roll into balls.

Keep balls covered! <– really important

Use a rolling pin or (ahem) a muddler. I prefer a smaller 1″ diameter rolling pin, but since I couldn’t find the one my mom gave me, I’m using a muddler. It will do. The giant rolling pin seems overkill on this itty bitty ball of dough.

Roll it out into an oval-ish shape.
It’s not completely round. There’s a reason for that. Just slightly oval.

The reason is because you’re gonna fold it in half into a half circle bun.

Place it on a parchment square. This makes sure that the bun doesn’t stick to the steamer.

Keep ’em covered until ready to steam! <– important too

To steam the buns, get a wok. Fill the wok or large, wide pot with a inch-ish of water. Place a rack on top – or something to prop up a plate in the pot. I’ve been known to use 3 shot glasses or a can of tuna (without the tuna, of course).

Place a plate on top of the rack.

Put buns on plate (don’t over crowd – they puff up when they cook).

Cover and steam for 15 minutes.

They’ll puff up like this!

Let ’em cool.

Like clouds….

How to make the chili/green onion topping
Chopped green onions + fresh chilies of your choice + vinegar + salt in a heat-proof bowl.

In a small saucepan, heat 2 tbl of cooking oil until smoking. Yes – make sure you wait until you start seeing wisps of smoke.
But don’t set off your fire alarm, or start a fire. Keep yer eye on the oil!
Once it starts smoking, immediately pour the oil into the bowl. Carefully.

Magic happens! The hot oil sizzles, crackles and POWS! the green onion and chili, releasing its flavors without burning them.

You might also want some sweet hoisin sauce so spread on the buns.

Take a bun, open it up and spread just a bit of hoisin sauce. Add a piece of pork belly, top it with the chili/green onion. Sneak in a bite of kimchi.
Enjoy.

How to make steamed buns with Pillsbury Buttermilk Biscuit Dough
My friend, Isabelle, came over for dinner and she arrived the same time I was popping open this can of Pillsbury Biscuit dough. Even though my mom told me to use this dough 9 years ago, I had never experimented with this.
So Isabelle’s sitting at the counter, enjoying her wine and watching me roll these balls and I’m like, “This is SO NOT GOING TO WORK” — “I bet you $10 that this canned dough will fail miserably.”
Lesson learned: never doubt my Mom. They were just as tasty as the dough mixture – and they looked better with smooth, pillowy texture.
This will make 20 buns, however, they will be just a bit smaller than the buns I’ve made above – just make sure you cut the pork belly into thinner slices.
2 tablespoons all-purpose flour for dusting work surface
2 cans Pillsbury Buttermilk Biscuit dough (7.5 ounces each)
20 parchment squares (about 4″x4″)
1. Dust work surface with the flour. Open the can of dough. Separate out the biscuits – there should be 10 in each can. Keep the dough covered loosely with plastic wrap or towel. Roll each biscuit into an oval and fold in half. Place on parchment square. Keep covered until ready to steam.
2. Prepare steamer as shown above in photos. Steam the buns for 12 minutes. You’ll steam the buns in batches, avoid overcrowding the plate while steaming otherwise the buns will stick to each other.
Use Pillsbury Buttermilk Biscuits:

Roll each biscuit out to oval-ish shape

Fold in half and place on parchment square:

Steam:

Fluffy!

Gorgeous. Brilliant trick, Mom!

A Super Popular Dish
Pork Belly Buns is probably one of the biggest Asian food fads to hit American palates, right next to Korean Tacos and Bo-Ba Tea. It’s no surprise, since since pork belly is essentially where the much-loved bacon comes from!

Pork Belly Buns
My version of Pork Belly Buns is sort of a mashup between three cultures: Vietnamese caramel braising sauce, Chinese steamed buns and pork belly and Korean kimchi. You won’t find a better combination of flavors or textures.
I’ve adapted the pork belly recipe from my buddy, John, of Food Wishes. Do you know John? If not, you must see his videos! He’s amazing. Plus, we have matching mustaches.

Can I Use Pre-made Buns?
Those who live near a good Chinese market can find pre-made buns (usually frozen), but for the rest of us, I have 2 solutions for you. A flour mixture, specifically for steamed buns, is available in many Asian markets (there’s photos below). And if you can’t find that, a cheater recipe that I learned from my mom is also written for you using….get this…canned Pillsbury Buttermilk Biscuit dough. YES! Really!

Take Some Time
Unfortunately, there’s no cheater recipe for the pork belly. But I swear, it’s all worth the effort.
Full disclosure here – THIS IS NOT A FAST RECIPE. Plan on an afternoon. Or you can slow-roast the pork belly one day and make the buns/finish the pork belly the next day, which is what I did.
How can you resist?!
Top Tips For This Pork Belly Buns Recipe
- Use heavy tin foil to wrap the pork or 2 layers of regular tin foil.
- Use all purpose flour to dust your work surface when making the buns.
- You can use pre made buns or Pillsbury dough, for a shortcut.
- Add some kimchi for an extra kick!

Check Out These Delicious Pork Recipes
- Pork Belly Lettuce Cups Recipe
- Sous Vide Pork Belly Recipe
- Thai Pork Chops in Ginger Coconut Sauce
- Pork and Spinach Wonton
Have you tried this Pork Belly Buns recipe? Feel free to leave a star rating and I’d love to hear from you in the comments below!

Pork Belly Buns Recipe
Ingredients
FOR THE PORK BELLY
- 1 slab pork belly about 2 pounds
- 1 tablespoon cooking oil
- 2-3 cloves garlic finely minced
- 1 tablespoon finely chopped fresh ginger
- 1 fresh chili pepper minced (optional)
- 1 green onion chopped
- 1/4 cup packed brown sugar
- 2 tablespoons rice vinegar
- 3 tablespoons Asian fish sauce
- 1 tablespoon soy sauce
- 1/2 cup water
FOR THE BUNS
- 14 ounce package of steamed bun flour banh bao
- + ingredients as per package instructions I used milk, sugar, oil
- 3 tablespoons all-purpose flour for dusting work surface
- 16 squares of parchment paper about 4"x4"
FOR THE CHILI SAUCE
- 1 stalk green onion minced
- 1 fresh chili minced or sliced very thinly
- 1 teaspoon rice vinegar or white vinegar
- 1/4 teaspoon salt
- 2 tablespoons cooking oil
- 3 tablespoons hoisin sauce
- Kimchi optional
Instructions
- Preheat oven to 275F. Wrap the pork belly in heavy tin foil (or use 2 layers). Place on baking sheet and roast for 2 hours. Remove from oven and let cool before refrigerating at least 2 hour or up to 2 days.
- Unwrap the pork belly, and slice into 1/2" pieces
- In a large bowl, whisk together the brown sugar, rice vinegar, fish sauce, soy sauce and water.
- Heat a wok or large saute pan over high heat. When hot, swirl in cooking oil and add several slices to the wok, but do not overlap. Fry each side until browned. Remove to plate. Repeat with remaining.
- Turn the heat to medium-low. Add in the garlic, ginger, chiles (if using) and green onion. Saute for 30 seconds until fragrant. Pour in the remaining caramel sauce into the pan.Return the pork belly slices back into the wok and let simmer for 10 minutes.
FOR THE BUNS
- Follow the directions on the package to make the dough, cover and let rise for 20 minutes.
- Sprinkle clean work surface with the all-purpose flour. Place the dough on work surface and cut into 16 equal pieces. Roll each piece into a ball and keep all balls loosely covered with plastic wrap or towel. You'll work with 1 ball at a time, keeping the rest covered.
- Use a rolling pin to roll out each ball into an oval, about 4"x3". Fold the oval in half to create bun shaped. Place on parchment square. Keep covered loosely with plastic wrap or towel to prevent drying out. Repeat with remaining dough.
- Prepare steamer (see photos above). Steam the buns for 15 minutes. You'll have to steam in 2 or 3 batches (avoid overcrowding the buns).
FOR THE CHILI SAUCE
- Place the green onion, chili, vinegar and salt in a small heatproof bowl. In a small saucepan, heat the cooking oil until smoking, remove from heat and immediately pour on top of the green onion mixture. Please be careful, the oil will bubble and crackle.
- To serve, carefully open each bun, spread a bit of hoisin sauce in the bun. Add a slice of pork belly and top with the chili sauce. Add a bit of kimchi if desired.


