 Earlier this month when the handsome Gnome treated me and my girlfriend to a hot date to NYC, he brought us to David Burke’s Fishtail restaurant for dinner [by the way, during NYC restaurant week at select restaurants, you can get lunch for $24.07 and dinner for $35 per person – a massive deal for these otherwise very expensive restaurants!]
My good buddy, Mark Tafoya was able to join us for dessert and boy am I glad he did. At the center of the table was this tower of balls.
 Okay, the restaurant was dark, I couldn’t see what they were at first, but after we all oooh’d and aaaah’d over the tower of balls, we finally looked closer and discovered they were CHEESECAKE POPS. Some were covered in chocolate, some in strawberry candy melts and all rolled in graham cracker crumbs.
I can’t stop thinking about them.
All I have been talking about for the past 2 weeks are cheesecake pops. But after the gorge-fest from NYC, I’ve been on a no-sugar thing. But I want those cheesecake pops. I want them BAD. Can’t have. Want. Can’t have. Want.
I asked Julie from The Little Kitchen for help. Please help me stop this insane obsession. I need an intervention!
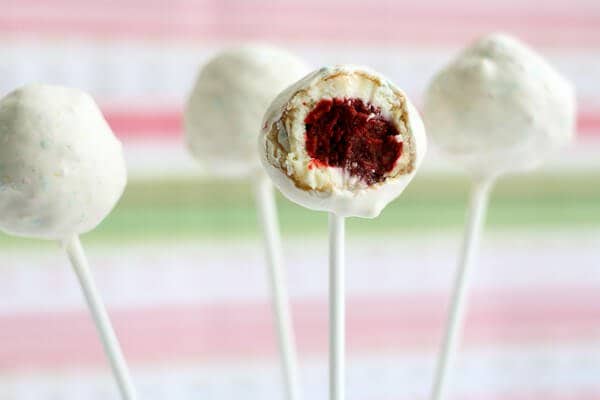
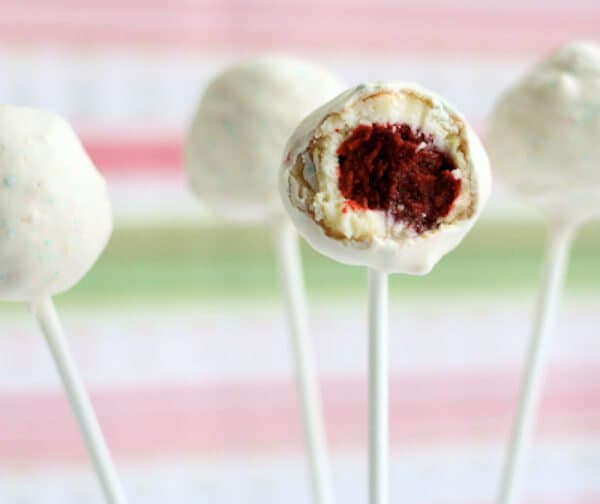
And so she made me these: Red Velvet Cheesecake Pops.
Ah geeze….there goes my no-sugar thing. There’s always next week, right?!
***
 Meet Julie, a software engineer by day and food blogger by night. Though, I email her often about food stuff during work hours and she seems to respond relatively quickly. Which means. She’s a food blogger ALL THE TIME.
I think she’s just as obsessed with food as I am. She’s exceptional at baking cakes – her Hello Kitty Cake will make girls meow.
~Jaden
p.s. If you love cake pops – see me and the boys in action in this quick video on how to make cake pops, step by step.
***
I was thrilled when Jaden asked me to do a guest post about cheesecake pops. I just made my first ever cake pops last month and I fell in love. They are cute little treats that are totally worth the work because they taste so good. Of course, my favorite are chocolate cake pops. I did some research and found Bakerella’s cheesecake pops. I’m a huge fan of Angie’s and like Jaden, she is so nice in person! Her cheesecake pops are so beautiful.
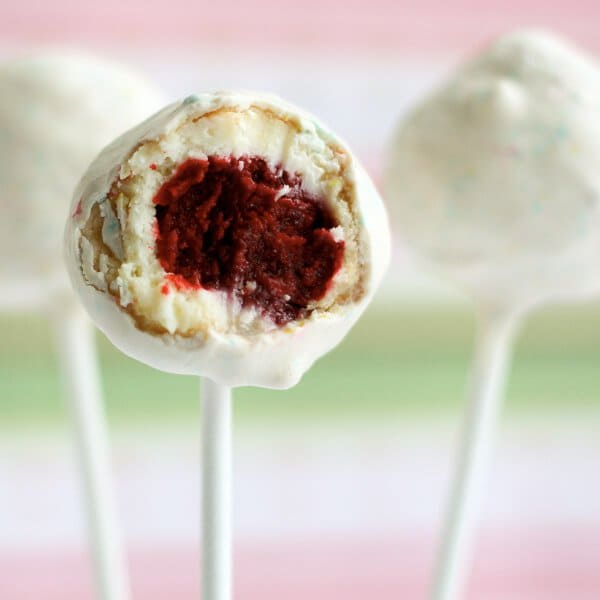
I was wracking my brain on how I could put a twist her cheesecake pops. Then, I thought, why not combine cheesecake pops and cake pops? You’ve seen those red velvet cheesecakes, right? What a winning combination, a moist chocolate cake that’s red with creamy cheesecake. Why not have that all in a cake pop – with a candy coating on the outside?
It takes a little bit of work but it’s completely worth it. This combination is to die for…the addition of cheesecake to the already fluffy red velvety chocolate cake and the candy coating on the outside…a winning combination!
I hope you’ll give it a try and enjoy them as much as I did!
-Julie
Red Velvet Cheesecake Pops
Note: the recipe is also below in printable form (scroll to bottom of post) with no photos.
Ingredients
1 box red velvet cake mix
1/2 cup store-bought buttercream or cream cheese frosting (I used Betty Crocker Whipped Buttercream)
7” plain cheesecake
1-2 cups graham crackers, crumbled into small crumbs
1 bag of 10-12 oz. candy melts, your favorite color (I used Wilton Color Burst Pastels, can find at Michael’s crafts)
¼ – ½ cup of vegetable oil
Supplies
24-30 candy/cookie sticks (found at craft store)
Microwave safe bowl, at least 3-inches deep
1/2 tablespoon measuring spoon
Cookie sheet, covered in foil
Rectangular foam block or another cookie sheet covered in foil and topped with parchment paper
1. Bake the red velvet cake in according to directions on the box or your recipe. Alternatively, you can make the cake in the microwave. You will only use half the cake, so you might want to divide the batter into 2 pans (and enjoy cake for dessert!) Cool the cake. Once the cake is completely cool, crumble the cake with 2 forks or better yet, a food processor. Stir in the frosting to create a smooth cake mixture.
2. Using the measuring spoon, scoop & level out 1/2 tablespoon of cake.

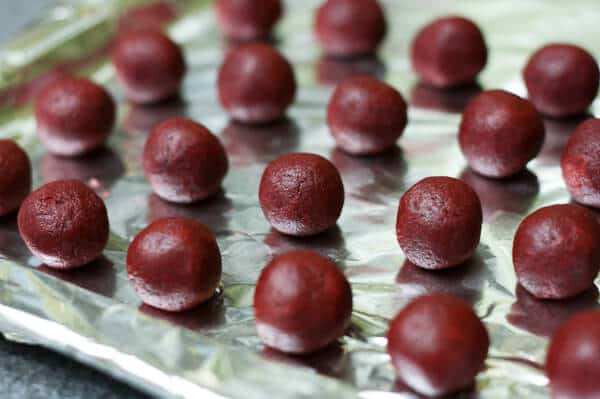
3. Roll into ball and place on cookie sheet. Roll up about 24-30 cake balls. Place them in the refrigerator for 20-30 minutes.
3. And now for the messy part, when the cake balls are ready, scoop about 1/2 tablespoon of cheesecake. Flatten a little in one hand, add the red velvet cake ball on top. Mold the cheesecake around the cake ball a little. Using other hand, measure out another 1/2 to 3/4 tablespoon of cheesecake and mold around the rest of the cake ball. And if necessary, roll into a ball in the palm of your hands. (Note: this can get very messy. After every two cheesecake balls, I had to wash my hands and dry them thoroughly before going on to the next ones.)

4. Place cheesecake balls into refrigerator for 20-30 minutes.

4. Remove cheesecake balls and roll in graham cracker crumbs until entirely covered. Put cookie sheet back into the refrigerator while you prepare the candy melts.


3. While the cake balls are in the refrigerator, melt the candy melts in a microwave safe bowl according to directions on the bag. Add in 1/4 cup of the oil and whisk. Add in more oil until you get the right consistency, providing a thin, even coating for the cheesecake pops.
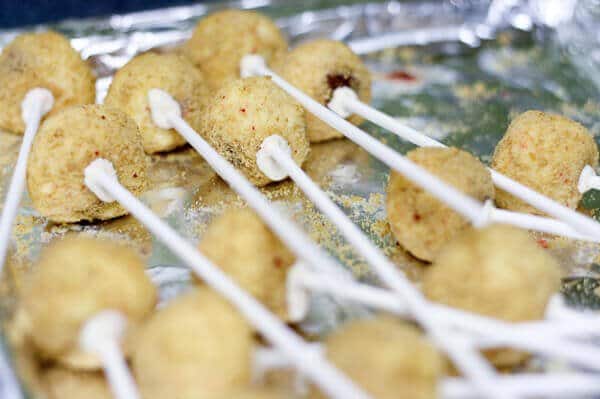
4. One at a time, dip a candy stick into the candy coating about a ½ inch. Then push stick into the “bottom” of your cheesecake ball. Now it’s officially a cheesecake pop. Be careful not to push the stick too far that it goes straight through the cake ball. Refrigerate cheesecake pops for 30 minutes to an hour (or overnight even).
5. Now it’s time to coat the cheesecake pop. Remelt the candy melts in the microwave. Take one pop and completely dip into the candy melt and remove quickly. I use Angie’s from her book Cake Pops method of spinning the lollpop stick and tapping your wrist to remove the excess candy melt. Once this is done, put onto second cookie sheet covered in parchment paper on its top or place into rectangular foam block.

6. Refrigerate for at least 15 to 20 minutes. Always keep your cheesecake pops refrigerated until you’re ready to eat them.

Each bite has a layer of sweet candy melt, graham cracker, cheesecake and red velvet cake!

Other Tips:
● Use a bowl so that when the candy melts are melted, will allow for at least 3 inches of depth so you have enough room to dip your cheesecake pop.
● I used Wilton Color Burst Pastels candy melts http://amzn.to/gyOEPN
● I did end up with more than enough cake “dough” so I rolled out 1 Tbsp cake balls to make red velvet cake pops with them.
● Some of your graham cracker crumbs will make it into your candy melts but I didn’t notice that this was a problem. It might become a problem if you’re using chocolate or a darker color candy melt.
● If you have any leftover candy melts, put them into a plastic zip bag for later use. You can easily cut open the bag and put the candy melts (now a block) into your electric chocolate melter or a microwave safe bowl to melt again.
● If you don’t have a whole day to devote to this project, you can always bake the cake one day and after it cools completely, wrap it in plastic wrap. Also, you can roll the cheesecake balls on one day and dip them in candy melts the next.
Red Velvet Cheesecake Pops Recipe
Ingredients
INGREDIENTS:
- 1 box red velvet cake mix
- 1/2 cup store-bought buttercream or cream cheese frosting (I used Betty Crocker Whipped Buttercream)
- 7" plain cheesecake
- 1-2 cups graham crackers, crumbled into small crumbs
- 1 bag of 10-12 oz. candy melts, your favorite color (I used Wilton Color Burst Pastels, can find at Michael's crafts)
- 1/4 to 1/2 cup of vegetable oil
SUPPLIES:
- 24-30 candy/cookie sticks (found at craft store)
- Microwave safe bowl, at least 3-inches deep
- 1/2 tablespoon measuring spoon
- Cookie sheet, covered in foil
- Rectangular foam block or another cookie sheet covered in foil and topped with parchment paper
Instructions
- Bake the red velvet cake in according to directions on the box or your recipe. You will only use half the cake, so you might want to divide the batter into 2 pans (and enjoy cake for dessert!) Cool the cake. Once the cake is completely cool, crumble the cake with 2 forks or better yet, a food processor. Stir in the frosting to create a smooth cake mixture.
- Using the measuring spoon, scoop & level out 1/2 tablespoon of cake. Roll into ball and place on cookie sheet. Roll up about 24-30 cake balls. Place them in the refrigerator for 20-30 minutes.
- And now for the messy part, when the cake balls are ready, scoop about 1/2 tablespoon of cheesecake. Flatten a little in one hand, add the red velvet cake ball on top. Mold the cheesecake around the cake ball a little. Using other hand, measure out another 1/2 to 3/4 tablespoon of cheesecake and mold around the rest of the cake ball. And if necessary, roll into a ball in the palm of your hands. (Note: this can get very messy. After every two cheesecake balls, I had to wash my hands and dry them thoroughly before going on to the next ones.) Place cheesecake balls into refrigerator for 20-30 minutes.
- Remove cheesecake balls and roll in graham cracker crumbs until entirely covered. Put cookie sheet back into the refrigerator while you prepare the candy melts.
- While the cake balls are in the refrigerator, melt the candy melts in a microwave safe bowl according to directions on the bag. Add in 1/4 cup of the oil and whisk. Add in more oil until you get the right consistency, providing a thin, even coating for the cheesecake pops.
- One at a time, dip a candy stick into the candy coating about a ½ inch. Then push stick into the “bottom” of your cheesecake ball. Now it’s officially a cheesecake pop. Be careful not to push the stick too far that it goes straight through the cake ball. Refrigerate cheesecake pops for 30 minutes to an hour (or overnight even).
- Now it's time to coat the cheesecake pop. Remelt the candy melts in the microwave. Take one pop and completely dip into the candy melt and remove quickly. I use Angie's from her book Cake Pops method of spinning the lollpop stick and tapping your wrist to remove the excess candy melt. Once this is done, put onto second cookie sheet covered in parchment paper on its top or place into rectangular foam block.
- Refrigerate for at least 15 to 20 minutes. Always keep your cheesecake pops refrigerated until you’re ready to eat them.