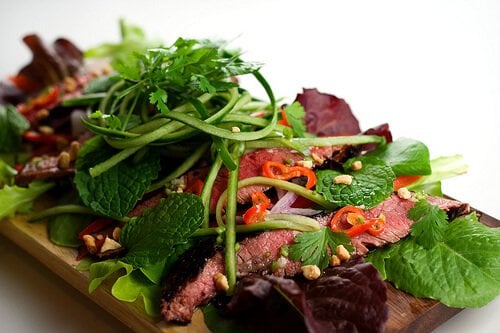
Thai Beef Salad above taken probably around midnight, on auto settings with my Canon Rebel XT,
Lowel EGO lights for food photography are magical. During late Spring to early Fall months at the Steamy Kitchen household, my photo “studio” was the ratty ottoman and a $3 foam board near a big open window. Ahhhh….I so miss those late sunset evenings where I could still capture wonderful natural lighting even at 7:30pm.
Now in the winter months, by the time the clock rolls around to 5pm, my light is gone (sniff sniff) and I don’t like using my flash. For the cookbook, I needed a solution that would provide me light, even when I cook at 10pm after the rugrats go to bed.
So I set out to find an inexpensive, portable solution and came up with the Lowel EGO lights.
They are portable, lightweight, provide a wonderful, soft, even lighting and relatively inexpensive for professional photography lights. Each light is less than $100 – and really, you only need one. The Lowel EGO lights are great for food photography, especially for food bloggers because each light weighs less than 3 lbs, and are small enough to hide in a closet. Each Lowel EGO light comes with (2) full-spectrum fluorescent bulbs which do a fantastic job of mimicking daylight.
For food shots, the one variable that makes the biggest difference in the quality of shots is the lighting. Yes, camera is important, but only secondary to lighting and sharpness. Let’s talk about sharpness first – if your food photo is blurry, it ain’t gonna look good. Fortunately most point and shoot cameras allow you to select which area you want to focus on. Most of you know how to take pretty sharp photos.
Lighting is the big wild card and can vary from hour to hour, from one side of the room to the other, and the type of light bulbs you use. If you are lucky enough to get good, natural, filtered light (i.e. not directly under the harsh sun but rather through a window, indoors, or even a piece of vellum taped to the window to give a nice diffused glow) then that’s your first choice. Your second choice would be to get lights that get as close to the look of natural sunlight as possible – so that the colors in your photo will look as true-to-life as possible. For food, its important. Does gray chicken look appealing to you?
Ok, here are some comparison shots for you–
Plain house lights
No fancy lights, just the cheap-ass Home Depot ceiling fan with 3 lights. The photo is bland, too orange and the flowers are flat. White of the label looks pink.
Now with the lovely built-in flash
Too harsh, the white is blown out, there are unflattering shadows and the reflection is distracting.
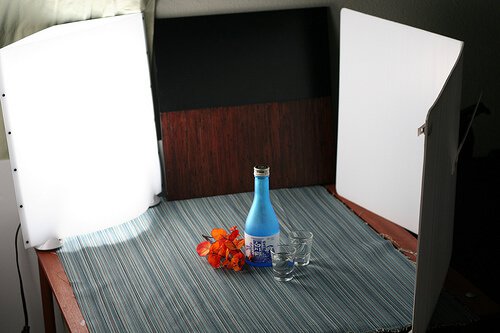
Magical EGO lights
And now…drumroll please…..beautiful natural, vibrant colors and textures.

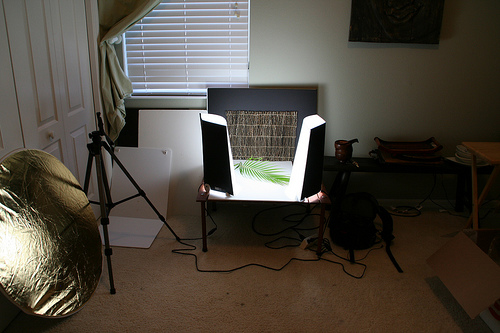
This is the setup: only one EGO light + a plain, white cardboard used to reflect the light.
When I snapped this pic below, I must have moved the light and reflector back. The light should have tilted down and leaned down on the front edge and the reflector was placed closer to the bottle/glass.
Wanna see my point and shoot camera in action?…
Point and Shoot with EGO
Just for comparison, here is my 6 year old point-and-shoot camera whose battery doesn’t last for more than 2 minutes (because I dropped it in water 5 years ago). Pretty damn good. It’s not about the camera sometimes! If you’re on a tight budget, I’d recommend improving your lighting first before investing an expensive digital SLR camera.

btw, point and shoot flash SUCKS

I guess you’re all wondering if these Lowel EGO lights are worth the expense:
For the winter months when I don’t have good natural lights in the late afternoon, the Lowel EGO was great. I could take photos that looked wonderfully bathed in natural light. Working on the cookbook, it’s been indispensible. I would suggest getting 1 light first and trying it out. As I mentioned, $100 for professional lights is pretty darn good. I don’t think I’ll need them when the days grow longer and I can get back to my lovely ottoman next to the big glass sliding door.
This month, I’ll continue my posts on lighting – and show you before and after photos of food.
Where to get these magical lights?…
Where to buy:
 One Two EGO lights* + magic light bulbs is $88.90 sold by Adorama via Amazon. I’d recommend buying here, since it’s guaranteed by Amazon.com. And you know they’d never piss off a food blogger.
*Another few weeks of playing with the lights and I’ve found that 2 EGO lights works way better than 1.
 You could also get a set of 2 lights + magic light bulbs and the sweep. $219.95 sold by Adorama via Amazon. It comes with the white, plastic sweep (see my photos – I use the sweep for reflecting light) and sheets of very flimsy colored paper to clip onto the sweep so you can have a continuous background. IMHO, it’s useless for a food blogger. The paper crinkles and tears easily. Any drops of sauce or oil and it’s stained for good. Plus, food looks much better against neutral or natural fabrics, surfaces and papers. I just can’t think of too many dishes that would look scrumptious against a school bus yellow piece of construction paper. You could use a piece of $3 foamboard from the office supply store to use as a light reflector.
But wait one stinkin’ moment – it’s cheaper to buy them all separate. $88.90 per light x 2 plus $23.90 for the sweep/papers = $201.70. WTF???? Ok, buy them separate.
You could just get the magic bulbs by themselves, they are $19.99 each. You could screw them in your own light fixture, but I’ve found that the bare bulb is too harsh. You could use a shade to cover the bulb, but unless it’s pure white and semi-opaque, you’re wasting your money on the bulb. Well, if you’re McGuyver, I’m sure you could rig up something!
Buy here and I get a teensy weensey commission from my Amazon store – just enough for a double espresso latte!! 😉
Buy two EGOs and one Sweep:
*Even though the photo for the sweep doesn’t show the construction paper, it does come with it according to the description in Amazon. The Lowel EGO lights each come with 2 magical light bulbs.
—
Or….if you want just the light bulb:
***
 B&H Photo sells the same set for $229.95 – B&H is a very well-known photography retailer in NY. I actually bought this set from B&H – one of the light bulbs arrived broken and it took 2 weeks for a replacement bulb to arrive. But, that being said, I still buy stuff from B&H – my expectations are just a tad bit lower if I ever run into problems.
***
Here are more food photography posts:
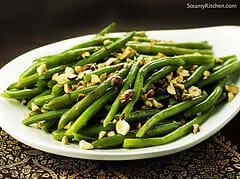 Green Beans with Garam Masala Butter and Toasted Hazelnuts (light setup)
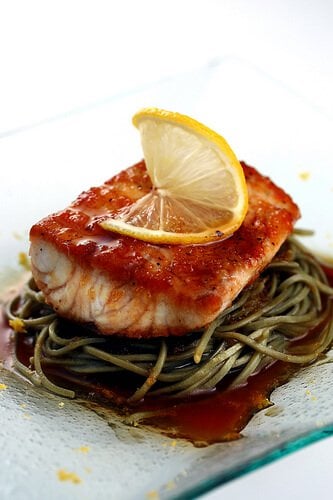 Kona Kampachi on Citrus Soy Soba (see my step by step photo analysis)
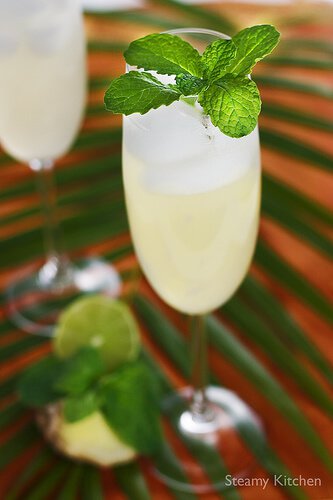 Sparkling Ginger Lime & Mint Cooler (see my step by step photo analysis)
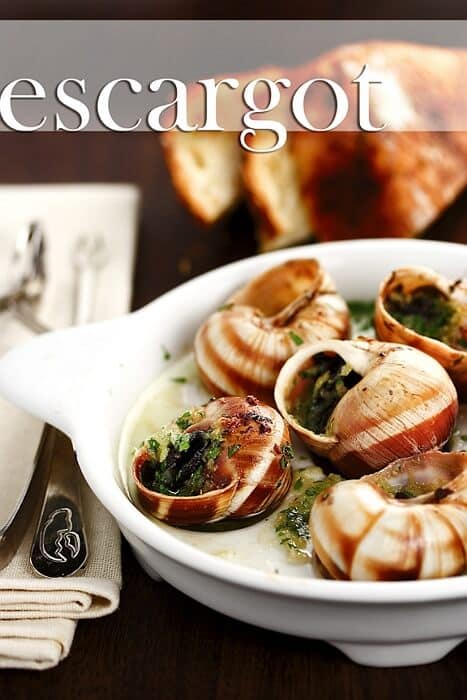 Escargot with Garlic Butter and Splash of Cognac (see my step by step photo analysis)


WOW! Thank you so much for the tips. The photos are amazing. I’m shopping for a new camera…can’t wait to get it and play. What great information and beautiful photos!
Nice shots, I definitely need a lamp like this
Thanks for sharing a nice post with us. Keep posting informative piece of writing.
Thanks for sharing this precious information with us, This really helpful for me and also for my upcoming project as well
This is mind blowing, thanks for sharing this precious information with us.
Hi!
I’m finally going to invest in this system because I too am tired of racing against the clock to shoot in daylight! Thanks for all the info. They are currently out of stock everywhere but I found them at a store here in Toronto. My question is….do I need to buy two or will one suffice for a great shot?
I prefer 2, not sure 1 is enough for a dark the room.
Hi there, sorry to say but the lights you recommend are out of stock and Amazon does not know when, or if, they’ll be back. Can you recommend another option?
Thanks!
Hi Lauren, if you have room, we also like softboxes http://amzn.to/1VN7NwN
But it does require having the space to store them.
Just in the past 12 months i have developed a passion for food photography and at the earlier stages i realised i needed a lighting solution for those dull days and nights shooting. im in australia and purchased two of these lights (before discovering your site, sorry) and i swear by them, as they came with US plug,,, i had to purchase a 500w step down power inverter to use as Aust 240v adapter does not come with the lights, but its amazing and faultless. just sharing my experience.
So glad to have found your site (through google search for food photography lighting). I am tired of chasing the winter light and eating meals at 3 so I can still have good light to capture the food. Indoor lighting is in my near future. thanks for the excellent advice
This is really helpful and handy for food bloggers that can’t afford studio setup at home. Thank you.
oh yay! just bought one!
hi,
Are you using DSLR for your other photos or point and shoot itself ???
I use dSLR camera now: Canon 5D Mark II with a 24-70mm lens. Sometimes I will use a 100mm macro lens for the final shot.
I usually came here for some salad ideas, but kinda stopped at your lights posts. I am selling some small products overhere in uk and europe. I did not know that there exist this type of light “boxes”. They seem really perfect for my products. They a little bit smaller than the bottle, you used. So sorry that I will take no pictures of food, but thanks a lot for the tip 😉
Amazon doesn’t have it anymore and http://www.bhphotovideo.com/c/product/439977-REG/Lowel_E1_92E_Ego_Fluorescent_2_Light.html has a little logo with an “I” inside that notes: Note: This is a “European Voltage” product and CANNOT be used in the USA
This seems odd as it is something you did not mention, nor did I see it in the Amazon description. What kind of plug does yours have?
Hmmm, no mine is made for US voltage. I’ll find out if they have a different newer model.
Sad that the price on the lights went up since you posted this. $124.95 each
I’ve been trying to figure out my lighting situation and was so happy to find this post! This looks like the perfect solution for me. I’m going to start with just one and see how it goes. Thanks so much for the great information!
Hi Jaden, I’ve heard about your blog for a long time, but only today did I actually go check it out, and I kept reading and reading and reading and then I found this post! Love how you are always so candid and honest with your responses and feedback!! I’ve only started food blogging last year, and only last month did I make the move to self-hosting, which I’m so glad for. Now I have so much to practice with my food photography, but first, in search of a cheaper EGO light alternative (especially since i don’t live in the states!)
take care!
felicia
This is really confusing to me: “One (stricken out) Two EGO lights* + magic light bulbs is $88.90 sold by Adorama via Amazon.”
This makes it clear that you can buy TWO EGO lights + magic light bulbs for $88.90, when, in fact, you pay $124.95 EACH. Now, I know that the price may have gone up since your original post, but has it really nearly tripled in price from the $44.45/light you indicate here to $124.95?
Sad that the price on the lights went up since you posted this. $124.95 each 🙁
A few years ago, when I dabbled on food blogging, I visited your website (at that time, you still had that picture where you were sort of “lounging” on a lounge chair. I left a comment on your blog about how my pictures were so poor quality etc etc. You actually took time to check my website and left a few pointers.
I guess I am sentimental that way. Most “big” bloggers who already made a name for themselves won’t even take the time to answer comments. Anyway, to make an already long story short, I remember reading this post years ago but didn’t get to buy them as I gave up the blogging thingy before I could. But last night, my daughter needed some lights for her blog. She found them on another website but I insisted we used your link. I wanted to at least buy you “a double espresso latte” through the purchase of these lights. Thanks for listening and taking some form of involvement…it means a lot when people give you their time especially during stages of our lives when we are unsure about our skills.
Liza! Oh thank you so much! That means the world to me….xo jaden
thanks for the info about the lights… purchased through your aff link, so you should get a commission. Always great to help a fellow affiliate! 🙂
So glad to have found your site (through google search for food photography lighting). I am tired of chasing the winter light and eating meals at 3 so I can still have good light to capture the food. Indoor lighting is in my near future. thanks for the excellent advice.
So glad that I found your post – I was in the market for just the right light, because I often have to take photos at night also. I just ordered these today from Amazon! So very excited to try these and pump up my photography shots! Many thanks! I can’t wait to read future lighting & photography posts of yours.
Very please that I found your post. I lose light really early in my apartment so this will make a huge difference!
Thanks! Your photos are amazing!
If you don’t have the $200-$300 to spend on the actual EGO set, the EGO lights use 30W / 120V E26 base compact daylight florescent bulb with a color temperature of 5,500K and a CRI (color rendering index) of 93. So essentially you could get any kind of lamp or fixture you wanted as long as you’re using these bulbs and some kind of light diffuser (could be as simple as tissue paper or a cloth draped over the lamp) you can re-create the same kind of quality light.
Dear Jaden, I just order my EGO lights tonight. Hope it will help me to improve my pictures.
Thank you for your post. It was a big help.
wooooow really very clear pictures specially the food pictures makes me hungry 🙂 nice job
Gotta love your photography here. I’m a huge fan!
Hi Jaden! Thanks for the tips! I was going batty trying to figure out what lighting equipment to buy. Now I can’t wait for my next shoot with these awesome lights!!
really it has useful info
dear jaden
i love your site, and you can’t imagine how helpful your advice on food photog is! very much appreciated.
BUT: i’m afraid it seems those super cool lights are not working in europe/in switzerland, due to volt..? (apart from the shipping costs being incredibly expensive…)
now i’m really crushed. been looking for a dealer in switzerland or germany all weekend, but with not much success… do you have any advice?
a smile
scarlett
gosh that thai salad looks so colorful and vibrant under those lights! almost too pretty to eat! almost… 😉
Hi Jamie,
I am a food & travel blogger AND mother of 2 (soon to be 3) kids. Plus I have a full-time hospital job. In the Fall and Winter, by the time I get out at 4:30 pm, light is gone. And I get so frustrated (read: depressed) at this! These Lowel Ego Digital Lights were my saviours!!! In a way, they are kinda like those lights for Seasonal Affective Disorder (SAD)! Can you tell I work in mental health? LOL!!! But these lights have totally kept me sane and have allowed me creative freedom! Sometimes, my only time to cook and photograph is after my kids go to bed…these lights allow me to do my projects at night (and at a budget since I am not a pro). I LOVE them to death. Without them, I’ll be lonely in the winter 🙁 Thanks for sharing your experience with them!
Hey Jen – I am totally loving your site!!!
After trying several DIY lighting experiments that have all resulted in yellow pictures I just purchased this after reading your post – thank you so much for sharing this and I hope the one light will make the difference I’ve been going for!
Very useful tutorial and advice.. 😀 I always had a problem with the flash!! :)) Sweet! Thanks!
Thank you very much – the picture comparisons were very convincing!
I’ve ordered 2 of these and can’t wait to start using them!
— René
Hi, Jaden,
I’m a new follower. I can’t tell you enough how much I LOVE , LOVE, LOVE……….your blog! Your photos were the best i’ve ever seen, i started searching for the name of your photographer for your site n OMG, that’s you…………Your site is my wish come true……….
I have been searching for delicious Chinese food recipes that had step by step photos for couple of years and n your site never came up. Your PHOTOS ARE INCREDIBLE, GREAT, FANTASTIC, should i go on :)………..!!! Thanks for taking the time and effort in posting all those AMAZING RECIPES N PHOTOS. I really appreciate your FREE cooking and photo lessons. I have always wanted to take a photography classes but couldn’t make the time, being a single mom. But recently i got into food photography …….just as a hobby since i cook alot. I knew it involved lighting cuz when i took a pic. in my kitchen, then went to the table near the window, the pics looked so much better. I can’t wait till i get the Lowel EGO Lights !! I can tell by your blog U WOULD MAKE A WONDERFUL NEIGHBOR………..hahahahah !!! hope i get a chance to meet you someday to share recipes with you ……
CONGRADS ON YOUR SUCCESS !!!!
Thanks again, Jaden.
Thanks so much Kim! ~jaden
These are great lights and so easy and portable. I think though I may opt for some Lowel so I can snoot or direct better. This is a fantastic article Thanks!
Many! Many! Thanks for your help!! I am just getting started and find the photography part difficult!
Thanks for the terrific review — I’d been wondering about those lowel lights and wasn’t sure if i would need one or two. I’d also had the same reservations about paper backgrounds, and ultimately came up with a much better and very cheap option with endless possibilities — since this sort of backdrop is most needed for posts about freestanding treats (like brownies, etc.), I wait until Hobby Lobby has a sale week on scrapbooking materials and stock up on 12×12 scrapbook background sheets for a quarter apiece. I keep a ton of them in a drawer, and use them for special posts. As long as you use a macro lens, you’re not going to need more than 12×12 area anyway, and it works amazingly. Makes things so dynamic when a little pattern is just what the doctor ordered.
Here’s an example of what I mean — and it cost me a quarter, so no worries if grease or crumbs happen:
http://redkitchenproject.com/2010/08/20/the-brownie-that-broke-my-heart/
Anyway, thanks for giving exactly the sort of review I needed to talk myself into a lighting purchase! Keep up the great job. I always love poking around your archives!
Wow…you are truly spot on about these wonderful amazing lights. Ordered two and just finished testing them out, and I’m SO STOKED that I can finally get back to nighttime cooking! Seriously, this is life-changing LOL. And you’re right about needing two: I think you could get away with using one (plus lots of reflectors/white boards) depending on what you’re shooting, but for food, two is definitely a must. I’d say these lights are 99% close to natural lighting!
Hi!
This is sooooo helpful for the HOME foodie/photographer! I feed off of food photos and I love yours! I’ll add your link for others to enjoy on my page.
Healthy Day!
Thanks for the tips! I am the marketing director for a bakery manufacturer in San Diego and we make both branded retail, and custom products for many grocery, restaurant, and diet companies. Our branded products are professionally photographed, but I wanted to purchase equipment for use in-house to snap new projects that come up, so our sales people have decent photos to show customers. I just purchsed the set of EGO lights and a MyStudio Professional Table Top Seamless Photo Studio.
Hi Website Administrator,
We are purely organic search SEO Firm; we can get your website on the 1st page of Google, Yahoo and MSN (Bing.com). We can increase your sales at least 4 times. We do not use \”link farms\” or \”black hat\” methods that Google and the other search engines frown upon and can use to de-list or ban your site. The techniques are proprietary, involving some valuable closely held trade secrets. Our prices are less than half of what other companies charge. We can fairly quickly promote your website to the top of the search rankings with no long term contracts! We are working on Guarantee basis.
We would be happy to send you a proposal using the top search phrases for your area of expertise. Please contact me at your convenience so we can start saving you some money.
Sincerely,
Dona Gabril
donaseomarketing@gmail.com
COMPLETE INTERNET MARKETING SOLUTION
SEO – Link Building – Copyrighting – Web Designing – PHP
Ohmygoodness, I could just hug you. You managed to answer all my Ego light questions in one fell swoop. And your “studio” setup photos are priceless. Thank you!!
hello.. i just read your recomendation and im really buying this little babies!
really price worth and easy to move, just what i needed, thanks for taking the time to review those!
I got my Lowell ego light in (only ordered one). I still getting rejected from foodgawker and tastespotting for lighting issues. So I went out and bought to clip on lights and hung them over my winebar (75 watt equivalent and my picture still doing look bright light yours. Should I invest in another lowell ego?
Hey Rosemaryandthegoat: Why don’t you post your photos and a picture of your setup on foodblogforum.com (just join as a member and post your photos in the Photography forum) you’ll get a ton of other bloggers who will happily give you feedback. It’s hard to give you advice w/o seeing your set up, where you’re lighting is, etc.
I ordered my light today and if I find it helps I will order another one. I ordered a new zoom lens and speed light this weekend also so now I just need to learn how to use my new Nikon D3000. How do I get bokeh???
Hi Jaden,
love the photos you took using the lowel! i got one too but I couldnt get the effect you get with it. I need to use the flash as well with the lowel to give it that magical look. i need to experiment more the angles of the light and where to take my shots but thank you for all the post about the Lowel Ego lighting. Hope you can show where to situate the light.
Thanks!
Once I get more of the technical details of blogging down, I’ll be tackling my photography. Thanks for this information. I know it will be invaluable to me.
Thank you. This article is very interesting and informative. I will have to try the things you mention about lighting any type of still life subject. Well done.
Hi Sammy can I post up my site, I am just building it now and I’d love your readers to see it.
thanks
enrique
Hi Megan,
I haven’t tried that product, but I don’t like using those popop tents – takes up a ton of space and it’s hard to wrangle those tents back into the packaging. EGO lights has cover that diffuses the light, so no tent is needed.
I commented here a few months ago and you recommended I buy a tripod (which I did, and I LOVE it, so thanks!). My next question is about the difference between these sorts of lights and some sort of photo studio tend thing (like this one http://www.amazon.com/gp/product/B001B8G4R8/ref=oss_product). Obviously you use the EGO lights, but do you know how they compare to studio tent lighting like the link I provided?
Thanks so much! I have so much to learn and your tutorials are so helpful.
Is there a tripod you would recommend? There are so many to choose from, I’d like to stick around $100 with a locking plate option. Thanks!
I just bought a Promaster T325P, but it’s pretty pricey. Try looking on adorama.com for Flashpoint carbon fiber.
thank you!!!! I’ve been looking for a lighting kit since the light in our kitchen is horrific and I leave before the sun comes up and get home after it’s down. This is great!! You just used a white piece of cardboard?
Um, can we say “I totally need
onetwo of these!” I hate using flash and even though SLRs are awesome, I still struggle with lighting. Thanks for this post. Awesome post, really awesome!Thank you so much for this review and especially the comparison shots. I’ve been stuggling because my full time job is an hour long commute so in the winter, by the time I get home from work, have dinner made, and am ready to take pictures, it’s pitch dark outside. $100 is well worth it to have lighting that can simulate daylight and I have to get a pair next paycheck!
Gosh…I really need to bite the bullet and get one of these. Thanks for explaining it and showing the differences in the shots!
Your advice, recipe and pictures are spectacular, thank you for sharing and teaching us all great lessons.
Terrific. I do the photos/recipes for a company recipe newsletter (now blog) and find myself trying to time it for the best natural light. Been wanting to make this investment for a couple of years. Many thanks!
Thanks so much for this post. I need all the photography help I can get! In your opinion, which would be a better first purchase – a tripod or one of these lights? I have to space them out 🙂 Thanks so much!
tripod!
you can use tripod in any situation.
Hi Jaden, I heard about these lights from Meeta at What’s for Lunch Honey blog during her talk at Food Blogger Connect in London last week. Now that I’ve seen your comparison shots I’m even more convinced I would benefit from one and having shown him the photos, even my husband agrees (hooray!) Thanks for a very useful post.
You can buy the bulbs by themselves for about $10 each at 1000bulbs.com
You want full-spectrum daylight bulbs that are either 5000K or 5500K and 90 CRI (I won’t go into detailed explanations, just look for those terms when you shop for photography bulbs). I get mine from
http://www.1000bulbs.com/23-Watt-Compact-Fluorescent-5000-Kelvin/12033/
I need the same lights for jewelry photography (I use the same bulbs, slightly different lighting setup). (not affiliated with 1000bulbs, just a happy customer–however, you can find these same bulbs lots of place, sometimes even at Home Depot or Lowes)
Hello,
Jaden thanks so much for this crisp and to the point article on using EGO lamps for food photography. I have been struggling to take decent pictures and think I have found the answer. Do you also use a tripod, or that isn’t a big factor?
Regards
I was just thinking about what I was going to do when the winter months roll around. Thanks so much for this post. I am absolutely going to purchase these lights.
Great Resource, I need some serious help with my photos. I have a vintage rebuilt SLR and a bunch of lenses, and no knowledge. I also have a nikon coolpix that I have been using for convenience, but I realized I know nothing about how to use either camera. I am pretty sure I can build the case for the bulb, I did a similar project before. Your pix are amazing!
So much appreciated! Smiles,
Thanks for those very useful information about light and camera and how to take good food pictures. It was really educational and I really appreciate it. Thank you very much.
I just came across your website and I love it! Great stuff. Would you please post the lighting set-up for the Thai Beef Salad photo? Looks incredible. Thanks!
I finally splurged and got the ego lights. still trying to master lighting in general… shadows are a friggin pain in the ass!!
email me a pic of your setup! the cardbard reflector is what helps you with your shadows. jaden
Jaden – THANK YOU THANK YOU THANK YOU! I’ve been perplexed by all things lighting and this spells it out perfectly. Granted I’m moving soon but you know I’ll be bookmarking this to purchase after I get settled in the new digs!
Thank you so much for this advice!! You just made my life easier. This has really saved me a lot of time researching what kind of lights to get. I just got mine yesterday and my boyfriend and I took some test shots and it works great. I’ve always had to wait until the weekend to take pictures because of my 9-5, M-F job, but now I can take pictures in the evening. Woo-hoo!
And yes, you’re right about needing two lights but one will have to do for now.
Many thanks for your tip on lighting, I am only 6 months in to photographing my own food fro my Blog but quite frustrated with the lighting now that we are in our winter months. I like your tips on the EGO lighting, it is a maze out there on what to buy but this seems like a good first step into lighting. Thanks for sharing!
Thank you so much for your wonderful advice and tips, much appreciated!
I researched for a while and actually bought the Lowel Ego lights that star in this post. However, I found it difficult to assemble – pieces weren’t necessarily doing what they were supposed to do and it’s hard to see why the product is worth $90. Any insight for me? Thanks in advance!!
amazing post – great information and totally helpful. i’ve been really struggling with lighting my food (running around my house with a plate of food trying to catch good light) and this would just make my life sooo much easier….
Great information of the Lowel Ego lights that surpasses even the manufacturers sight for foodies, anyway. Now to find a competetive dealer in Vancouver, Canada that will sell me a light for a decent price. (Groan)
I purchased one light and it arrived a few days ago. Love it! I still seem to be struggling a bit with my photography (I bought a Canon SLR so I’m still learning the ropes), but the lighting has helped immensely. Glad I could toss a coffee your way! It’s the least I could do as a thank you!
thank you!!! ~jaden
Thank you Steamy!! I went to amazon and got the lights! They are remarkable.
I run into the same scheduling issues as you and have do my cooking and shooting after the girls are in bed so these lights are gonna be a life saver! Thanks to @limelightfood for linking here and thank you Jaden for sharing your tips!
hi jaden! I have a light box with two desk lamps with 23 watt bulbs just like lowell ego’s bulbs.I made the light box which you can see here http://www.shootfirsteatlater.com/2009/03/1-month-anniversary.html but since then I bought a new tent light box. Is the lowell ego and a white reflector a better set up than a tent with two desk lamps? If I get a lowell ego can I still use it inside or outside my tent? I love your pictures! I hope one day I can learn to make my pictures look like yours.
With the EGO lights, you’ll not really need a tent! They wouldn’t fit inside the tent anyways. ~jaden
Thank you so much for this post Jaden. I couldn’t take my terrible kitchen lighting any more and broke down and bought two of the lights. I clicked through here so you should get a latte or two…or actually considering the shopping I did perhaps a new coffee maker?! Now I’ll be checking the tracking number eagerly until they arrive. Thanks again!
Phoo-D
Murasaki-no I don’t. but i think you can order from B&H photo and will ship to you. -jaden
I don’t think they sell these in Europe. Do you know of any European alternatives to these lights?
[…]Thanks for sharing your work with us! Your theme is just awesome![…]
PS: I originally found you on Twitter. Just so you know. Twitter is effective at introducing us to new readers!
Thank you SO MUCH for this excellent and very thorough post. I was looking for exactly this information months ago but did not find it anywhere.
I’m bookmarking this page so I can buy that light set in the near future. Very excited!!!
Thank you for sharing this – I just purchased an EGO today as as result and look forward to better quality photos in my blog!
You lady may have just solved a lighting issue for me. Thank you!
Hey brilliant demo! I think anybody involved with food photography will find this post useful! Am going to order osme lights me thinks!
Hey Jaden-Thanks for the awesome demonstration of the Lowel EGO lights. I first saw this post about six months ago and I just keep coming back to it and staring at it, wishing I had the lights. I finally broke down and bought a pair of them through Amazon just now. I hope I did it right so that you get your latte.
great site, found it through another blog
A question before jumping into buying the EGOs.
is the light source big enough for food? I know lot of people use them but I just want to be sure. Currently, I am using a speedlight (580EX) inside a westcott apollo softbox (http://www.bhphotovideo.com/c/product/62245-REG/Westcott_2334_Apollo_Mono_Softbox_with.html)this is a 28″x28″ in size and on my first attempt I had decent results but wound up having some reflections that i could not control. I was told that a larger light source would be required. that is the reason for my comment here.
Thank you so much for this post and sharing this information. I have just ordered the lights on Amazon through this blog. I cant wait to use them!
Hello, Do something for help the hungry people from Africa and India,
I made this blog about that subject:
on http://tinyurl.com/556poc
Hi there,
I just wanted to let you know that I linked to this page from my blog. I just posted about my newly purchased Lowel EGO light and mentioned that I got some of my inspiration for that purchase from your blog.
The direct link is here: http://www.freestylecookery.com/2008/10/new-light-in-my-life.html
Many thanks for a great blog!
// Mike
http://www.freestylecookery.com
Just bought both the Ego and the Sweep! I’m so happy I found this information, thanks for sharing it.
I’ve just discovered your blog through Marion’s ilenfautpeupour.canalblog.com and I love it. Thanks:-))
That is such a beautiful piece of information.I have just realised this few weeks ago that natural lighting is best for food.I am glad to know that Ego light are so cool and useful when we are short of natural lights in winter.Thanks for sharing the tips.It is an essential part of food photography.
As a newbie blogger and a newbie blog photographer, can I just say I bow to you in recommending this incredible light? I took your advice and bought one. It is amazing! I am no longer hampered by only being able to shoot food shots during a two-hour period in my house when the natural light was just right. Now, I can take photos anytime. Thanks for spreading the word about it. It’s definitely a worthy investment for any food blogger.
Wow.It’s the answer to all my dreams
And i thought it was gonna be some cute nerdy chick.
Thanks so much for your tips. I will purchase these lights from your amazon for my blog. I’m very excited!
Chase: this guy has:
http://lightingwithego.blogspot.com/
Hi all,
These lights sound great but I was wondering if using these lights for shooting wine bottles would work okay. I need some nice bottle shots and was thinking these lights might be the perfect match but I’m not sure. Anyone taken bottle shots with using these lights?
I’ve just got into SLR photography, from the Canon G7 earlier… and lights were proving to be a challenge. Thank you!
Sid
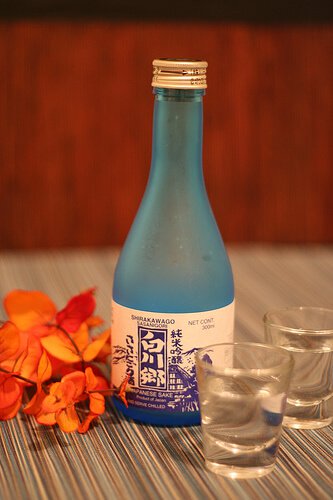
Glasses of water can’t stand in for Shirakawago–shake that nigori up.
Thanks for the wonderful review! I’ve been needing something like this for a long time.
Just one question, is there going to be any difference between the Lowel bulbs and standard daytime lights available from home depot?
eg:
http://www.homedepot.ca/webapp/wcs/stores/servlet/CatalogSearchResultView?D=945574&Ntt=945574&catalogId=10051&langId=-15&storeId=10051&Dx=mode+matchallpartial&Ntx=mode+matchall&recN=0&N=0&Ntk=P_PartNumber
It’s a 2-pack Philips Twister Compact Fluorescent Lamp rated at 6500K for $13.
I know that the right equpiment makes all the difference, but I was just wondering if this could be one exception.
I’d expect the ‘ego’ shades are as important in generating the balanced light as the bulb? Otherwise one would be able to use any run of the mill
table lamp from Ikea.
I’d appreciate your comments. Thanks.
thank you so much for the info. i’ve used my kit a couple of times–what a relief that i don’t have to take all my food photos before i go to work anymore 🙂
Thank you SO MUCH for sharing the wonderful tips, comparison photos, etc.! You betcha — I’ve placed my order! Can’t wait to start using the light & sweep.
The beef salad looks gorgeous.
That is a lot of useful info. Thanks for sharing, Jaden. 🙂
Jaden, you are a darling. I’ve been looking into lighting for home and had a few items selected. I’ve heard good stuff about the Lowel EGO. However, it’s not available in Germany and Amazon.com won’t ship this to Germany. I really wanted to get you that latte! Bummer! I gotta think of another way to get my hands on this!
SK, thanks for sharing this – very helpful and yes, I LOVE, thai beef salad.
I take the worst food pictures ever! I blamed my point and shoot camera so I bought a DSLR. Photos are still bad. I thought maybe because it’s a Sony Alpha 100k and very basic. So, I searched online but most reviews of the cam were good. Thank you for this post. Now I have the “lighting”, and the lack of, to blame. I sure am running of things to pass the buck on. Unless you come up with another tip, I just have to face the fact that it is me!
Yeah that is amazing, taken at midnight (besides the fact that you are motivated to garnish like that at midnight…)! What a concept, it looks fantastic
Wow – thank you so much for this post. As a new food-blogger I really appreciate you taking the time to help us all understand how you take such drop-dead gorgeous photos. TYVM!!
Damn, thanks for the awesome tutorial! I only have a simple little digi cam but it can get the job done well if there is good light. THis would solve a lot of problems for me!!!
while the photography tips are super helpful and amazing. i can’t help but wonder if you could put the recipe up for that beef salad that you so tantalizingly photographed. please? =]
It’s amazing that you can bring your food to me like that. I can practically smell it.
Amen sister. I regularly find myself blue in the face attempting to extol the virtues of NOT relying on available light. That maybe good uv balanced lighting and/or off camera flashes can actually WORK. And it warmed my heart to see a tripod there. I can always tell which images of mine were taken with a tripod or not.
My little homespun trick, a handful of years ago, was to paint the inside of my kitchen cabinet doors white. This way I can open up a cabinet door, yank my flash to the right or left and reflect me some flash action. Close the cabinet door and my lighting equipment is all put away.
I’m hungry, what’s for breakfast?
Biggles
It’s very generous of you to share your tips and tricks. I’ve just bought two lights but they don’t have shades and now I realise that they will be too harsh. Oh dear, what a waste of money!
Many thanks for your generosity of self and spirit.Super duper info.
Wonderful advice on lightings. I always like to see how food bloggers set up their lights and reflector when taking their food shots. Thanks for the generous tips.
Oh! thank you WonderWoman for such a gift of advice on photography! I needed them!
Thank you, thank you, thank you,
I have to say millions of thank you in order to express my appreciation of this post,
I learned so much from it, and I love your example photos,
I’m so glad that I found your blog!
Great info on those lights, thanks! As soon as it is in my budget, that sounds like the way to go. :0)
Wow! Just….WOW!
I am clicking through to purchase those lamps right now. You know, I have been thinking about and looking for a lighting set up. I was browsing my Calumet mag and they were way out or range for my skill level. I own so much VERY expensive DJ equipment, that if I were to bring MORE lighting equip into the house, well let’s just say that the accountant, my wife, may have a small issue with it. But what you have shared here is well within my spending budget. I am off to clicking and thanks again!
I love your blog, so inspiring! I wanted to thank you for this, while I plan other usage for these lights, I do want to thank you introducing them to me!
Keep-up the fab work you do here!
Thank you so much for those tips and product recommendation! I normally ignore product recommendations but it’s very different from a respected source. I love your clear before and after shots too.
Btw, I’ve tried adjusting white balance AND photoshopping. At least with my camera, I just don’t get enough color information in the night-time photos to de-yellow the shot and still have the image look non-grainy or over-saturated.
This definitely seems like the way to go and with the option to get just the bulb, it’s a no brainer. You ROCK!
Thanks, Jaden!
I’ve always been scared by electronic lights and just use whatever’s available through my windows. But as you say, during the winter there’s just not enough and waking up early to take a photo for my blog before work isn’t fun. Thanks for the tips! And it’s a shame that B&H has shoddy packaging–you’re not the only one I know who has had their box arrive with damaged goods. But it’s still an interesting store to shop in–have you ever been?
that salad looks so crisp and fresh jaden! thanks for sharing the tip girl:)
Looks like a good setup 🙂
Also, do you always use just your auto settings when using the EGO lights? I know you used auto settings to make a point in this post, but do you fudge with your camera’s settings at all for your other posts?
Thank you thank you for this post J! I especially liked how you included a comparison with a point and shoot because I was wondering if the lights would be worth it for me.
Now if I can just convince my wife that spending $100+ on a little light is worth it. Maybe I can lie and tell her it’s a desk lamp too.
Fuuuuuuuuuuuuuuuuudge. 🙂 Thanks for posting the tips. I may in fact buy that set up!
Great info on the lights! But of course impeccable food styling accounts for a lot too. Beautiful thai beef salad.
And…if I’m not mistaken full spectrum lights affect your mood! (In a good way.)
So Jaden, (off topic), I can’t eat soy sauce , even gluten-free soy sauce because I’m allergic to corn and they use corn /grain alcohol. Sooo…I was going to try to make a yummy stir fry sauce with some fish sauce, a little Bragg’s Liquid Amino and honey and ginger. Any other ideas for me?
Totally, Jaden. Lights are very important when we are shooting in winter months, even if it IS the Sunshine State!
those lights are great — what a huge difference! i’m always trying to figure our where my photo budget should go — such a tough call, new lenses v. new lights!
Wow, thanks for the instruction on proper lighting! The detail in your food pics is so awesome that it almost inspires me to whip out my own Rebel XT. But I wonder if I could get the same results with a 50 mm f1.8? On the other hand, the food I cook is not as elegant or mouthwatering as yours. 🙂
Wow! That is amazing! Thank you so much for all this info, I even found a dealer where I can get one of those lights here in Canada! Now all I have to do is save up a bit and I can get one 😉 Your photos are gorgeous, btw!
Just the post I needed! Thanks for sharing your world. I’ve been looking into some lighting, and I think this is the direction I’ll go in. If I order, I’ll order through your site… I’m aware of how this benefits you 🙂 THANK YOU!
Lori
http://TheRecipeGirl.blogspot.com
Thank you so much for this post. I really appreciated the shots showing the different results with ambient, flash and lights.
Your pictures (and your food) inspire me!!
This was very helpful. I’ve spent a lot of time this winter trying to work with different types of indoor lighting and external flash, without much success. Having a pretty good camera doesn’t help much, either. And I’m *always* cooking late at night, so this type of light would be put to good use indeed. Thanks!
Looks like a nice lighting setup. I enjoy the meta-food-blog posts. Photography was never my thing, but post production work was (photoshop, print, prepress, etc). As much as I enjoy going through and making some quick fixes on my photos, it is always nice to just get it right the first time and save myself the time. For me, taking a better photo has been a long, slow process, and every bit helps. Keep ’em coming! 🙂
Wow, lots of wonderful information here! Makes me want to take a photography class. Of course the class could be about photographing food and then after we take pictures we get to eat the food. I’m just saying.
Jaden :
Thanks for the excellent tips!!Salad looks good…
Happy New Year to you and your family.
Thanks for sharing your photography tips Jaden. I have enjoyed peeking into your studio!
Thanks for the tip on the Lowell Ego Lights. I’ve been so obsessed with lighting these days, especially reflecting light to fill the shadows. Good lighting and a good tripod will produce great pictures, even with a point-and-shoot.
Thanks Jaden for the great tips. Easy for a beginner like me to understand. I have the same problem as jane spice. I have to either cook really quickly in the morning before I go to work so that I have time to take my pictures, or anything fancy and time consuming has to be done on weekends. Else, artificial lighting doesn’t do me any good. Btw, do you know of any place that sell these lights which output is 240VAC instead of 120? Thanks.
I was struggling with the same issue. I work late, so I had to do all my cooking on weekends for day light.. Thanks I just ordered it.
Phil – the point was to have a point of reference – used auto settings on each photo. did you even seen the rest of the photos? plus most bloggers don’t own Photoshop nor white balance on their point and shoot cameras.
Thanks for the lighting tips. I am going to have to look into these lights.
>>The photo is bland, too orange and the flowers are flat. White of the label looks pink.<<
Probably could have been fixed by adjusting the white balance of the camera, or a little Photoshopping after the fact.
Wow, Jaden- your light tips are great and it just dawned on me that I could use our daylight spectrum “happy lite” (my husband’s way of keeping me “Florida” happy in winter-is-such-a-downer Atlanta) when I’m taking my photos. Thanks for the brainstorm! And BTW, Thai Beef Salad is on my menu for this week!
Haha your play-by-play of each type of lighting flaws is something I go through on a nearly daily basis. I have actually called in sick to work just so I could get a photo of some dish in daylight! I am definitely picking up those lights.
I love learning about your behind the scenes stuff. It is so interesting and makes me feel better about my lousy photos- maybeit is the lighting and not me!!
thank you so much for solving my 4pm in Brooklyn problem (where I force my husband to eat dinner at a way too early hour just so I can photograph the food with adequate light!).
I am going to pick up just one of these lights and see how I do. You are a sweetheart for sharing all your secrets, btw.
You have a loyal bunch of us who read your blog—thanks for sharing your insight & expertise to help others create their own personal accomplishments thru all things related to the love of good food!
Thanks for the tips!
I will invest in those lamps really soon. They do an amazing job!
Ohhh thanks for sharing the light tips. I just spent 250 buying a camera so may be I should wiat for few months before I slap another bill on DH’s face ;).
Also, i voted for your entry at the culinate. Looks like we can vote again for you next week ( not just once) 😉
yup, point and shoot flash does suck…sigh. thanks for introducing me to the ego light 🙂 will have to figure out if I can get it in japan.
Yeah, your Negative Calorie Chocolate cake got my vote … and no, I don’t expect to go to Napa with you!
I’m gearing up for a possible video shoot tomorrow, in the teaching kitchen at the Community College. The lights aren’t bad … flourescents with a decent spectrum. The Chef will not wear a ball cap! 😉
Lord…I just take a few pictures of my food with my old camera and hope one turns out decent enough to use on my page. I am lost as far as photography goes, and I doubt I’ll ever work at it…Oh well, I’ll enjoy great food pics elsewhere 😀
i love those lights! gotta get me some! thanks for sharing!
Dang woman! Is there anything you can’t do??? Great photos and tips. Thanks.
I am huge fan of you site!
Mainly for the picture that you post.
plus the recipes are made very easy to understand!
As I live in where you cannot charge your cards international to buy stuffs that you like to buy.
I have to find another way around.
So, I search online for few DIY project.
these two seems to be perfect for people like me, who cannot buy things online!
http://strobist.blogspot.com/2006/07/how-to-diy-10-macro-photo-studio.html
http://www.diyphotography.net/homestudio/cheap-homemade-diy-studio-no-lighting-needed
Hope Jaden wont mind, As I am posting these links here.
I wonder how the lights would work with jewelry? Hmmm!
I just need to buckle down and get a newer camera and the the gadgets…fortunately I have two great friends that are pro. photogs that can gift me some or their gadgets in the meantime.
Thanks for the suggestive post! 🙂 And, please don’t try any radish juice!
WOW! Thank you so much for the tips. The photos are amazing. I’m shopping for a new camera…can’t wait to get it and play. What great information and beautiful photos!
I think I can make those lights (or something pretty close). Hmm…
You are so generous with your knowledge. I am sure this is why great things are happening to you and will continue to happen! Thanks. I am so gonna get those lights 🙂
I think my blog simply exist to make all the others look fantastic.
Thanks for the tips. It is something to aim for!
This is a great discovery for a food blogger like myself, especially when I’m located in cold nordic Montreal, where the sun sets at 3:30pm in the winter times. Thanks so much for sharing. And the photo of the Thai salad does look fantastic.