This post may contain affiliate links. Please read our
disclosure policy
for more information.
Ah, the humble boiled egg – simple, yet surprisingly tricky to perfect. It’s a staple in many of our kitchens, and for a good reason. From breakfast tables to salad toppers, the boiled egg has earned its spot in our culinary hearts. But, if you’ve ever wrestled with a stubborn shell or found a gray ring around your yolk, you know there’s an art to boiling this little gem just right. Let’s dive in and master the magic behind the perfect boil, whether you’re aiming for the best soft-boiled or hard-boiled eggs.
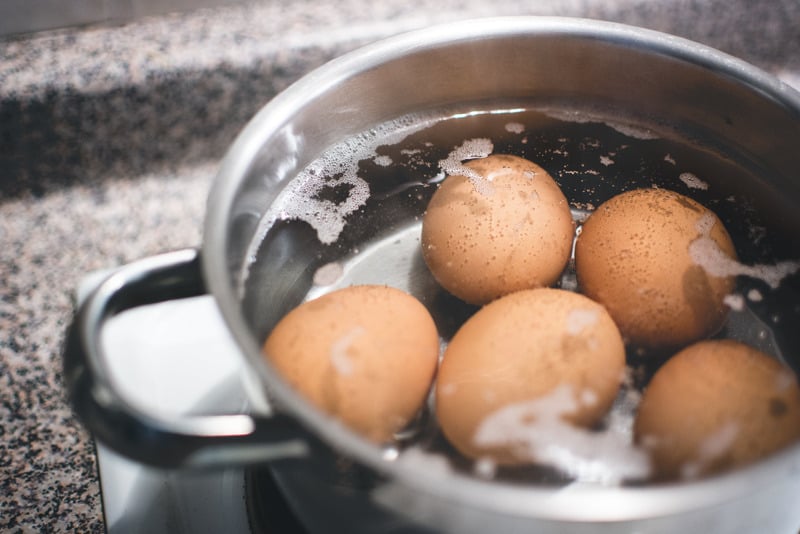
Understanding the Different Stages of Boiled Eggs
Boiling an egg might seem like the simplest of kitchen tasks, but achieving the perfect consistency requires a bit of knowledge and precision. The time an egg spends in boiling water determines its final texture. Let’s break down the various stages:
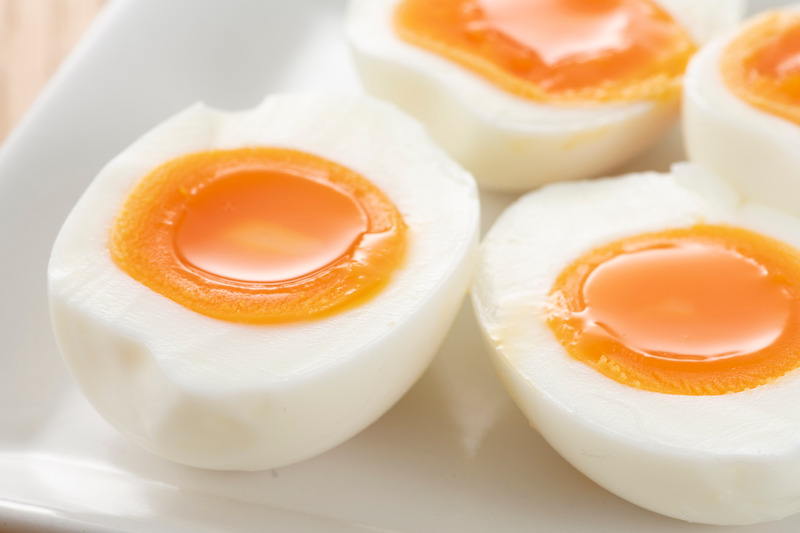
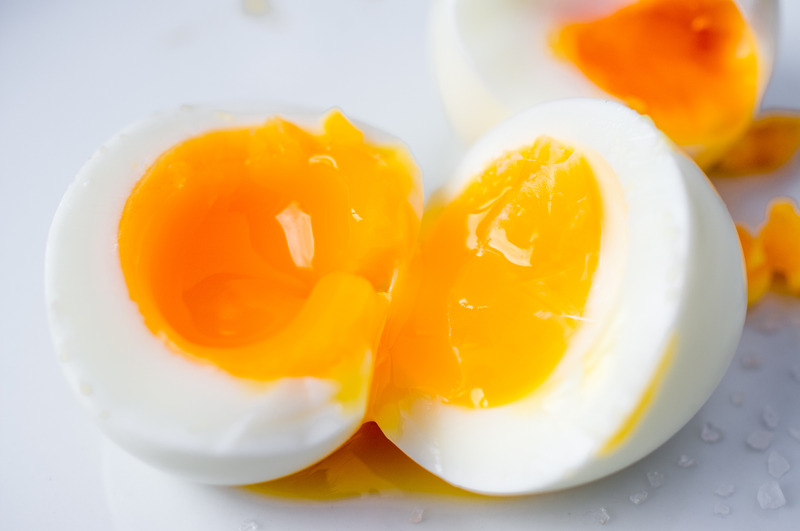
- Soft-Boiled: Runny and Dreamy (4-5 minutes)
- White: Set, but possibly still slightly translucent.
- Yolk: Completely runny, perfect for dipping toast soldiers into.
- Medium Soft-Boiled: Creamy Middle Ground (6-7 minutes)
- White: Fully set.
- Yolk: Partly set, but still quite creamy and a bit runny.
- Medium Hard-Boiled: Almost There (8-9 minutes)
- White: Firm and fully set.
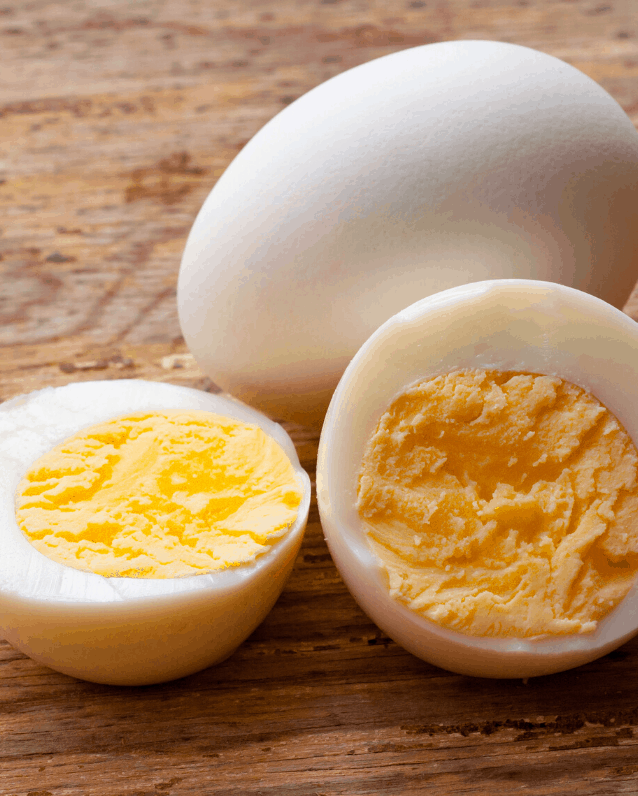
- Yolk: Mostly set with just a hint of creaminess in the center.
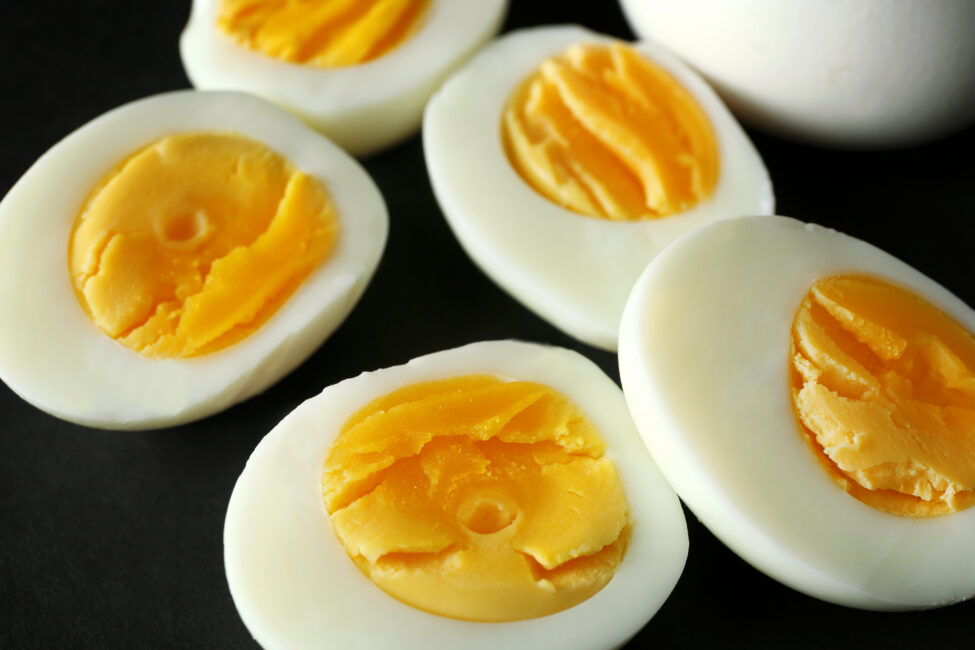
- Hard-Boiled: Firm and Flakey (10-12 minutes)
- White: Hard and fully set.
- Yolk: Completely set with a crumbly, yet moist texture.
Knowing these stages will not only help you get your preferred egg consistency but will also assist in customizing recipes. Whether you’re making a salad, ramen, or just having them for breakfast, understanding these stages ensures you’ll always have the perfect egg to match your dish!
Choosing the Right Eggs for Boiling
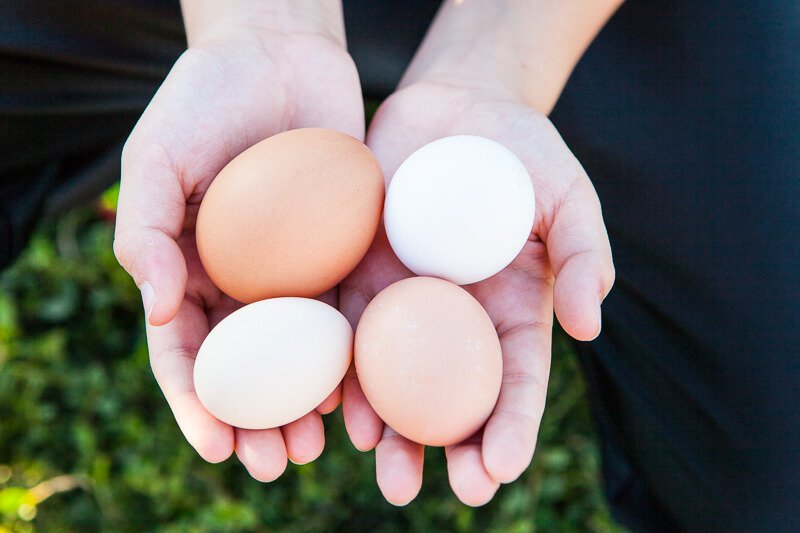
When it comes to boiling eggs, not all eggs are created equal. The choice you make at the grocery store or farmers market can influence the taste, texture, and even the peeling process of your boiled eggs. Here are some key factors to consider:
- Freshness Matters:
- Why It’s Important: Older eggs are often easier to peel once boiled. As an egg ages, the pH of the whites increases, which makes them less likely to adhere to the shell. That said, super fresh eggs can be delicious but might give you a harder time when you try to peel them.
- Tip: If you’re not sure about the age of your eggs, try the float test. Fresh eggs will sink to the bottom of a bowl of water, while older eggs will stand upright or float.
- Size and Consistency:
- Why It’s Important: The size of the egg can impact boiling time. A large egg will naturally take a bit longer to cook than a medium or small one.
- Tip: For consistent results, try to boil eggs that are all approximately the same size.
- Free-Range vs. Organic vs. Conventional:
- Free-Range: These hens have access to the outdoors. Their eggs often have a richer flavor due to a varied diet and more exercise.
- Organic: These eggs come from hens that are given organic feed and have access to the outdoors. No synthetic hormones or antibiotics are used.
- Conventional: These are typically the least expensive option and come from hens in industrial settings with limited space. While they’re budget-friendly, they might not have the robust flavor of the other options.
- Tip: Choose based on your personal preference, budget, and ethical considerations. Remember, a happier hen often produces a tastier egg!
In essence, while any egg can be boiled, understanding these nuances ensures you’re making informed decisions based on your culinary needs and personal values.
The Perfect Hard-Boiled Egg: Step-by-Step
Hard-boiled eggs can be a kitchen staple. Ideal for salads, snacks, and protein boosts, the perfect hard-boiled egg is both delicious and versatile. Here’s how to achieve it:
- Start with Room Temperature Eggs:
- Let your eggs sit out of the fridge for about 15-30 minutes. This can help prevent the shells from cracking due to sudden temperature changes.
- Place Eggs in a Single Layer:
- Use a saucepan that’s big enough to lay all your eggs in a single layer. This ensures even cooking.
- Cover with Water:
- Add enough cold water to the pot to cover the eggs by an inch or two.
- Slowly Bring to a Boil:
- Put the pot on medium heat and bring the water to a boil. A gentle boil reduces the chances of the eggs cracking.
- Turn Off the Heat and Cover:
- Once boiling, turn off the heat, cover the pot, and let it sit for 9-12 minutes. The residual heat will cook the eggs to perfection.
- Cool in an Ice Bath:
- After the time has passed, transfer the eggs to a bowl of ice water or run them under cold tap water. This stops the cooking process and makes peeling easier.
Now, you should have perfectly cooked hard-boiled eggs with a firm yolk and no unsightly green ring!
The Dreamy Soft-Boiled Egg: Step-by-Step
The allure of a soft-boiled egg lies in its luxurious, creamy yolk. Here’s how to achieve that dreamy center:
- Use Room Temperature Eggs:
- Just like with hard-boiled eggs, start with eggs that have been left out for about 15-30 minutes.
- Prep Your Pot:
- Place the eggs in a pot in a single layer and cover them with cold water.
- Bring to a Boil:
- Place the pot on high heat and bring the water to a rapid boil.
- Timing is Key:
- Once boiling, reduce the heat to low (or off) to maintain a simmer. Let the eggs cook for 4-5 minutes for a runny yolk or 6-7 minutes for a more gel-like yolk.
- Ice Bath Immediately:
- Transfer the eggs immediately to an ice bath or run them under cold tap water for at least 5 minutes. This cools them down fast and stops the cooking process.
Now, when you open up that egg, you’ll be greeted with a beautifully soft, golden center that’s just waiting to be dipped into!
Common Mistakes (and How to Avoid Them)
Boiling eggs might seem like one of the simplest kitchen tasks, but there are numerous nuances that can make or break the end result. Here are some common mistakes many of us make, and the solutions to ensure egg-cellent outcomes every time:
- Overcooking: This is perhaps the most frequent misstep. Overcooked hard-boiled eggs can have a greenish ring around the yolk, which is a result of a reaction between the iron in the yolk and the sulfur in the white. While safe to eat, it’s not the most appetizing. Solution: Stick to the recommended boiling times, and always use a timer!
- Using Super Fresh Eggs: Contrary to what you might think, extremely fresh eggs are actually harder to peel once boiled. Solution: If you can, use eggs that have been in your refrigerator for a week or so. They tend to peel more easily due to the pH of the whites altering over time.
- Starting with Hot Water: Dropping cold eggs into boiling water can cause them to crack. Solution: Always start with your eggs in cool water and then bring the water to a boil. This gradual change in temperature reduces the risk of cracked shells.
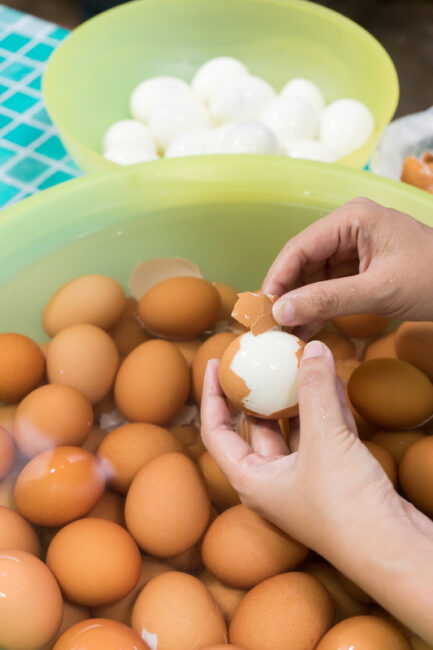
- Peeling Right Away: While it might be tempting to peel the eggs immediately after boiling, this can lead to pockmarked whites. Solution: Let the eggs cool down first. A quick ice bath can help make the peeling process smoother.
- Not Using Enough Water: If the water doesn’t cover the eggs by at least an inch, they might not cook evenly. Solution: Always ensure there’s ample water in the pot to cover all the eggs.
By keeping these potential pitfalls in mind and following our tips, you’ll be on your way to mastering the art of boiling eggs!
Our Favorite Method
Over the years, we’ve experimented with countless techniques, but we keep coming back to one tried-and-true method. Not only does it yield perfectly cooked eggs every time, but it also consistently produces eggs that are a breeze to peel.
- Locate the larger end of the egg. Using a bamboo skewer, toothpick or paring knife, carefully tap a hole without pricking the membrane. Transfer the eggs to a steamer basket.
- Bring 1” of water to a boil in a saucepan.
- Lower in the steamer basket with eggs.
- Turn heat to medium, cover and cook for 8 minutes (soft boil), 12 minutes (hard boil).
- When eggs are done, immediately transfer eggs to a bowl of ice cold water.
Frequently Asked Questions
- Why do some hard-boiled eggs have a grayish-green ring around the yolk? This greenish ring is a result of a reaction between the iron in the yolk and the sulfur in the white. It usually indicates that the egg has been overcooked or was cooked in water with a high iron content. While it may look unappetizing, it’s perfectly safe to eat.
- How long can I store boiled eggs? Boiled eggs, whether hard or soft, can be kept in the refrigerator for up to one week. Just ensure they are stored in a covered container to prevent them from absorbing strong odors from other foods.
- Can I freeze boiled eggs? It’s not recommended to freeze boiled eggs because the white becomes rubbery and the yolk can become crumbly. However, you can freeze separated egg yolks and whites for later use in different recipes.
- Why is there sometimes an “air pocket” at the bottom of a boiled egg? The air pocket, or “air cell,” forms as the egg cools after being laid. When boiling the egg, this pocket can expand, making it more noticeable. It’s completely natural and safe to eat.
- Is there a difference in boiling times for brown versus white eggs? The color of the eggshell doesn’t affect boiling time. The primary factors are the egg’s size and starting temperature.
- Why do egg whites sometimes appear slightly brown after boiling? If the boiling water contains a high amount of iron, it can react with the egg whites and tint them a brownish color. It’s safe to eat, but if you prefer, you can use distilled water or another source with lower iron content.
Egg-ceptional Dishes to Try
Want to put your perfectly boiled eggs to delicious use? Here are some fabulous recipes where a soft or hard-boiled egg will elevate the dish:
Dive into these dishes and enjoy the creamy or firm yolk of your boiled eggs, enhancing every slurp or bite!
This post may contain affiliate links. Please read our
disclosure policy
for more information.
This post may contain affiliate links. Please read our
disclosure policy
for more information.
Ah, the humble boiled egg – simple, yet surprisingly tricky to perfect. It’s a staple in many of our kitchens, and for a good reason. From breakfast tables to salad toppers, the boiled egg has earned its spot in our culinary hearts. But, if you’ve ever wrestled with a stubborn shell or found a gray ring around your yolk, you know there’s an art to boiling this little gem just right. Let’s dive in and master the magic behind the perfect boil, whether you’re aiming for the best soft-boiled or hard-boiled eggs.

Understanding the Different Stages of Boiled Eggs
Boiling an egg might seem like the simplest of kitchen tasks, but achieving the perfect consistency requires a bit of knowledge and precision. The time an egg spends in boiling water determines its final texture. Let’s break down the various stages:
- Soft-Boiled: Runny and Dreamy (4-5 minutes)
- White: Set, but possibly still slightly translucent.
- Yolk: Completely runny, perfect for dipping toast soldiers into.
- Medium Soft-Boiled: Creamy Middle Ground (6-7 minutes)
- White: Fully set.
- Yolk: Partly set, but still quite creamy and a bit runny.
- Medium Hard-Boiled: Almost There (8-9 minutes)
- White: Firm and fully set.
- Yolk: Mostly set with just a hint of creaminess in the center.
- Hard-Boiled: Firm and Flakey (10-12 minutes)
- White: Hard and fully set.
- Yolk: Completely set with a crumbly, yet moist texture.
Knowing these stages will not only help you get your preferred egg consistency but will also assist in customizing recipes. Whether you’re making a salad, ramen, or just having them for breakfast, understanding these stages ensures you’ll always have the perfect egg to match your dish!

Choosing the Right Eggs for Boiling
When it comes to boiling eggs, not all eggs are created equal. The choice you make at the grocery store or farmers market can influence the taste, texture, and even the peeling process of your boiled eggs. Here are some key factors to consider:
- Freshness Matters:
- Why It’s Important: Older eggs are often easier to peel once boiled. As an egg ages, the pH of the whites increases, which makes them less likely to adhere to the shell. That said, super fresh eggs can be delicious but might give you a harder time when you try to peel them.
- Tip: If you’re not sure about the age of your eggs, try the float test. Fresh eggs will sink to the bottom of a bowl of water, while older eggs will stand upright or float.
- Size and Consistency:
- Why It’s Important: The size of the egg can impact boiling time. A large egg will naturally take a bit longer to cook than a medium or small one.
- Tip: For consistent results, try to boil eggs that are all approximately the same size.
- Free-Range vs. Organic vs. Conventional:
- Free-Range: These hens have access to the outdoors. Their eggs often have a richer flavor due to a varied diet and more exercise.
- Organic: These eggs come from hens that are given organic feed and have access to the outdoors. No synthetic hormones or antibiotics are used.
- Conventional: These are typically the least expensive option and come from hens in industrial settings with limited space. While they’re budget-friendly, they might not have the robust flavor of the other options.
- Tip: Choose based on your personal preference, budget, and ethical considerations. Remember, a happier hen often produces a tastier egg!
In essence, while any egg can be boiled, understanding these nuances ensures you’re making informed decisions based on your culinary needs and personal values.

The Perfect Hard-Boiled Egg: Step-by-Step
Hard-boiled eggs can be a kitchen staple. Ideal for salads, snacks, and protein boosts, the perfect hard-boiled egg is both delicious and versatile. Here’s how to achieve it:
- Start with Room Temperature Eggs:
- Let your eggs sit out of the fridge for about 15-30 minutes. This can help prevent the shells from cracking due to sudden temperature changes.
- Place Eggs in a Single Layer:
- Use a saucepan that’s big enough to lay all your eggs in a single layer. This ensures even cooking.
- Cover with Water:
- Add enough cold water to the pot to cover the eggs by an inch or two.
- Slowly Bring to a Boil:
- Put the pot on medium heat and bring the water to a boil. A gentle boil reduces the chances of the eggs cracking.
- Turn Off the Heat and Cover:
- Once boiling, turn off the heat, cover the pot, and let it sit for 9-12 minutes. The residual heat will cook the eggs to perfection.
- Cool in an Ice Bath:
- After the time has passed, transfer the eggs to a bowl of ice water or run them under cold tap water. This stops the cooking process and makes peeling easier.
Now, you should have perfectly cooked hard-boiled eggs with a firm yolk and no unsightly green ring!

The Dreamy Soft-Boiled Egg: Step-by-Step
The allure of a soft-boiled egg lies in its luxurious, creamy yolk. Here’s how to achieve that dreamy center:
- Use Room Temperature Eggs:
- Just like with hard-boiled eggs, start with eggs that have been left out for about 15-30 minutes.
- Prep Your Pot:
- Place the eggs in a pot in a single layer and cover them with cold water.
- Bring to a Boil:
- Place the pot on high heat and bring the water to a rapid boil.
- Timing is Key:
- Once boiling, reduce the heat to low (or off) to maintain a simmer. Let the eggs cook for 4-5 minutes for a runny yolk or 6-7 minutes for a more gel-like yolk.
- Ice Bath Immediately:
- Transfer the eggs immediately to an ice bath or run them under cold tap water for at least 5 minutes. This cools them down fast and stops the cooking process.
Now, when you open up that egg, you’ll be greeted with a beautifully soft, golden center that’s just waiting to be dipped into!

Common Mistakes (and How to Avoid Them)
Boiling eggs might seem like one of the simplest kitchen tasks, but there are numerous nuances that can make or break the end result. Here are some common mistakes many of us make, and the solutions to ensure egg-cellent outcomes every time:
- Overcooking: This is perhaps the most frequent misstep. Overcooked hard-boiled eggs can have a greenish ring around the yolk, which is a result of a reaction between the iron in the yolk and the sulfur in the white. While safe to eat, it’s not the most appetizing. Solution: Stick to the recommended boiling times, and always use a timer!
- Using Super Fresh Eggs: Contrary to what you might think, extremely fresh eggs are actually harder to peel once boiled. Solution: If you can, use eggs that have been in your refrigerator for a week or so. They tend to peel more easily due to the pH of the whites altering over time.
- Starting with Hot Water: Dropping cold eggs into boiling water can cause them to crack. Solution: Always start with your eggs in cool water and then bring the water to a boil. This gradual change in temperature reduces the risk of cracked shells.
- Peeling Right Away: While it might be tempting to peel the eggs immediately after boiling, this can lead to pockmarked whites. Solution: Let the eggs cool down first. A quick ice bath can help make the peeling process smoother.
- Not Using Enough Water: If the water doesn’t cover the eggs by at least an inch, they might not cook evenly. Solution: Always ensure there’s ample water in the pot to cover all the eggs.
By keeping these potential pitfalls in mind and following our tips, you’ll be on your way to mastering the art of boiling eggs!

Our Favorite Method
Over the years, we’ve experimented with countless techniques, but we keep coming back to one tried-and-true method. Not only does it yield perfectly cooked eggs every time, but it also consistently produces eggs that are a breeze to peel.
- Locate the larger end of the egg. Using a bamboo skewer, toothpick or paring knife, carefully tap a hole without pricking the membrane. Transfer the eggs to a steamer basket.
- Bring 1” of water to a boil in a saucepan.
- Lower in the steamer basket with eggs.
- Turn heat to medium, cover and cook for 8 minutes (soft boil), 12 minutes (hard boil).
- When eggs are done, immediately transfer eggs to a bowl of ice cold water.

Frequently Asked Questions
- Why do some hard-boiled eggs have a grayish-green ring around the yolk? This greenish ring is a result of a reaction between the iron in the yolk and the sulfur in the white. It usually indicates that the egg has been overcooked or was cooked in water with a high iron content. While it may look unappetizing, it’s perfectly safe to eat.
- How long can I store boiled eggs? Boiled eggs, whether hard or soft, can be kept in the refrigerator for up to one week. Just ensure they are stored in a covered container to prevent them from absorbing strong odors from other foods.
- Can I freeze boiled eggs? It’s not recommended to freeze boiled eggs because the white becomes rubbery and the yolk can become crumbly. However, you can freeze separated egg yolks and whites for later use in different recipes.
- Why is there sometimes an “air pocket” at the bottom of a boiled egg? The air pocket, or “air cell,” forms as the egg cools after being laid. When boiling the egg, this pocket can expand, making it more noticeable. It’s completely natural and safe to eat.
- Is there a difference in boiling times for brown versus white eggs? The color of the eggshell doesn’t affect boiling time. The primary factors are the egg’s size and starting temperature.
- Why do egg whites sometimes appear slightly brown after boiling? If the boiling water contains a high amount of iron, it can react with the egg whites and tint them a brownish color. It’s safe to eat, but if you prefer, you can use distilled water or another source with lower iron content.
Egg-ceptional Dishes to Try
Want to put your perfectly boiled eggs to delicious use? Here are some fabulous recipes where a soft or hard-boiled egg will elevate the dish:
Dive into these dishes and enjoy the creamy or firm yolk of your boiled eggs, enhancing every slurp or bite!
This post may contain affiliate links. Please read our
disclosure policy
for more information.
 Did you try this recipe? Please leave a star rating in the recipe card below and leave a review in the comment section! I always appreciate your feedback and I know other readers do, too!
 Stay in touch with me in our Facebook group, on Pinterest or follow me on Instagram! Sign up for my email list, too where we chat all things recipes, tips, giveaways, and more!


