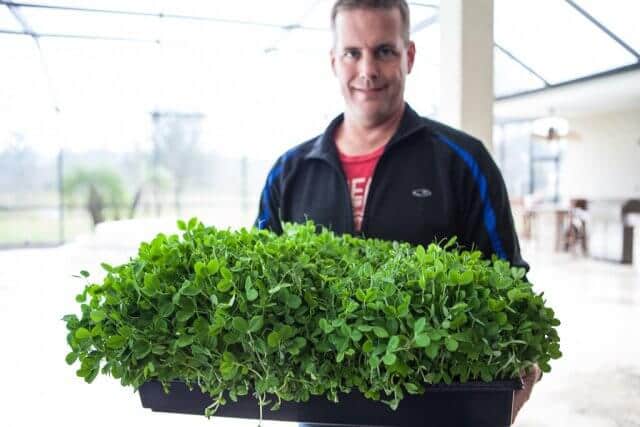
What you’ll learn:
- Step by step, how to grow pea shoots
- What you MUST do to prevent dangerous contamination
- Why coconut coir, seedlings pads do not work for pea shoots
- Recipe for simple pea shoots stir fry
We love growing microgreens! They are not only highly nutritious, but also so simple to grow. No garden required. Just a sunny spot anywhere in your house. Of all the microgreens we grow, my favorite has to be pea shoots. I love the delicate, pea-flavored shoots to add to salads, sandwiches, tacos, as a topping for soups — basically anytime I want an extra boost of nutrients.
We also let the pea microgreens grow a little longer, a little taller, and harvest them as “pea shoots,” and stir-fry them Chinese style. Though you can eat the pea shoots raw, in salads, just like microgreens.
A big thank you to Mercola for sending us lots of seeds to play with!
How to grow pea shoots
Step 1: Soak the Pea Shoot Seeds
The first step is to start with good seeds. We use High Mowing Organic Pea Shoots exclusively. They are certified organic, non-GMO.
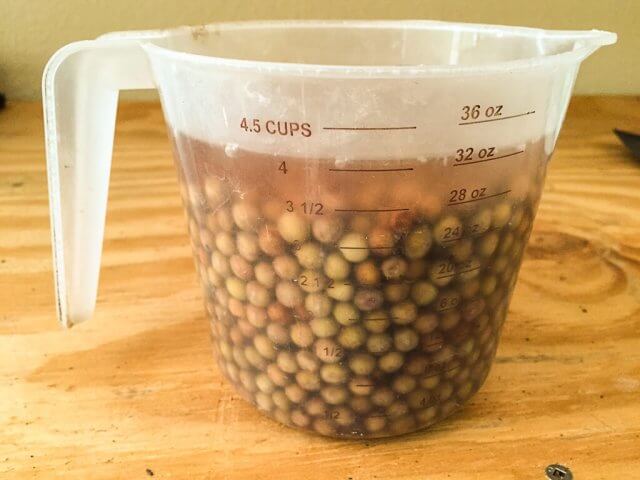
The seeds need to be soaked in clean, cool water for 8-24 hours. Allow enough water and have a big enough container for the peas to nearly double in size.
Before:
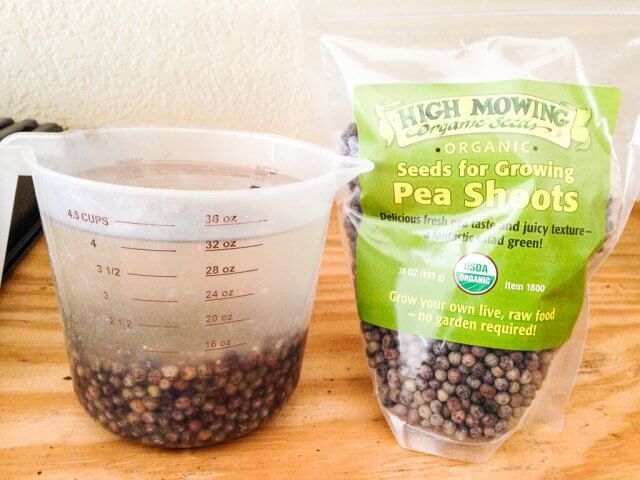
2 cups pea shoots + 4 cups water for a 10×20 tray.
After:
Pea shoots nearly double in size.
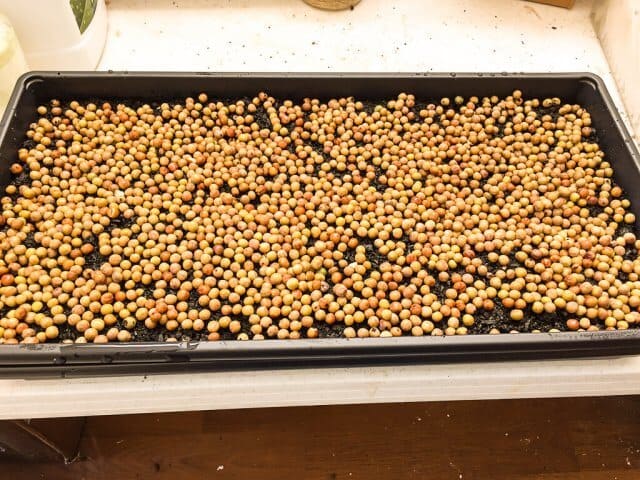
Step 2: Spread 1-inch thick of organic potting soil into a large tray. We use re-usable 10″x20″ standard plastic seeding tray (called “1020 trays.”) You can use any type of large, shallow tray, even a baking sheet would work, as long as it will hold 1″ of potting soil.
Growing Medium for Pea Shoots
For our microgreens, we’ve tried:
- Growing pads (too expensive, non-organic, non-compostable)
- Micro-Mats (organic, but fall apart too easily when wet, expensive)
- Coconut Coir (organic, very messy, slow to decompose, may contain high concentration of salt, which is not good for plants)
For pea shoots – the larger, faster growing plants that we grow beyond the “microgreen stage” – we prefer to use potting soil, which includes soil + vermiculite + other organic compost (such as worm castings, compost.) Pea shoots will require the nutrients in soil. They will not thrive in the growing pads or coir.
When growing shoots or microgreens, we always recommend organic, nutrient and microorganism-rich soil.
What you must avoid:
Any soil containing chicken or cow manure, which could lead to very dangerous contamination. Shoots and microgreens are extra-susceptible to contamination – because the parts we eat are so close to the soil and especially in a warm, humid, moist conditions.
The soil we use:
Sprout Doctor Soil Enhancement from Mercor which is:
- Sustainable Biochar – Provides inorganic carbon that builds soil and acts as a nearly permanent “sponge” to absorb nutrients and water and creates a friendly home for microorganisms.
- Organic Compost – Provides immediate soil food with organic carbon, building soil tilth and humus.
- Organic Worm Casings – Provides nutrients, enzymes, and improves soil structure.
- Organic Kelp Meal – Adds the slowly dissolving nutritional benefits of ocean plants and helps with nitrogen in the soil.
It’s natural and compostable: After harvesting the pea shoots, the soil added to our garden compost.
After spreading soil:
Drain the water from the seeds. Scatter the seeds evenly and in one layer, all over the tray.
Step 3: Water, Mist and Cover
Water the the sprouts and soil feels damp (not soaking wet.)
Use a second tray and spray the inside of the second tray with water. Place tray upside down on top of first tray to create darkness and humidity.
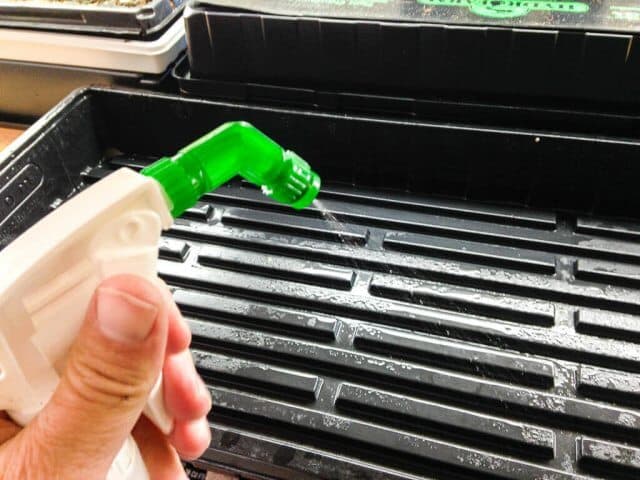
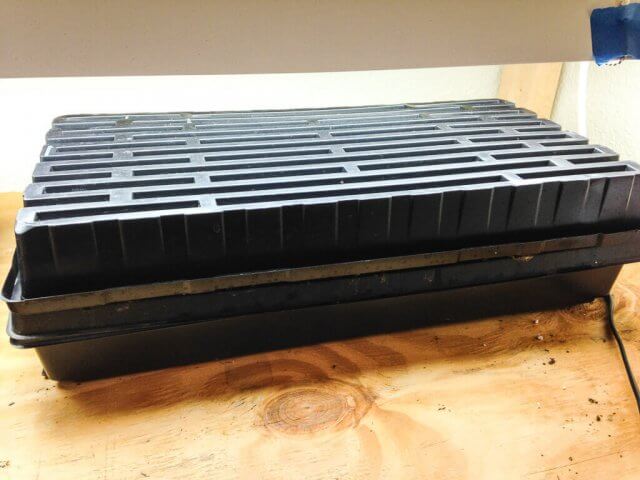
Place tray in a warm (70F is ideal), dark place. Every day, spray the second tray and recover – to maintain the humidity. If you live in a colder environment, place try on top of refrigerator (you may want to cover everything with a dark cloth to keep sunlight out), for added heat. Avoid sunlight. We’ve also used a Seedling Heating Mat with great success when the temperature dips too low.
We currently have our pea shoots on a heating mat, as last night, it dipped to freezing here in Florida (rare, but it happens!)
After 2-3 days, the pea shoots will have germinated.
Uncover and move the tray into light, like a windowsill, or outside enclosed patio if the weather is nice and cool. While peas germinate best in warmer environment, peas grow after germination in cooler temperature, below 70F. Try to avoid placing the tray out in the open – as birds and unwanted critters will delight in the treat and possibly contaminate with excrement.
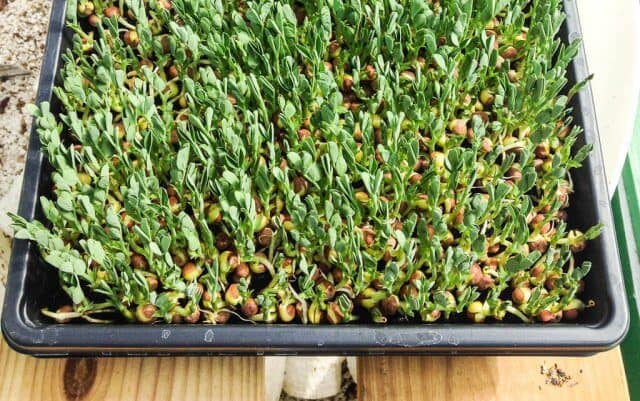
Step 4: Continue Watering Using Thumb Test
For the next 7-10 days, you’ll water the pea shoots by using the thumb test.
Use your thumb to press against the top of the soil. If your thumb comes off clean and dry, water the peas. If your thumb comes off even slightly moist or with a little soil, you’re good until tomorrow.
Another test is to lift the tray. As you gain experience with growing microgreens and shoots in the container, you’ll be aware of how heavy/light the tray is. Light trays means it probably needs water.
If you are growing on a windowsill, or where there you have light coming in from just one side, you will want to rotate the trays so that the shoots will get sunlight more evenly.
Step 5: Harvest Pea Shoots
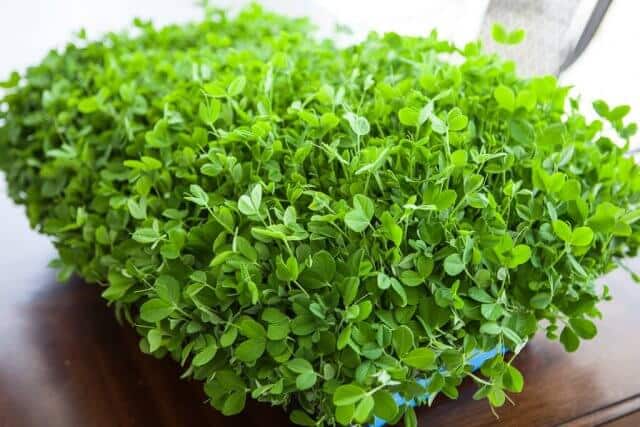
When do you harvest the shoots? Whenever you want to.
You can even harvest them after their first two true leaves appear as microgreens. What’s the difference between cotyledons vs. microgreens?
If you wait a few more days, the pea will begin growing taller and become what we call “pea shoots.” We like to harvest them when they reach between 6″ – 10″ above the soil.
If you peek at the root structure, you’ll see that the pea shoots have taken hold of the soil. If we would have used coconut coir or growing pads, the pea shoots would not thrive in those environments – and would require supplemental feeding. So, you might as well start them in soil to avoid the extra step of feeding.
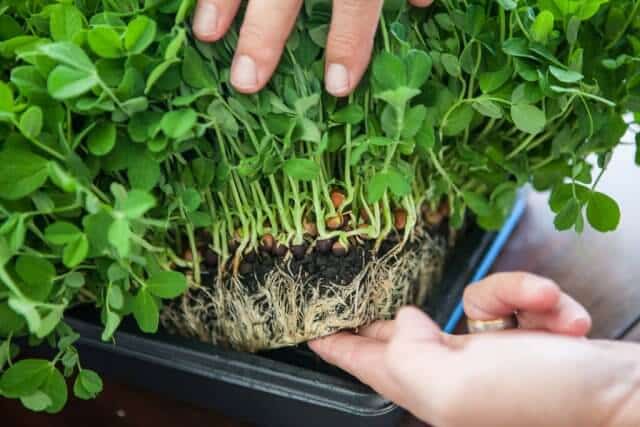
To harvest, we use a pair of kitchen shears, and give the pea shoots a “haircut.” We cut 1″-2″ above the seed. We don’t want to bring any of the soil in the harvest. We are very careful to only harvest the tops and not touch the soil or seeds. This reduces any further risk of contamination – like bacteria.
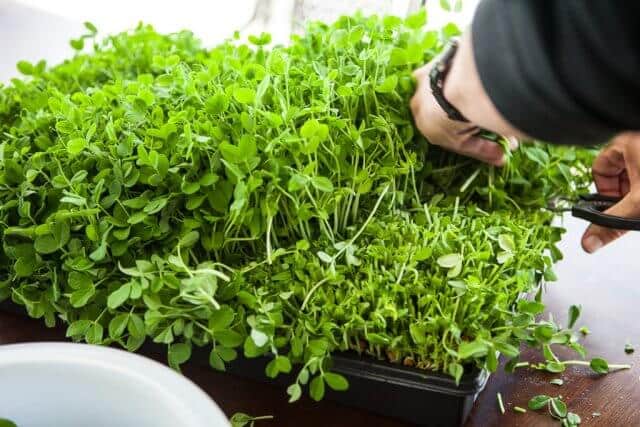
You’ll get plenty! Our 10″x20″ tray yielded about 2 pounds of pea shoots.
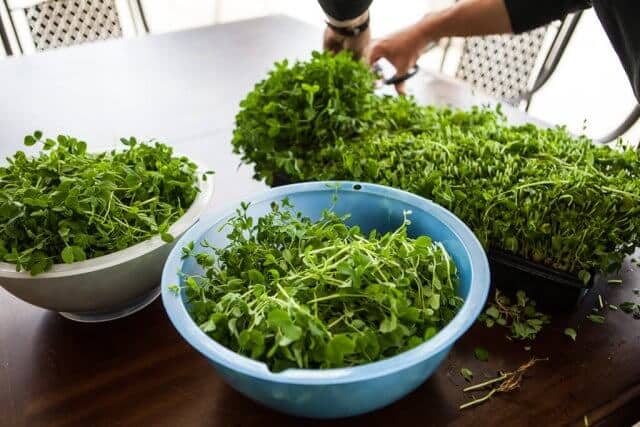
How to store pea shoots
Store harvested pea shoots in resealable bags in the refrigerator until you are ready to eat. TIP: we do not wash the pea shoots until ready to cook. The extra water from washing will deteriorate the pea shoots faster. Keep the shoots dry. Just use a gallon-sized resealable bag. The pea shoots should stay fresh for over 2 weeks! If you find that there is moisture in the bag, take a single paper towel,
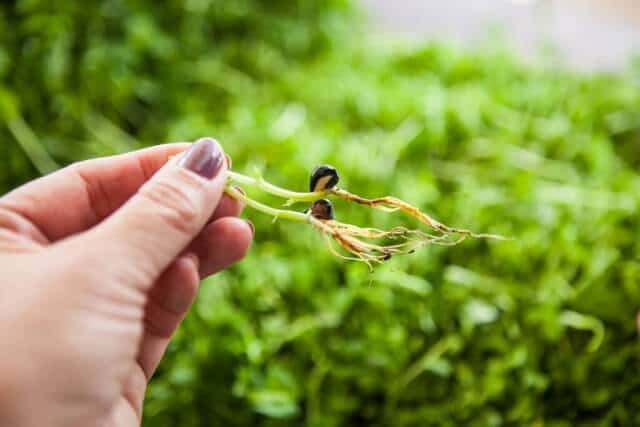
If you’re curious, this is what the root and seed looks like. Strong and healthy, and our flock of hens love picking through the cuttings. Will they grow shoots again? No, not if you’ve cut all of the leaves off of the stems. Perhaps, if you gave a shallow “haircut” to the pea shoots, and only cut off the tips, you might continue to grow pea shoots to harvest another batch. However, we have not tried this.
I would strongly avoid eating the pea next to the root – not only has the nutritional value been sapped already, but it’s been in direct contact with the moist soil.
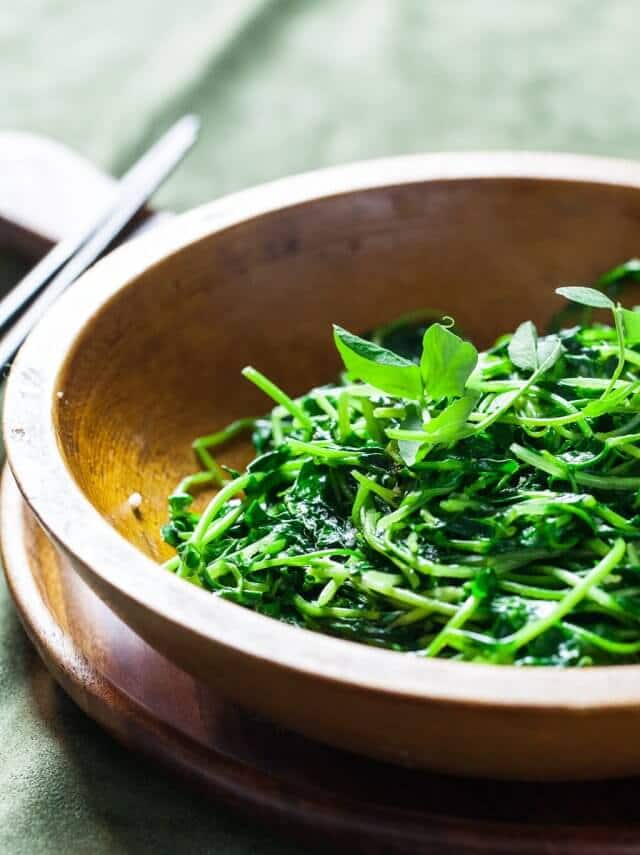
We’ve made Chinese Stir Fried Pea Shoots – click here for the recipe. It’s a very simple, delicious way to enjoy pea shoots!
If you are interested in growing Pea Shoots, Mercola has an entire kit, including the Sprout Doctor Soil for sale here.
We are also giving away a “Grow Microgreens” Kit from Mercola to several lucky winners! Come enter the giveaway here.



They are delicious ! Easy and simple. I bought a grow tray which has 3 parts. Dome, mesh (like colander) , and bottom reservoir. I use a simple store bought hydroponic nutrients. I follow the same steps as far as soaking and covering, the first week only water. From then on I introduce nutrients . Directions are on the bottle. I top off every 3 days and completely change water once a week. They FLORISh especially with an inexpensive grow light!
can we store the pea plant in the chiller?
Hi Faye – As it’s growing, you should leave it out. Once you get it at the desired height, you can store in the refrigerator. Growth will slow. You’ll have to cover the plants – the refrigerator will dry out everything and the plants will wilt and dry out if you don’t keep the plants moist.
Larry Hountz grows Pea Shoots in Coco Coir regularly with huge growth. This is his Youtube Channel: https://www.youtube.com/watch?v=S_IXLgwMdtU
I am just starting my journey. I have started with pea shoots to grow micro greens. They are about three inches tall. the ends have feather like protrusions on them. Do they go away or stay? How big do these plants grow and how long is optimal growth? Thank you
Well growing pads aren’t going to work without hydroponic nutrient. Price runs about $1.25 a tray which is about double that of soil (and that’s at scale). Great thing about rockwool (i use Precut 10×20 pads from Grodan) is that it IS compostable and holds double the water as regular potting mix, so less watering and less product loss due to underwatering. When i do Peas, i use half potting mix and half coconut. It really shouldn’t need more nutrients than this, but you could use a 1/4 strength hydro solution if you’re worried.
I use tendril peas and keep the germinated seed in blackout for a few days after germination. This gets the shoot nice and strong and crisp.
Do you have a preferred organic soil that you use when you mix with Mercola’s sprout doctor? I’ve only been growing sprouts for a few months with coconut coir and want to try soil but also want to avoid some of the issues like gnats, bugs, mold.
I know this is an old article but I’ve been searching and searching but no one seems to document what their yield of greens is vs seeds. ie for a 1lb of seed, how many lbs of greens do you get?
Josh, I never thought to document the yield rates verses per seed type. I know Johnny’s seeds has a planting density / estimated yield for microgreens. I haven’t seen one for pea shoots.
Josh Sattin of Sattin Hill Farms gets a yield of about 0.75lb per 10×20” tray and sells them for about $20/lb, $15/tray. Check out his YouTube for more info.
First time I heard of pea shoots plan on try growing
I see you advise against any soil that contains manure. I’ve been using MooDoo Germinating mix. Is that not an ok idea?
It’s a personal choice, but I tend to avoid them with shoots since they grow up through the soil and are harvested so close to the soil. If you do use a manure added soil, then make sure you wash your sprouts well before consumption.
Can we grow pea without the soil
Actually, you can grow pea shoots and sunflower microgreens without soil. Here is a great example of someone doing that. https://www.youtube.com/watch?v=k5Z7Ehlxlik
Scott
I bought pea sprouts from a store and I’ve regrown them after one use. My question now is can I plant them in soil as they already have roots and keep harvesting indefinitely? I live in Japan and greens are SO expensive here!
I have never tried to replant the shoots or tried letting the continue to grow after the harvest. Our harvested flats have always gone straight to the chickens. From my understanding, the shoots are most tender during the first few days of growth after sprouting. So the questions are: Will the pea shoot continue to grow after harvest? And, are the second growth stage of the shoot tender enough? I would suggest trying it once and see how it goes. We have always just started a new crop since they grow so fast.
The farm I used to work at could get 2,sometimes 3,cuts before they were too woody.
I grew my first batch of pea shoots. Tried to make your Chinese wilted dish and peas came out very woody. Do you know what I should have done to make them less woody? FYI, I grew them at home.
Hi Mike, Try harvesting them younger. The older they get, the tougher they taste.
Thanks! What about making them less spindly, more meaty? Any tricks for that?
Pea shoots’ natural tendency is to climb and reach for light. Uncovering them when you first see the shoot emerge from the pod and exposing them to abundant light will help slow their reach. Be careful. You will need to keep the pods moist. If you are using an artificial light source that puts out extensive heat, make sure there is a good breeze blowing across your shoots. We are now using LED light tubes with very little heat. We keep the lights literally 1-2 inches from the top of the shoots.
Summer temps can also cause some varieties of plants to “bolt”. You may need to look for a different variety of pea shoot that may be more heat tolerant. Or switch to some other microgreen during the hotter parts of the year. We enjoy the nutty flavor of sunflower which does well during warmer months.
MUST try this . Love pea shoots and looks easier than growing peas
My Thomas Laxton Pea shoots end up being about 80% stem by height! :S Very frustrating, since I have 2 fluorescent fixtures right above each planted flat! Is light the only factor causing ‘legginess’? Thanks!
Pea shoots, sunflower, and beans tend to be leggy in general. They like to climb high. If they are growing well, then the light is probably not the issue. If they look thin and scraggly, then double check to make sure your lights are 6500K lights. The higher temperature lights have a more blue light which helps the plant during the growth phase. We also cut our pea shoots and sunflowers higher up the stem when harvesting. This still gives us a healthy portion of stem on our shoots. Another suggestion is removing the blackout dome earlier and keeping the shoots closer to the light, and as the shoots grow, move the lighter further away from the flat.
Do you know what ithe compost is made of in the sprout doctor
Soil enhancement , is it all plant based. Except for the worm castings? I know a lot of compost may not have manure in it but are made with food waste that may contain animal products.
Thank you for your detailed post, just the thing I was looking for. I’ve turned a new chapter since January, coming away from meat and going mostly plant based food, but heading towards a vegan diet since plant based foods make me feel so much better physically and mentally. I began growing broccoli sprouts in mason jars with huge success, and now venturing into microgreens. I bought 400g of sprouting pea tendrils to begin with, and so thankful for your advice and great pictures.
What do you do with the leftover cut shoots and roots still in the tray? Do I pull them all out and compost and then start a new batch? How many times can I reuse the soil before adding back nutrients?
Hi Megan – we fed them to our hens! LOL. It’s compost. You can reuse the soil, but it will be very difficult to separate the soil from the spent roots.
Ha! Thank you! That’s what I was noticing. Looks like I will be using less soil next time.
Hi, I just started my first tray of pea shoots and everything seems to be going along as described. I am a bit alarmed at so many blogs and posts warning about potential food poisoning or sickness from eating sprouts. Should I be worried??
Just keep everything clean, it’s fine! Grow them indoors, elevated above doggy tails and wash hands before touching. Dangers come from unsanitary conditions, especially sprout farms.
If you let the plants get a little taller you can cut a bit less of then you can treat them like cut and come again salad – the plants will continue to grow taller and make shoots for the sides
Great read.how high shoukd the lighting be from the tip of tge tray if i grow the pea shoots indoors?
Depending on the spread of your light and how intense your light is will be factors that determine the height of your light. Most professional growing lights have charts. If you are using daytime fluorescent bulbs, then they should be fairly low to the tips of the plants. Usually in the 3-4 inch range. As they grow taller, you can move the light a little further away.
i have been trying my self,, but my pea greens get real leggy and are not bushy like yours,,, not sure why… Whats the name of the seed you use.. I went to then link but im in europe… What type of seed is better ?
Usually, if the pea greens are leggy, that means they aren’t getting enough light. Try looking for seeds that are specifically “pea shoots” or pea microgreens. Those varieties are bred for tender, leafy plants (vs. focus on producing the pea)
I see there is an unfinished sentence ” If you find that there is moisture in the bag, take a single paper towel, ” I presume you put the paper towel in the bag with the shoots? Love the post! Sounds really good.
That’s correct DKJ – I will update the post to include that.
just a question to how much all the equipment and supplies cost in total?
Hi Jenn – It’s inexpensive! For the tray and soil, less than $5.
Thank you so much! I grew some pea shoots because of you. Did a chicken, red pepper and pea shoots stir-fry. It was great.
Fantastic! I love hearing that! Fresh, organic, homegrown pea shoots are the best. So healthy!
Awesome guide!
After we cut the pea shoots, will they continue to grow and ready to be harvested again? or should we compost the lot and start again?
Thanks so much!
Justin
Hi Justin, yes, they will continue to grow, but not as vigorous or as tender/sweet.
Ah perfect. Thank you so much, Jaden!
Wow! What great looking pea shoots! And lovely modeling Scott.
I NOTICE A DENSE FOREST OF GREEN LEAVES AFTER YOU CUT.
ALSO THE TOP TRAY APPEARS WITHOUT DRAIN SLITS AND DO YOU
USE SLIT TRAYS FOR THE BOTTOM?
Yes, we cut approximately 1-2 inches above the soil to help reduce contamination risk from the soil. The very top tray used initially does not have any holes as it is used to keep out light and hold in humidity. If you look closely at the pictures, you might notice the bottom tray actually consists of two trays. We were experimenting with ways to water the shoots. We would place a solid tray on the bottom, then add a second tray with slots into the solid tray. The soil and peas would go in the slotted tray. This created a way to lift the peas up and put water in the bottom (reservoir) tray. When you lowered the pea tray back down, the water would go through the slots directly into the soil and root area. You just need to be careful not to add too much water or else it would overflow when lowering the pea tray down.
You’ll get the hang of the water content by handling a few prepped trays and feeling the weight. Should be heavy and require two hands to hold the tray, but water should not pool or drip out when tilted.
I use a small watering can or spray bottle to water. My trays have no holes. Might use holes trays for wheatgrass to combat mold, but otherwise would only use holed trays if i had a waterproof area and a floor drain. Otherwise you are using too many trays
I think this is an absolutely fantastic idea! I’m totally on board with the certified organic, non-GMO seeds. Lately, I’m been into sprouting, it’s been on the brain. And I can’t believe how tasty sprouts are in a stir-fry, positively sweet. Even the kids will eat them (yes, I have deprived children who have never had fish crackers, boxed mac & cheese or drank any of those ghastly huggs) My neighbors laugh at me, oh well! But pea shoots must be absolutely delicious! Sweet even. Lovely photo’s =)