We wanted to showcase some of the chicken coop pictures that were submitted by people using the Palace Chicken Coop Plans. We are inspired by some of the great coops featured here as well as the adaptions made by them. Hopefully, you can glean some inspirations and ideas for your own coop.
After you have built your coop we encourage you to send us your “Chicken Coop Pictures”. We would love to add them onto the site.
Interested in purchasing these plans? You can get them from our good friends at Happy For A Living by clicking the button below! You will get immediate access to the plans as well as any future updates that come out.
Thank you for your support.
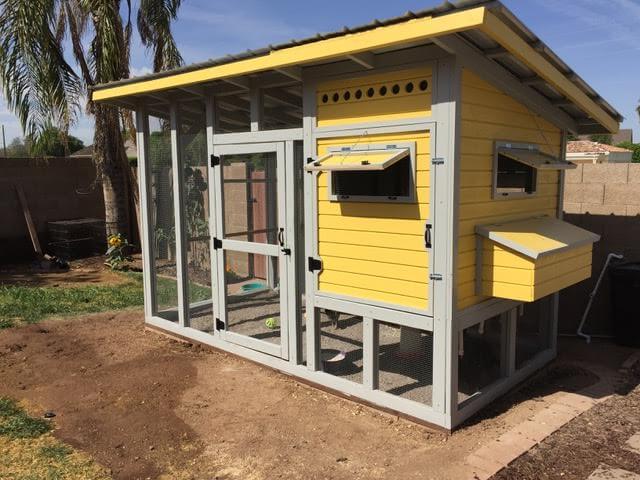
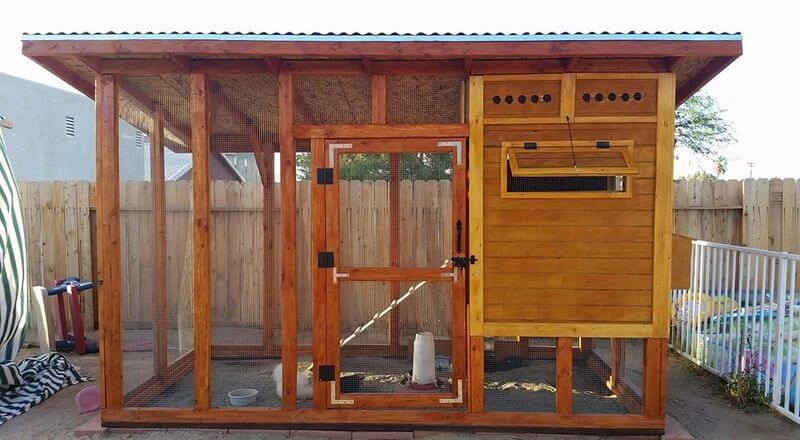
First up is a cool coop submitted by Jay W. I love some of the fantastic upgrades made to this coop. Notice he moved the door for the coop to the front of the structure since the back is facing the wall. This change allowed the coop to be closer to the wall and still allow easy cleaning.
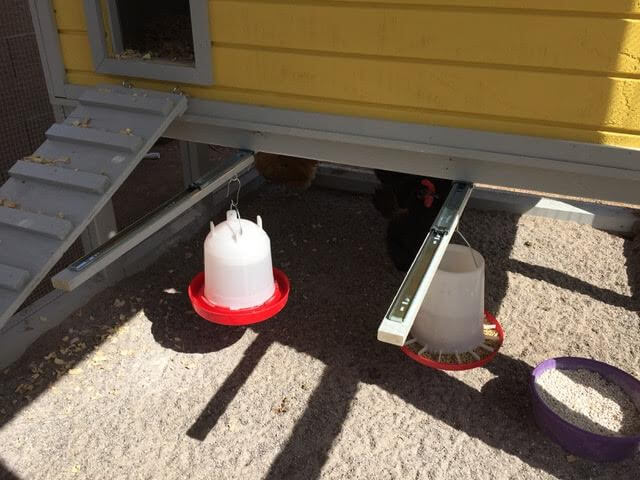
Fun little modification that allows moving the chickens’ food and water under the coop and still be able to access for easy cleaning. Using what appears to be drawer sliders in a verticle position instead of horizontal allows the water and feed buckets to be slide in and out.
Updated the inside molding pieces to give a clean angled look. I think it looks very nice.
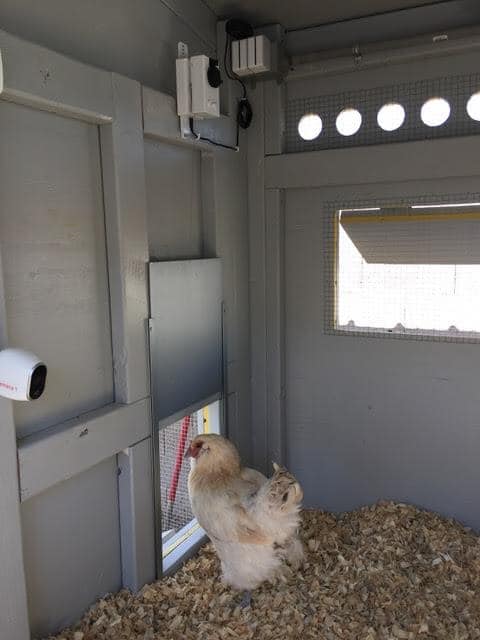
This coop is high tech as well. Looks like they added an automated door and a video camera to help keep an eye on their flock! This picture shows another way to trim cost on the coop by not installing all the detail molding on the inside of the coop. Look at the area around the window and ventilation holes. This is a great way to reduce cost and still look fantastic.
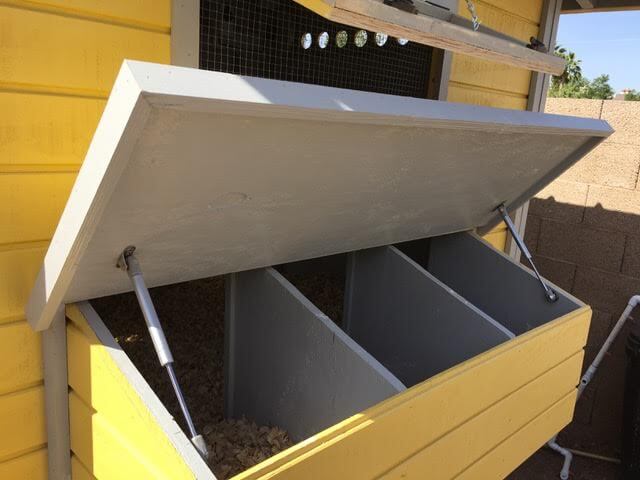
I love the pneumatic lifts here to keep the nesting box lid open to allow for two hands to gather eggs! This is one I wish I had thought of! We often resort to using the top of our head to hold open the lid while fishing out eggs. Perfect!
Chris sent us the next submission! I love the colors they choose for their coop. They blend well with the surrounding environment. I love the homemade Chicken Feeder! Nice adaptation of the front door too! Great job Chris!
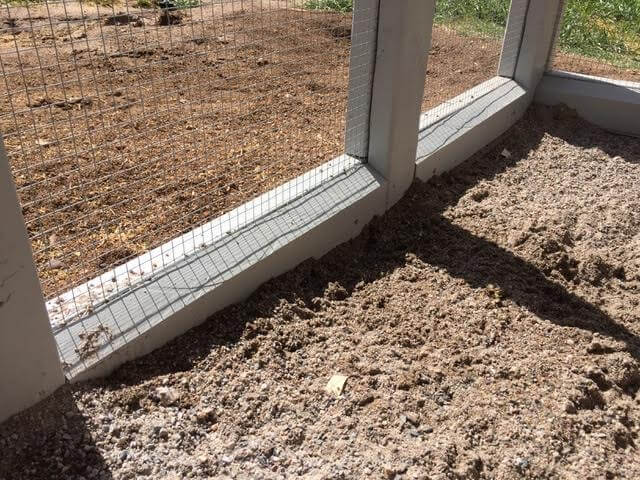
Here are John’s chicken coop pictures. It appears he has gone with the cinder block footer approach. It appears he has fewer drainage issues than we have and removed the footing/drainage feature from his build. Fantastic! Looks great John!

John did mention he made some straight cuts instead of angled cuts. Can you find them in the picture below? I had to look twice to find them! Looks great and I don’t think most people would even notice unless you pointed them out!


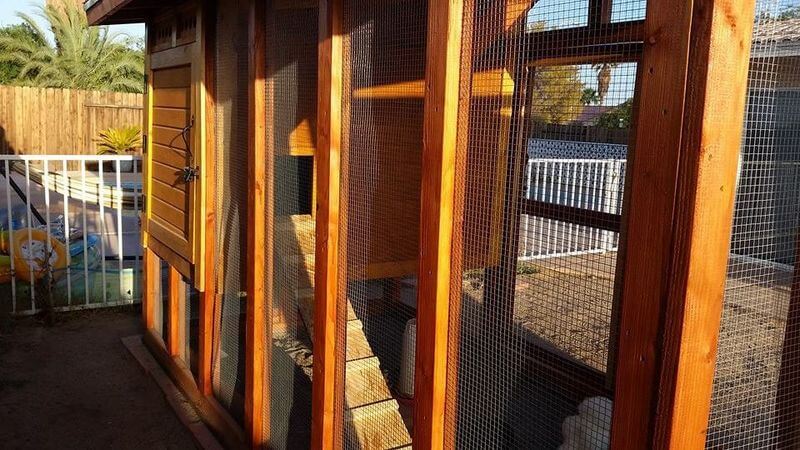
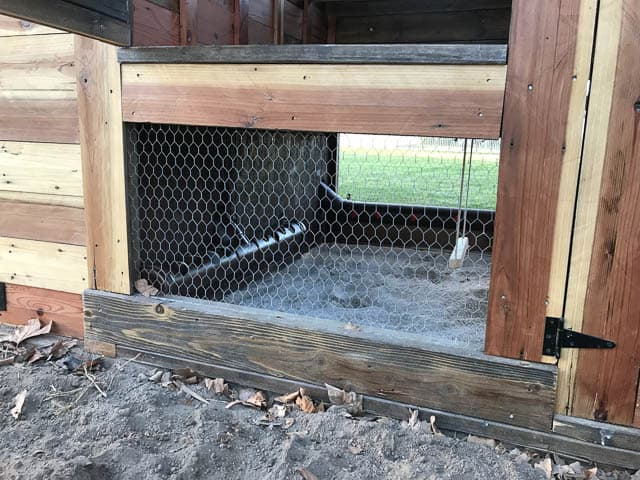
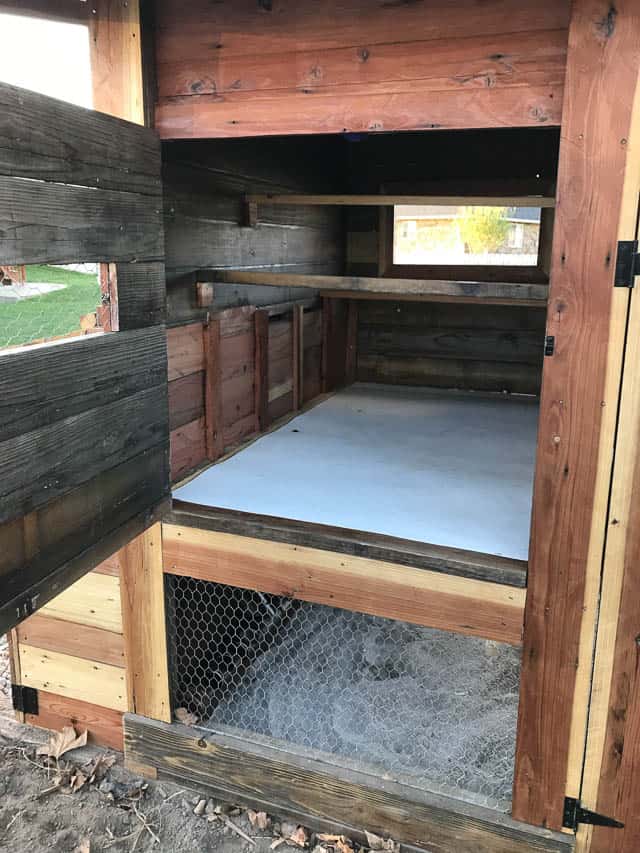
Here are Neil B’s chicken coop pictures! The most obvious adaptation that stands out is how he ran the siding down to the bottom of the coop. I am not exactly sure how he adapted the inside of the coop, but he mentioned something about not having a coop floor and instead has multiple roosting bars inside. Also, take a look under the hood. Here they saved some money by applying the roof directly to the rafters without using a wood subroof.

You can see the roof detail here in this angle as well. They went with chicken wire instead of the metal cloth and decided not to use the outer framing pieces to sandwich the wire.
I love the use of the roof to capture rainwater into a basin of some sort. This water can be used for the chickens or garden nearby. 
Probably my favorite upgrade to the coop was their use of additional trim on the nesting boxes. With their paint scheme it really makes the nesting boxes pop! Love it!
Our next submission is from Richard. His use of the clear plastic sheeting for the roof allows extra light in the coop since it’s in a very shaded part of the yard. The use of cinder blocks around the perimeter of the coop not only look nice but also help protect from digging critters.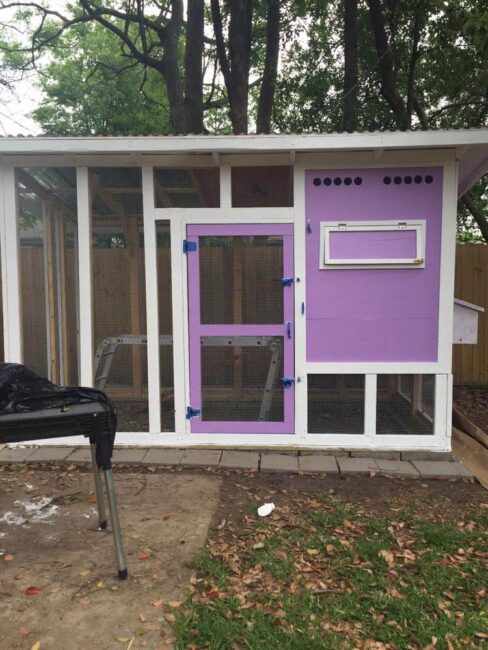
Here is the before painting photo. Great job Richard.
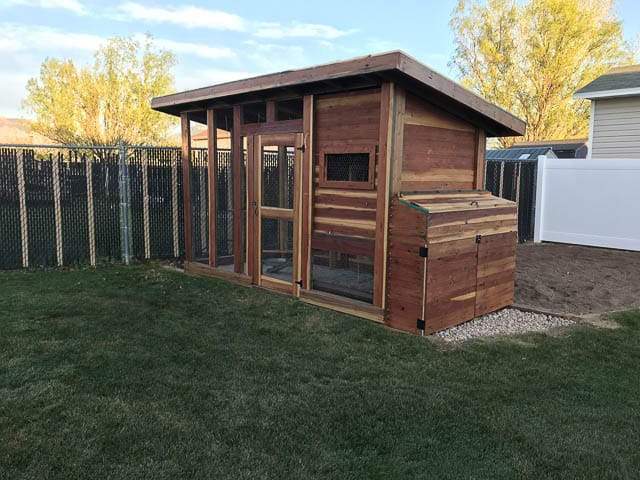
Debbie R has sent us some “Chicken Coop Pictures” of her fantastic coop they just finished. They named theirs the Cluckingham Palace. The name certainly fits!
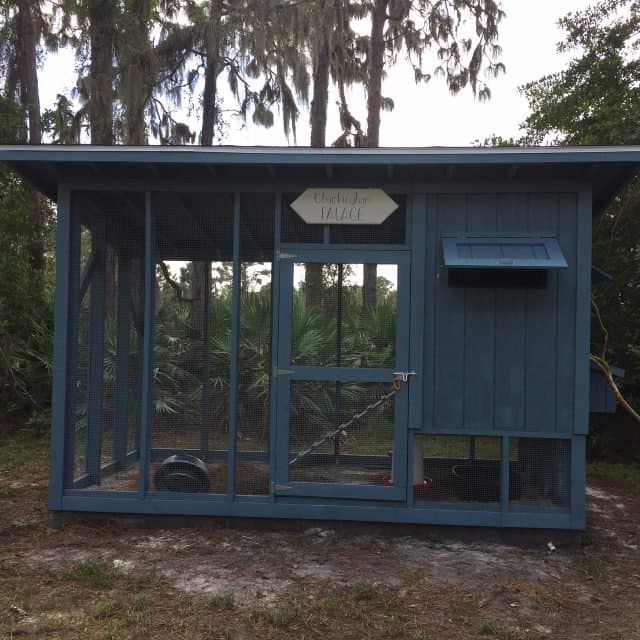
I love the use of natural materials. It gives any coop a personal touch and makes it unique to your environment. Note both the branches used in the run area as well as, the natural mulch on the floor of the run.

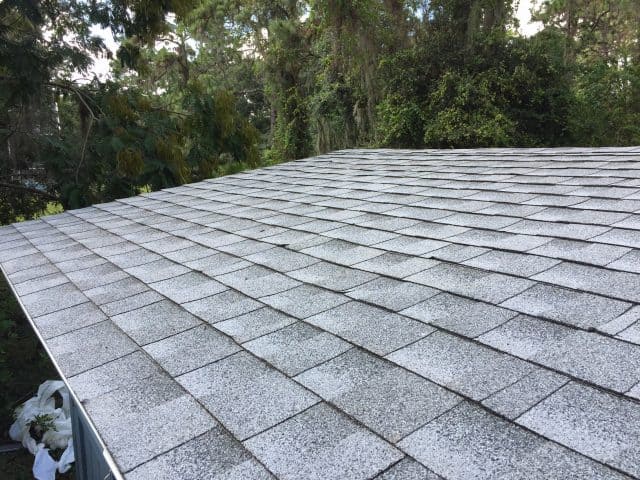
I also wanted to highlight their use of shingle roofing instead of the metal roof that we chose. Perfectly acceptable and goes to show some nice creativity and adaptability. Certainly, something to consider for your own coop.
Easy feeding and watering design
Eric built his chicken coop with many features to make feeding and watering as simple as possible.
Eric’s notes:
“I changed a few things like building five nesting boxes, two of them are used to fill their water and food, and i added a big storage cabinet below the nesting boxes, see pictures. Soon I’ll be putting on reclaimed green metal roofing.
I also added another door in the back just like in the front, so that I can clean out the coop right into my garden.
I didn’t build closing doors over the windows, I am going to put up plexiglass over the windows during cold weather, so the chickens will still have light but it will block out some of the cold.
The nesting boxes have sliding pieces of wood covering the openings until the chickens are old enough to start laying. I didn’t use hardware cloth, I used chicken wire because I already had a roll of it. The wood is reclaimed redwood from a deck that we removed it from.”
The coop is made from beautiful reclaimed wood:

Nesting boxes with temporary covering until the hens are old enough to lay:
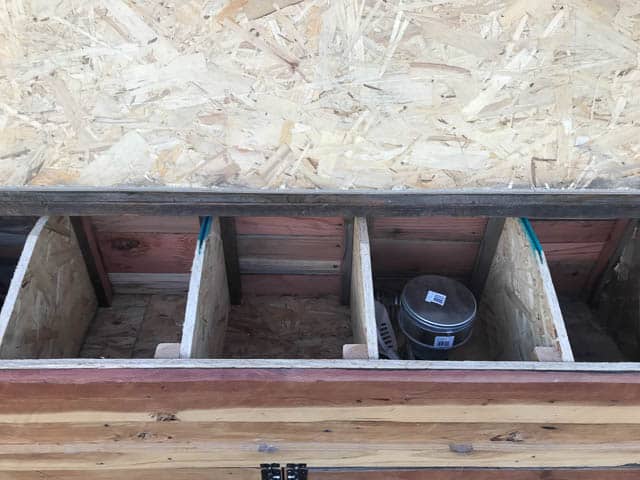
Under the nesting boxes, a really handy cabinet for food, trash and shavings storage:


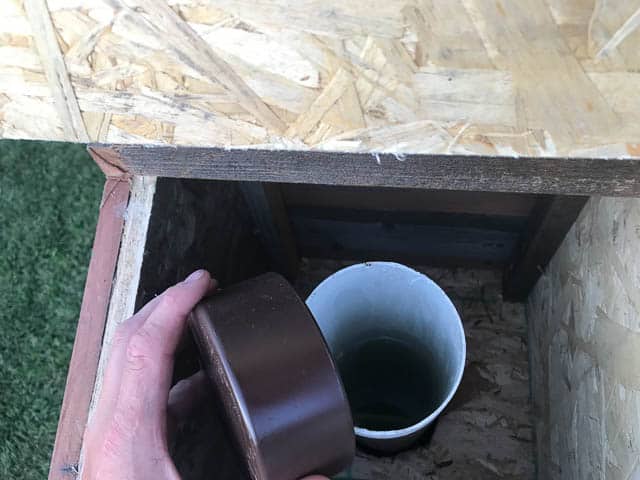
Eric built a genius waterer – here’s where he fills with water (just stick a hose in to fill)
And here’s the food chute!!
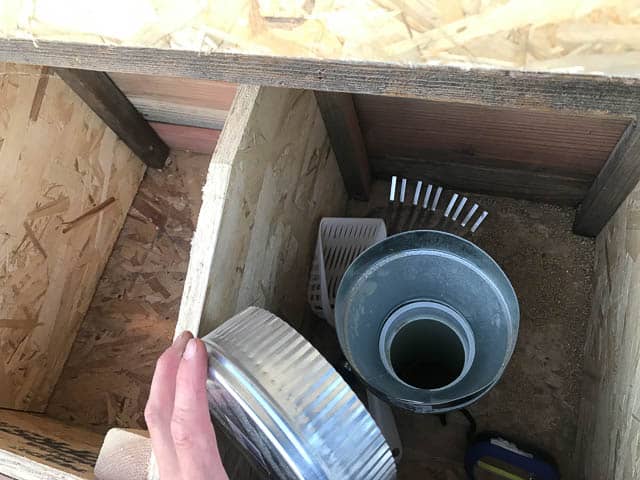
Both are located inside a nesting box.

Absolutely genius. The food dispenser to the left, water on the right (and a cute swing).

Roosting area:
Eric was very generous to share all these photos and notes! Here are the rest of his notes:
“I used your plans to build the frame structure and then for the walls of the coop, nesting boxes, cabinet and trim, I just kind of built by what worked, what looked right and what wood I had. Most all the materials are reclaimed except for the hinges, brackets, latches, nails, screws and materials for the feeder and waterer, So the whole thing cost me less than $400. I didn’t build a foundation. The whole thing is built on an existing sand box we had. I just had to slightly move and adjust the existing pressure treated timbers that were in the ground and I built it right on top of that and then just topped of the existing sand with 7 bags of new sand. I also didn’t put the vents in like the plans called for, the 4 walls just don’t go quite all the way to the top. There is a just an inch or two gap up under the roof, above the walls for venting. I live in northern Utah, so we have pretty hot summers, (it looks as though there is going to be plenty of shade) and we have really cold winters, so I hope all goes well with the cold. I will monitor the temperature inside the coop during the extreme cold temps to see if I need to add a heat lamp at times.”
Want to read more about our chickens? Check out these related posts: