Pan Fried Pork and Shrimp Potstickers

by SteamyKitchen on July 27, 2008 · 78 comments

chinese_potsticker_dumpling_recipe

In college, my friends and I used to get together once a month and have “Chinese Potsticker” parties. The kitchen would be prepped to create 3 big batches of Chinese potsticker filling and the dining table would be converted to our potsticker wrapping session.

We’d make hundreds of Chinese Potstickers. A small batch to enjoy that evening and the rest of the potstickers go straight to the freezer for my friends to take home. They were soooo fabulous and it was our girly-bonding time.

These days, it’s not my girlfriends who come over to pleat dumplings, but my little kids sit at the table wrapping the potstickers with Mommy. Love it!

Chinese Potstickers are really simple to make, and there are a few secrets that I’ll share with you.

How to pleat potsticker dumplings

I’m piecing together several photos of dumpling making from different cooking sessions, so you’ll have to excuse the inconsistent photo quality. Not to mention, these photos were from last year, before I learned how to use my camera’s basic fuction, like FOCUS. ;-)

These photos were taken when I handmade the dumpling wrapper – a feat that while delicious – to me is not worth the trouble, which is why I’ve not posted this before! The handmade wrappers are thicker than what you’d buy at the store.

Spoon about 1 teaspsoon of filling in the middle of the wrapper. Use your finger to brush the cornstarch slurry all around the outer edge of the dumpling to act as your “glue” to hold the potsticker together.

Bring up opposite sides and pinch the dumpling wrapper in the middle.

You’ll only be pleating the upper half of the potsticker. In this photo, all my pleats will be made on the upper half of the potsticker.

Start with your right side. Hold the potsticker in your hand. Fold and pleat as shown above. Pinch tight. You’ll do 3 pleats just like this on the right side. Then repeat on the other side, but in the opposite direction, so that all your pleats are pointing towards the center. See how my pleat points towards the center? This creates a crescent effect. The next time I make potstickers, I’ll have to take a few more photos, because it’s easier to learn by photos than in words.

Pinch all pleats tight – there should be no open spaces, otherwise your filling will fall out.

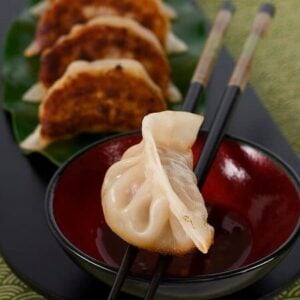
Now fry the potstickers in batches (read my instructions below in the recipe)

Sidenote:

While my potsticker recipe below does not call for cabbage, if you do want to include cabbage in your dumpling, make sure you salt the cabbage, let it sit for 15 minutes and squeeze all the water out of the cabbage. Watery cabbage = soggy dumplings. Look how much water comes out after 15 minutes of salting:

The salt draws out the water. For every handful of shredded cabbage, use about 1 teaspoon of kosher salt (1/2 tsp table salt), mix well, let sit for 15 minutes at room temp. Place salted cabbage in cheesecloth and squeeze water out. You could also just do this in your hands too, if you don’t have cheesecloth.

Print RecipePrint

Pan Fried Shrimp and Pork Potsticker Recipe

Serves 6-8

1 package of frozen dumpling skins, defrosted overnight in refrigerator or 40 minutes room temp (do not microwave or set in water)
3/4 pound raw shrimp, shelled and deveined
3 stalks green onions, cut into 2 inch sections
1/2 cup canned bamboo shoots
1/2 pound ground pork
2 tablespoons soy sauce
1/2 teaspoon kosher salt
2 tablespoons cornstarch
1 teaspoon freshly grated ginger
1 tablespoon rice wine (or dry sherry)
for the slurry: 1 tablespoon cornstarch mixed with 1/4 cup water in a small bowl
water
cooking oil

Dipping Sauce
1 teaspoon Asian chili sauce
1/4 cup soy sauce
2 teaspoon sesame oil
1/2 teaspoon sugar
1/2 teaspoon rice wine vinegar

Wash the shrimp and pat very dry. In a food processor, add the shrimp, green onions, bamboo shoots and pulse several times until the shrimp is chopped to about 1/4 inch. In a large bowl, combine the shrimp mixture with ground pork, soy sauce, salt, cornstarch, ginger, rice wine. Mix well.

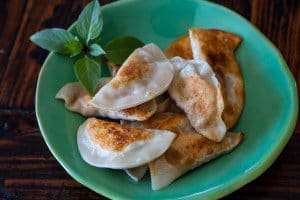
Spoon 1 teaspoon of the filling onto dumpling skin. Brush a bit of the cornstarch slurry
all around the edge of the dumpling skin. Fold over and press to secure edges. Make sure edges are sealed tightly. Shape the dumpling so that it has a flat bottom. Cover loosely with plastic wrap so that it doesn’t dry out.

When you are ready to cook, heat a large nonstick pan with 1 tablespoon of cooking oil over medium-high heat. When the oil is hot but not smoking, add the dumplings, flat side down, not touching, to the pan. Let fry for 1 minute until the bottoms are light golden brown. Pour 1/4 cup of water into the pan and immediately cover with a tight fitting lid. Turn heat to medium and let the dumplings steam for 3minutes. Open lid and let the remaining liquid cook off about 1 minute. Cut into a dumpling to make sure that the filling is cooked through. Remove to plate, wipe the pan clean with paper towels (or wash) and repeat with remaining dumplings. Serve with dipping sauce.

***

Still hungry?

Chinese Pastries with Hoisin Chicken

Con Your Kids to Eat Vegetables, Steamy-Style

Ground Beef with Beijing Sauce Over Noodles

Stir Fried Shrimp, Eggs and Peas + Stir Fry Secrets

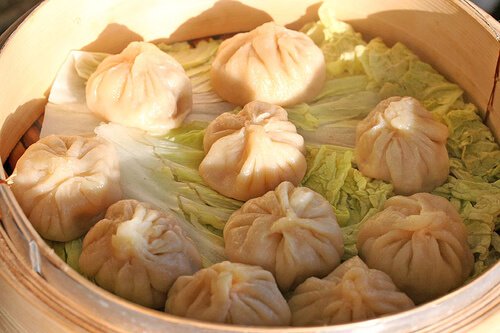
Xiao Long Bao – Steamed Shanghai Soup Dumplings
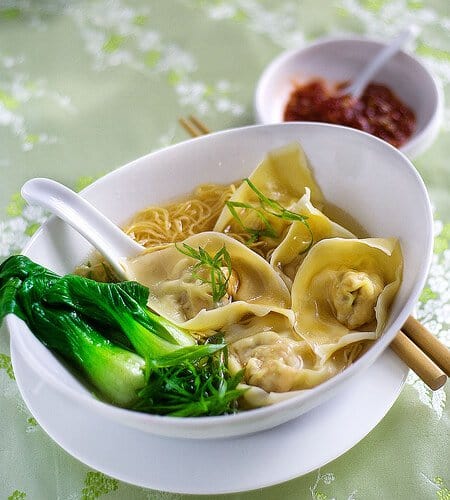
Wonton Noodle Soup

Related Posts with Thumbnails

Tsingtao Beer Banner

{ 78 comments… read them below or add one }

Laura August 4, 2008 at 11:04 am

Hi Jaden — potstickers are one of my favorite appetizers (I’m getting a craving for them as we speak) and this was perfectly timed! A friend of mine and I had planned a weekend potstickers marathon on Saturday, and I printed this out to use as our recipe.

We ground turkey, chicken, bok choy (treated like cabbage), green onions, ginger and low-sodium soy. If I’d remembered sprouts they would have been in the mix, too — next time!

We made a *massive* batch, cooked 12 on the spot (just to test, of course) and froze the rest in 10-dumpling packages. The total? 114 delicious potstickers. Hooray!

Reply

Ranjeet karki August 27, 2009 at 5:19 am

hi jaden i am see your pot sticker and i love food i am making new dishes and learning more recipe so my mail forward thanku

Reply

Hope August 6, 2008 at 3:41 pm

Hi Jaden

We love your blog.
just letting you know your potsticker pleating photos have dropped off the net, and no longer come up when the page is viewed. We hope they reappear soon so we can make some
thanks

Reply

TONY August 12, 2008 at 8:00 pm

Jaden or anyone,
Do you have a recipe for the potsticker dough?
They have become expensive here in California, and I really don’t like them all that much…to thin.
I use a recipe similar to yours, based on a recipe from on of my favorite cookbooks by Rhoda Yee…”Szechwan & Northern Cooking”. I used her dough recipe (2 cups flour + ½ water) and used my pasta maker to roll out the dough…but the dough was tuff and chewy.

Reply

jen August 14, 2008 at 2:06 pm

Dear Tony,

I too have been in search for the perfect potsticker dough. I believe in the order and technique of food science. While I have not tried Jaden’s Potsticker Dough recipe yet, it appears that her recipe may be “the one”. Trust me when I say I’ve have searched for “the one”. Key tips, her notes on Hot Water Dough and Kneading. All-Purpose flour (protein content 10-12%) is typically used, as Bread flour is higher is protein (12-14%), thus having higher glutens,thus typically resulting in a more chewy/dense product. Keep in mind that All-Purpose flour can vary slightly depending on brand and region. Make sure the dough rests as this helps the glutens relax. Too much flour can make a product tough. Hope this helps.

Reply

Jason Sandeman August 19, 2008 at 7:31 am

I really like your post here about potstickers. I just recently landed a sous-chef position at a hotel where we produce out a ton of those things, (with the pre-made wrappers of course ;) ) The photo where you show about how to pleat is top-notch.

Thanks for that.

Reply

Brenda August 20, 2008 at 5:59 pm

I love making potstickers with my girls. They are Chinese born, with American parents. We all love these and I really don’t mind the “work”. We have made them at dinners that we have had as thank yous for supporting us in a mission trip last summer with the girls. I have never learned how to make the pleats like the Chinese grandmothers. Now I know and with the filling that I have in the freezer, we will be making some this weekend.

Reply

S August 21, 2008 at 7:52 pm

In reply to jules, I have an allergy to wheat so I know how hard it is. I’ve never known which yum cha are gluten free either, but I can help you with wrappers. Buy vietnamese rice papers (they’re round) from your asian grocer – you can normally get small or large ones. If you’re making rice paper rolls (bit different to dumplings, but can use these wrappers too) you dip the rice paper in a bowl or slightly less hot than boiling, then you put your filling in and fold up the bottom, then the left and right sides of the wrapper, then roll away from you. According to a vietnamese cookbook I just borrowed from the library, you can also make a crepe using a flour which is rice flour to tapioca of 6 to 1, with normal crepe ingredients like eggs, etc. I recommend investing in vietnamese cookbooks as they normally show you how to make rice paper rolls or fried spring rolls, but I believe that rice papers work really well as a dumpling skin if you steam the dumplings. Not sure if you can fold them prettily like this though.

Reply

carlene shope August 25, 2008 at 7:25 pm

How can I print the recpie without all the other stuff?

Reply

SteamyKitchen August 25, 2008 at 7:49 pm

I know! I’ve been trying to get this stupid #*(&!@%$ print plug in to work. No luck.

Reply

Michael August 26, 2008 at 1:03 pm

Hi would you be able to contact me when you get a chance..I Live in London U.K and am thinking of opening a nice Chinese restaurant could you help me finding the right staff?looking forward to hearing from you soon THANK YOU V Much
Michael Gold

Reply

Gourmet Traveller September 4, 2008 at 11:13 am

Thank you for describing how to pleat the potsticker dumplings. I felt hesistated to try. I like you photos as well.

Reply

Merry January 3, 2009 at 9:24 am

I was searching the recipe for the potstickers via google and I found your blog. Thanks for your step-by-step of pleating the dumplings, now I can do it perfect and it looks like handmade by a restaurant or something. I made some today and it was such a crowd pleaser!

Reply

adeana January 12, 2009 at 9:20 pm

I made dumplings today using these tips and they were great. However the fried part of the dumpling became soggy after cooking it with water. The ones I get at my favorite chinese place are nice and crispy. Anyone know what the secret is to crispy bottoms? thanks!

Reply

ChefMal January 14, 2009 at 7:24 am

Gah! I’ve been experimenting with dumplings for a few weeks now and while they come out good, I knew there were some things I was missing…like the folding technique and the slurry. Don’t ask how many of those things came apart on me during frying. Anyways, thanks for the pics and advice. I will try your sagely methods very soon and let you know how it came out. Happy cooking!

Reply

Lyndsey January 25, 2009 at 12:59 pm

I love potstickers and I want to try your recipe. My pleating was okay but with your instructions and photos they’ll be a lot better. Thanks for sharing. I did have to laugh at the directions when told to use a nonstick pan. lol

Reply

MayLing April 26, 2009 at 3:00 pm

Hi Jaden,
Do you have the recipe for the potsticker dough? Since I live in a small town in TN, there isn’t any dumpling wrapper available at all. Would be really appreciate if you could email me the dough recipe. thank you.
MayLing

Hey there! I don’t have one posted on the site….I’ve made them once by hand but didn’t really record a recipe! :-( I will next time, k?
~jaden

Reply

QL7 April 30, 2009 at 6:50 pm

I FINALLY learned how to pleat potstickers! I found that if you follow your directions BUT keep the potsticker on the table (surface) instead of in your hand, it’s easier to pleat. Just my personal experience. Also, again having had to learn by trial and error, salt and squeeze out the cabbage. I wish your instructions were around about 20 years ago!!! I love your recipes! Thanks!

Reply

Natalie June 6, 2009 at 3:23 pm

My family and I LOVE potstickers. I usually buy the frozen potstickers available at the chinese grocery.
When I came into your posting for potstickers and all the detailed instructions, it just encouraged me to try to make it.I FINALLY make it, and it came out so PERFECT!!!…I follow all the instructions, and my potstickers came out nice, golden, crispy on the bottom and chewy on the skin.
Thanks so much, Jaden for this great recipe and step-by-step instructions. LOVE your website..:)

Reply

The Little Teochew June 7, 2009 at 4:46 am

Hi SteamyKitchen! Your blog was an excellent guide when I made pot stickers yesterday. They tasted really good, but I didn’t manage to get the lovely crescent shape as shown in your photos :( Next time, I suppose ;P
http://thelittleteochew.blogspot.com/2009/06/guo-tie-gyoza-pot-stickers.html

hey you did a great job on those potstickers! Jaden

Reply

The Little Teochew June 7, 2009 at 8:43 am

Thank YOU, Jaden. You da best!

Reply

Kamran Siddiqi July 21, 2009 at 12:32 am

Hey Jaden, as much as I love shrimp and pork, others in my house don’t. It’s difficult to have a love-hate relationship with seafood, especially when everyone else in your house hates it.

I happen to like this recipe a lot, especially because of the combo of the shrimp, but could I leave the shrimp out and just use pork without really compromising the great flavors that this recipe has? Because if it really does compromise it, I won’t mind sneaking the shrimp in (It’ll be a secret between you and I. Just don’t tell my mom. LOL).

Also, must I use canned bamboo shoots? Could I use the fresh kind?

use whatever you want! beauty of potstickers and dumplings is that it’s to your taste. secret it to cook a tablespoon of the filling in a frying pan, taste and adjust seasonings if necessary. ~jaden

Reply

Jeanie October 10, 2009 at 11:07 pm

I made these today and they came out really well! Just wanted to reiterate how much I love your website. I rarely ever make recipes that come out perfectly. :-)

I went to the market to buy the Chinese Shaoxing cooking wine today. Once you open it, how are you supposed to store it? In the fridge, on a shelf, etc?

Thanks!

Hey Jeanie-

Thanks for writing! I’m glad you loved the potstickers. Store the wine in the refrigerator or in your pantry that’s dark, cool.
You can throw a few slices or slivers of fresh ginger in the wine to make it even better. Anytime I have a little nub of fresh, raw ginger, I just slice thinly and stick it in the bottle. This wine will last for quite a while in refrig. I usually keep my wine for about 4 months.

Jaden

Reply

Patricia October 17, 2009 at 1:08 pm

I just wanted to say thank you for posting this recipe. 6 months ago I decided that I could make my own dumplings after spending ridiculous amounts of money to eat them at restaurants, but I wasn’t really sure how easy it would be. Before my decision to make my own, I did not know what a food blog was (I don’t IM, I don’t blog, I don’t chat on line). I googled dumplings and after searching a while, found yours. I decided to go with it. Especially since you were willing to show what happens if you add cabbage and you had great directions. After seeing all that water, I decided to try it without cabbage or lettuce. I made them exactly as you wrote.

I bought wrappers from our Asia Mart. I had never been in an Asia Mart before so that was a new, weird experience in and of it self. BUT, I made them and my husband and children gobbled them down. We did purchase the dipping sauce from the mart also, because I didn’t know that that was also so easy to make at the time. WOW. (I must also say that the clerks at Asia Mart were VERY helpful in helping me choose the right ingredients, and I ask their advice all of the time now).

You and your blog have launched me into a whole new world. I now go to the Asia Mart once a week AND I follow at least 20 cooking blogs. Because of your recipe and pictures (yes, mine even look professional because the pleating is SO EASY). I have even branched out a little and now make sushi and other dishes I thought would be impossible to make. I also own a steamer just for your dumplings! (I steam instead of fry now). I make these dumplings almost once a week.

I have started try to be creative with the filling, but I can’t seem to find a better one yet. My little one has decided he does not like them anymore (only because the older one LOVES them) LOL. But I can’t find anything more American to put in them yet that he likes. He does still eat them!

Anway, thanks so much for taking the time to write in an easy, free manner and take pictures of your work in progress to help those like me who need the visual aids!

Reply

SteamyKitchen October 17, 2009 at 7:53 pm

Patricia – you are too sweet! Can’t wait to see what you make! ~jaden

Reply

play2cre8 December 6, 2009 at 8:23 pm

Thanks for the great tutorial – I found your instructions a couple of months ago and my youngest and I had a great time making them (even better… he is 17, 6′4″ and a big guy… fun time in the kitchen). I didn’t bookmark your blog at the time – so I was so glad I could find it again. I also want to add a thanks about the salt and cabbage – amazing!

Reply

JOE December 13, 2009 at 10:29 pm

J

HI. I FOUND A RECEIPE FOR CHINESE DUMPLINGS. IT IS AT THE WEBSITE IN THIS EMAIL. I AM GOING TO TRY TO MAKE THEM THIS WEEK. I’LL LET YOU KNOW HOW THEY COME OUT

JOE

Reply

Laura January 22, 2010 at 1:19 pm

Jaden,

I love your blog, but this recipe has pushed my respect for you as a cook into the stratosphere. They were so delicious! I will be making these every month, at least. Thank you!

Reply

Leave a Comment

You can use these HTML tags and attributes: <a href="" title=""> <abbr title=""> <acronym title=""> <b> <blockquote cite=""> <cite> <code> <del datetime=""> <em> <i> <q cite=""> <strike> <strong>

Previous post:

Next post: