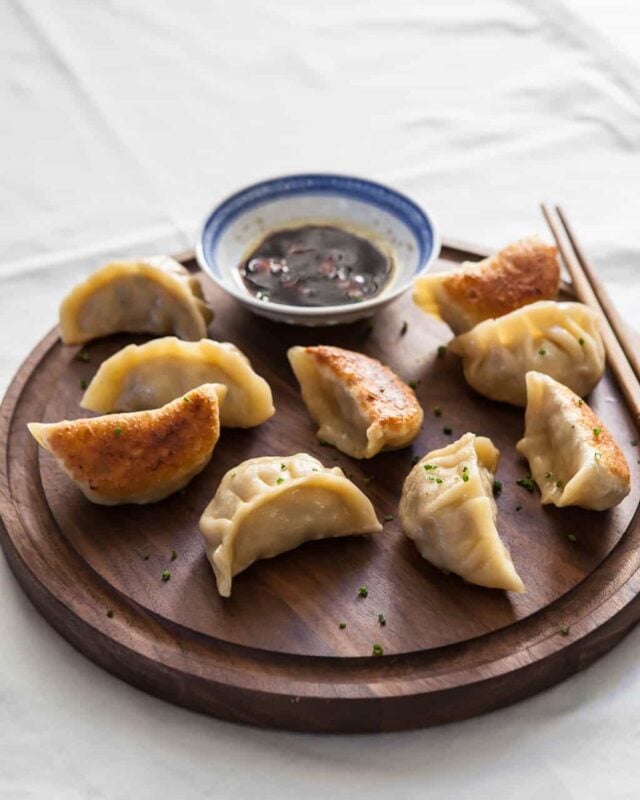
Best Chinese Potsticker Dumplings

What you’ll learn in this Chinese Potsticker recipe:
- Perfect potstickers from scratch – crisp bottoms that are not greasy, steamed filling that’s not soggy
- How to make Mom’s homemade wrappers with a bowl, spoon & rolling pin
- Clear, step-by-step photos – how to pleat potstickers so they never leak or fall apart
- Loaded with tips from my Mom, who has been making potstickers from scratch for over 45 years
How to Make the Best Potstickers
The perfect potstickers, whether you are making Korean Guun-Mandu, Japanese Yaki-Gyōza or Chinese Guōtiē (Mandarin) / Wortip (Cantonese) are pan fried, crisp-crunchy bottoms without being greasy, and steamed, flavorful filling that’s not soggy. The dumpling skin has the perfect bite to it, and the folds of the potsticker are not gummy or too thick.
This is my Mom’s hot-water dough recipe. We’ll show you step by step how to make the wrappers from scratch (all you need is 3 ingredients, a bowl, spoon & rolling pin!), how to perfectly fold the crescent shaped dumplings and how to cook the dumplings so they turn out neither too greasy nor soggy.
Why Hot Water Dough for Potstickers
The perfect dumpling wrapper uses both hot water AND cold water. Adding boiling hot water to flour cooks the flour just enough to denature the protein and prevent much of the gluten from forming. Asian dumplings wrappers don’t need a lot of gluten – we want our wrappers to be soft, relaxed enough to fold easily, but still with enough structure to hold its shape. The right combination of hot water and cold water will do the trick. Too much hot water and the dumplings will sag and be too soft. Too little hot water will make the dumplings too chewy.
There are only 3 ingredients to homemade potsticker wrappers – and even one of these ingredients is optional.
Flour + Salt + Water (2/3 cup boiling, 1/3 cold)
How to make potsticker wrappers from scratch
Ingredients
2 1/2 cups all-purpose flour (300 gr), plus more for dusting, if needed
1/4 teaspoon salt
2/3 cup boiling hot water
1/3 cup cold water
To a large bowl, measure in the flour and salt, give it a little stir.
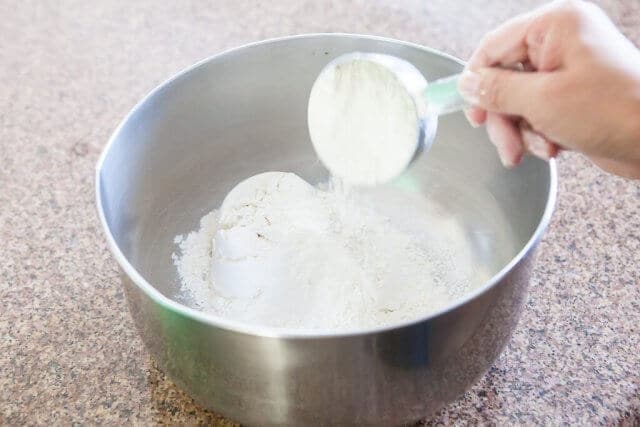
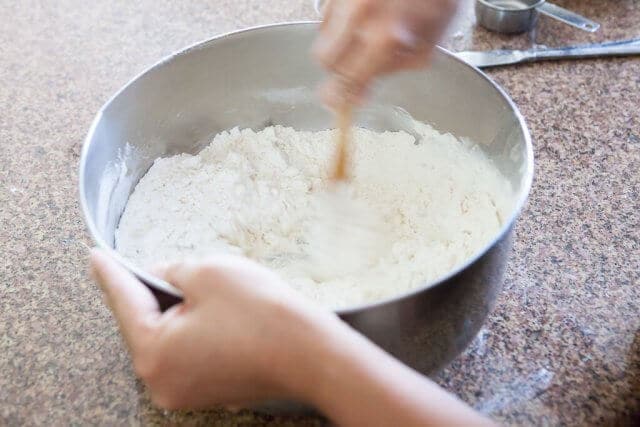
Add the just-boiled hot water (tip: water in a coffee cup, microwaved until just about to boil is just fine)
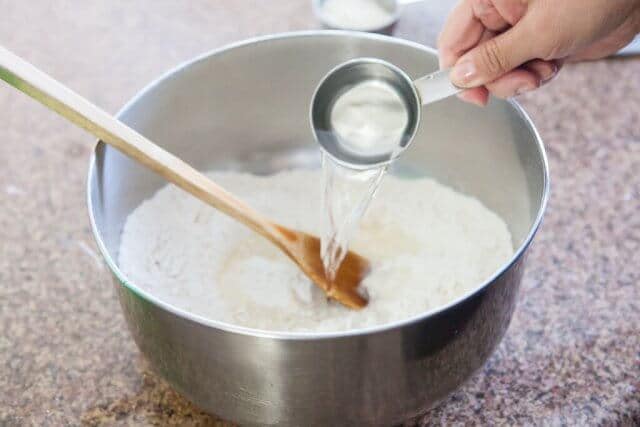
Quickly stir with chopsticks or a wooden spoon.
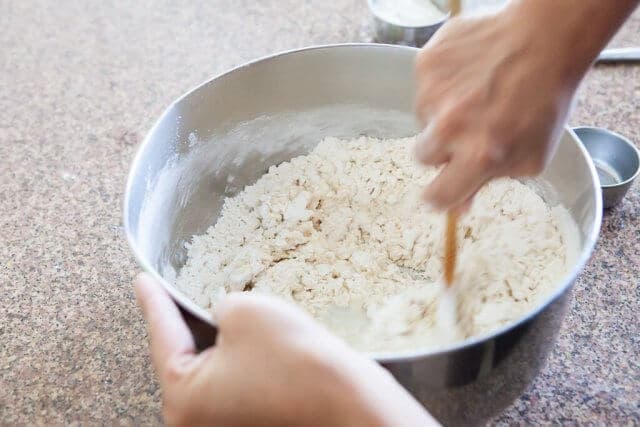
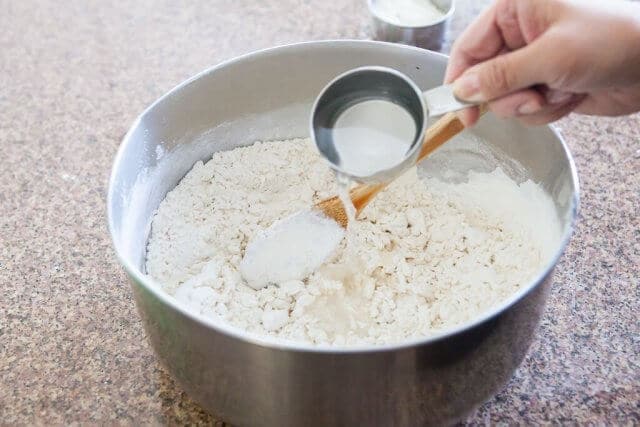
Once it becomes a crumbly mixture, add in the cold water (tip: use ice-cold water, or water from your refrigerator)
Quickly stir vigorously.
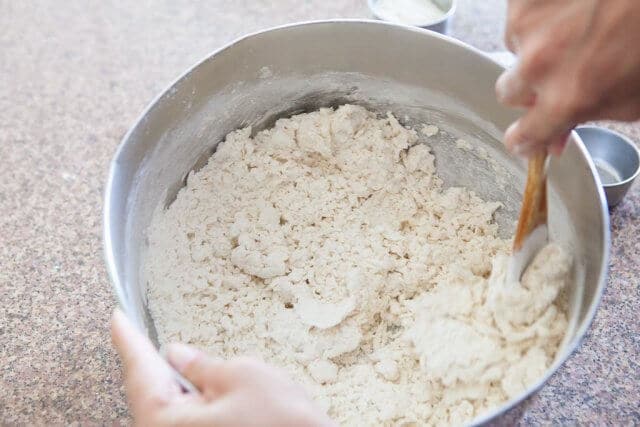
Until the flour becomes a scraggly mess.
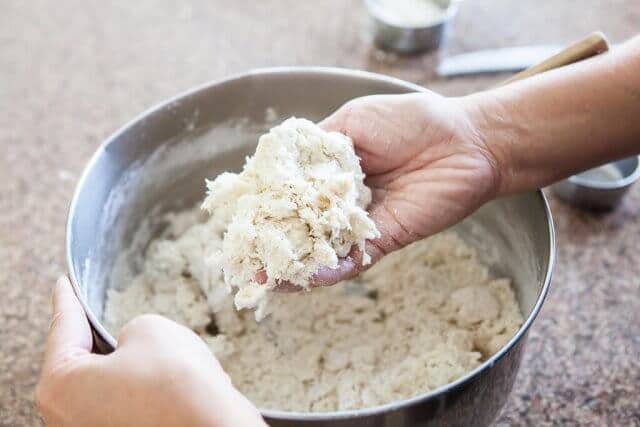
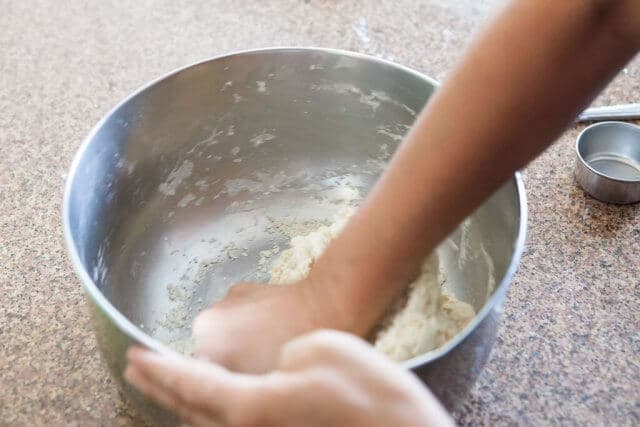
Put your wooden spoon down and it’s time to work the dough with your hands. Begin kneading the dough in the bowl, working to pick up all of the dough on the sides of the bowl. Use the heel of your hand to knead.
This should take 2 minutes. You’ll see the dough turn from crumbly to forming a large ball of dough.
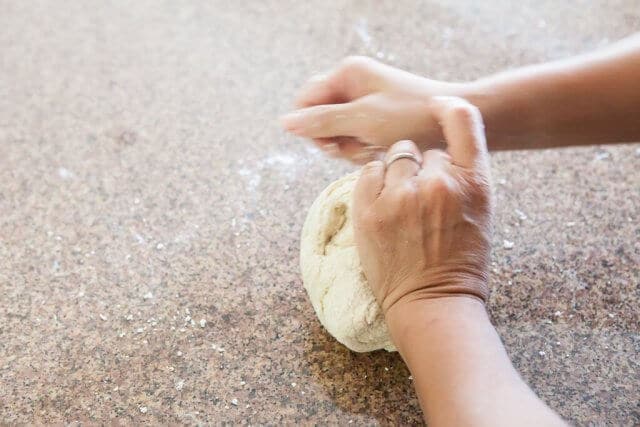
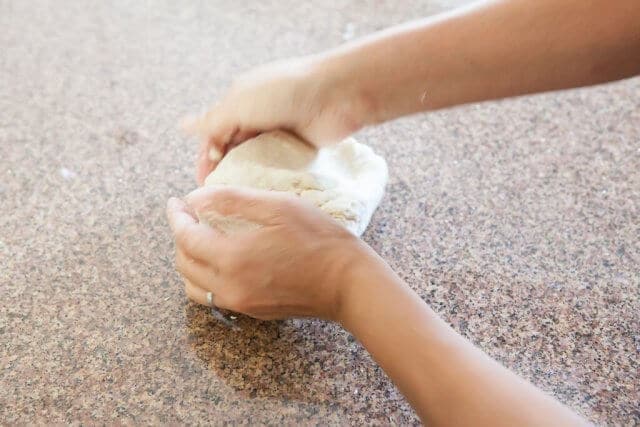
Once you’ve got a rough ball of dough (and there’s barely any dough left in the bowl) turn the dough out onto your clean work surface to continue kneading. You shouldn’t need any additional flour on your counter, the hot water makes the dough much easier to work with and less sticky. But, if the dough really sticks to your counter, feel free to use a small amount of flour to dust the surface.
Remember to use the heel of your hands and the meaty parts of your thumbs. In kneading, there are no fingers involved – you can put your fingers away 🙂
Knead, push, rotate, fold and repeat.
In just a couple of minutes, your dough will become smoother. It’s not quite ready yet.
So keep kneading.
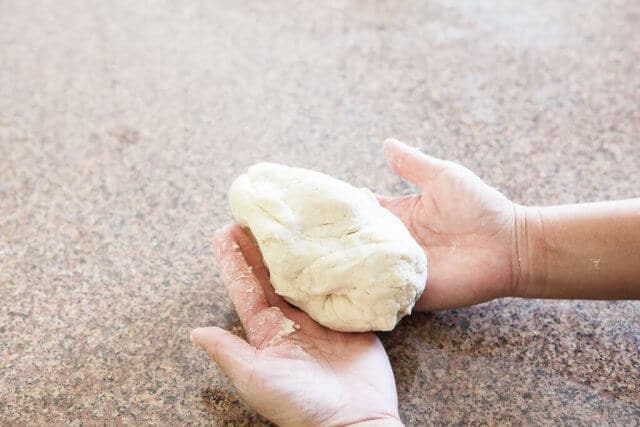
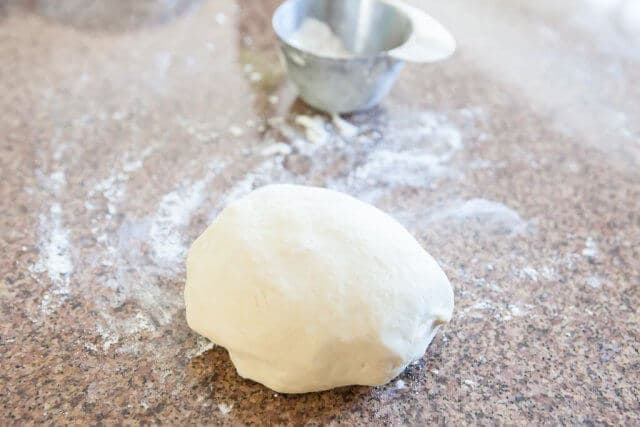
After 3-5 minutes of kneading, it should be ready. Smooth, stays round, firm yet gives slightly when poked and will ease back slooooowly.
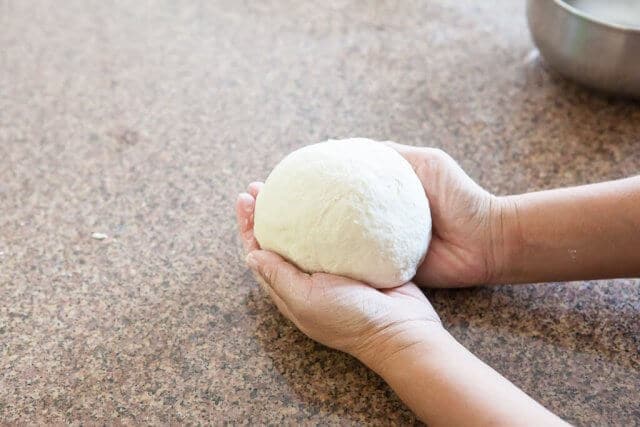
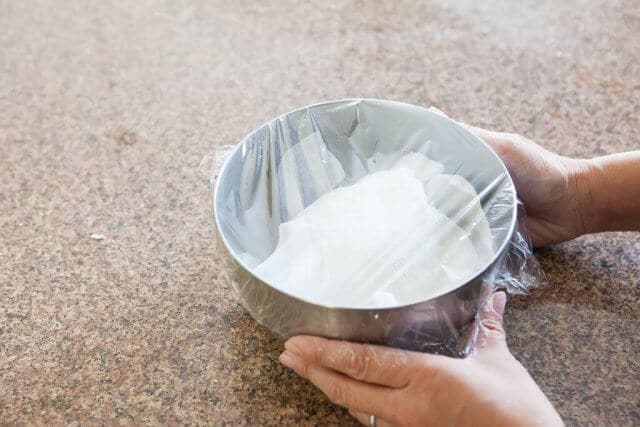
Place ball in a bowl.
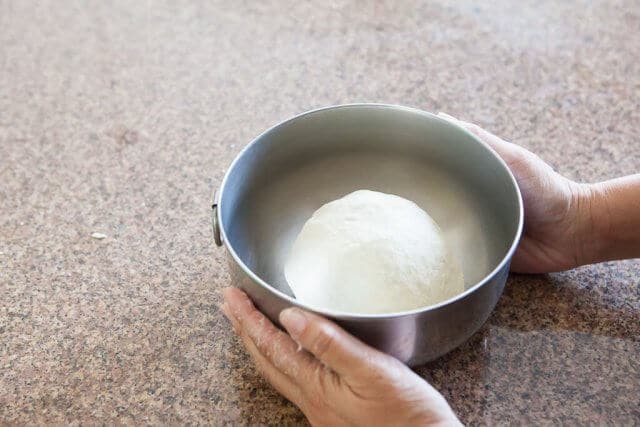
Cover with a barely damp paper towel (tip: this keeps the soft dough moist as it rests)
Cover with plastic wrap. Let rest for 20 minutes on the counter.
While the dough rests, we’ll make the potsticker filling.
How to Make the Potsticker Filling
You can use either regular green cabbage or Napa cabbage. Red cabbage will turn your potstickers pink (fun, if that’s what you want!)
Napa cabbage has higher water content (lots of water in the thick part of the leaves), and is milder tasting than regular cabbage. You can use either, I tend to choose regular cabbage, as it’s on sale more often.
Today, Mom had Napa cabbage in the refrigerator. You can finely chop/shred the cabbage in a food processor, use the large holes of a box grater, or chop by hand. The recipe doesn’t use much cabbage, I’d rather chop by hand than spend the time washing the food processor. For Napa cabbage, I much prefer chopping by hand. The thick, large, white section of the cabbage leaves (would you call these stems?) becomes very mushy in the food processor.
Finely chop the leafy portion of the cabbage first.
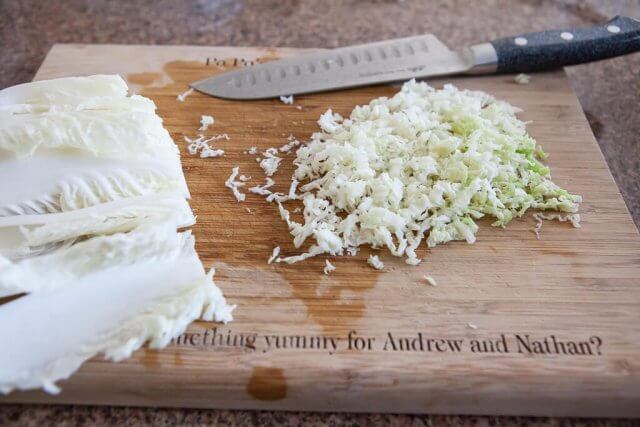
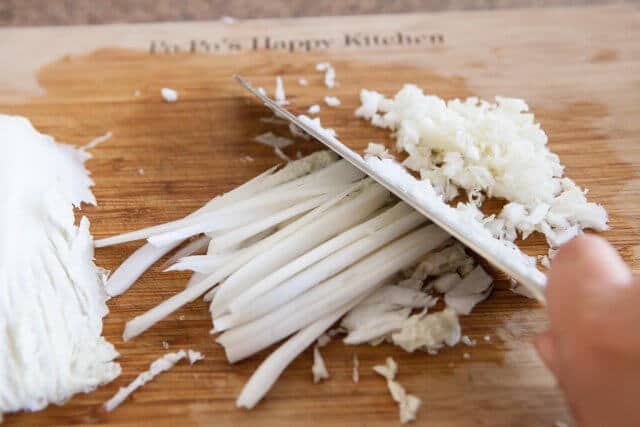
Then dice the thicker sections. (tip: I cut lengthwise into strips first, then dice)
The next step is crucial to perfect potstickers – salt the cabbage to draw out the water. Cabbage contains a lot of water, and the cabbage releases the water when it cooks, which makes the potstickers soggy (and prevents crisp bottoms.) The salt will draw out the water, later we’ll squeeze the cabbage and discard the water.
Add a little salt to the cabbage. Give it a good stir and let sit for 7-10 minutes while you move forward with the rest of the recipe.
In a bowl, marinate the meat of your choice. (Hey, where did my photo of meat go? Sorry.) Stir together ground pork, soy sauce, ground white pepper (or black), cornstarch, sesame oil and a little cooking wine. Give it a good stir.
(Tip: In Chinese cooking, ground white pepper is used more often than ground black pepper. White pepper is a little spicier, sharper, more pungent. Already-ground white pepper goes bad really fast. Instead, my Mom puts whole white peppercorns in a pepper grinder that’s dedicated just for white pepper. Grind as you need for the best flavor.)
I’m also adding some freshly grated ginger (tip: peel the ginger, grate on a microplane grater instead of chopping by hand) and minced chives. You can use Chinese chives (strong in flavor, a little tougher), or just regular chives. Oh, that cutting board? I made that for my Mom (“Po Po” is Grandmother in Cantonese) It’s made from bamboo, and it’s such a neat gift. After 8 years of daily use, it’s finally warped too much and this was our last use before retiring. If you get one – a tip: Don’t engrave in the main area where you normally chop – difficult to clean, food particles can get stuck. I suggest only using engraved boards for vegetables and fruit. No raw meat.
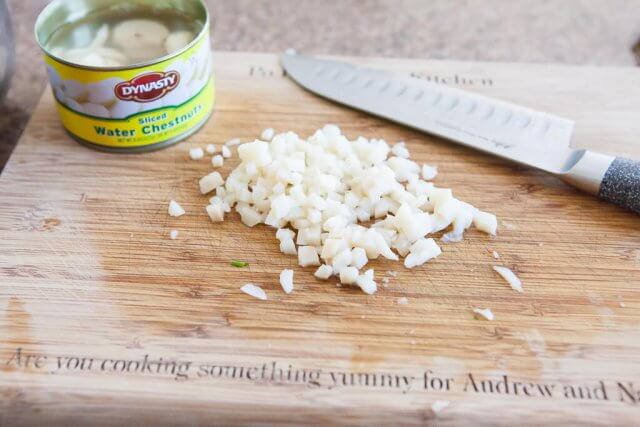
Water chestnuts – I love fresh water chestnuts, but they are hard to find! Canned water chestnuts are used mainly for texture, not for the taste (it’s too mild in taste). Water chestnuts add a delicate crisp-crunch, like an Asian pear or Fuji apple.
However, if you do not want to use canned water chestnuts (which are almost all grown in China), substitute with finely diced jicama, Asian pear, Fuji apple, or celery. For celery, use a vegetable peeler to peel away the stringy outer layer of the celery stalk first, before dicing. (Thank you reader Julie for these ideas!)
Other ingredients that I like to use in the dumplings: finely chopped fresh shiitake mushrooms or Chinese black mushrooms. Chinese black mushrooms are usually sold dried, they are thicker and heartier than Japanese shiitake mushrooms. You must soak in water to reconstitute these mushrooms before use. Soak in a bowlful of water for a few hours until soft enough to cut, discard the water, discard tough stem, dice the mushroom caps. (Tip: soak in hot water to cut soaking time in half; Microwave or boil for 3 minutes to further cut time. But it does take at least 1-2 hours of soaking, regardless, so plan early.)
Back to the cabbage!
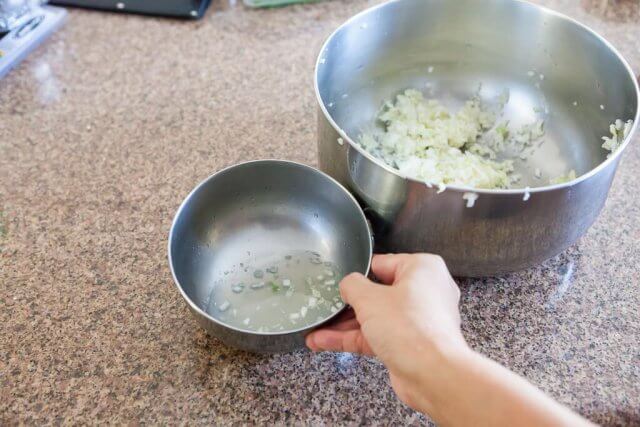
Take a handful of the salted cabbage and squeeze hard to expel the water into a small bowl or in the sink. Of course, you can use a cheesecloth, but it’s faster and easier with your hands.
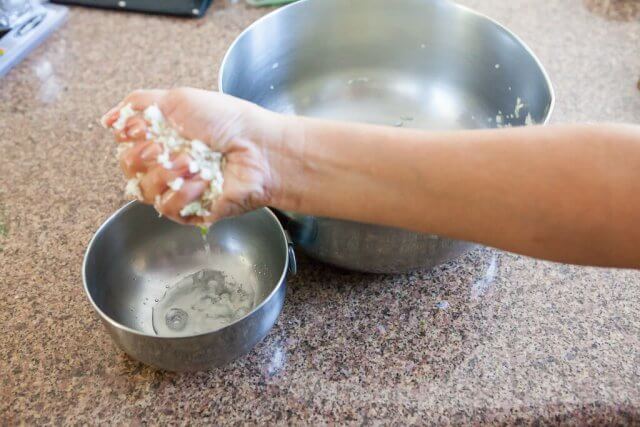
Look how much water came out of the cabbage! Discard the water. All of that water would have made the potstickers very soggy.
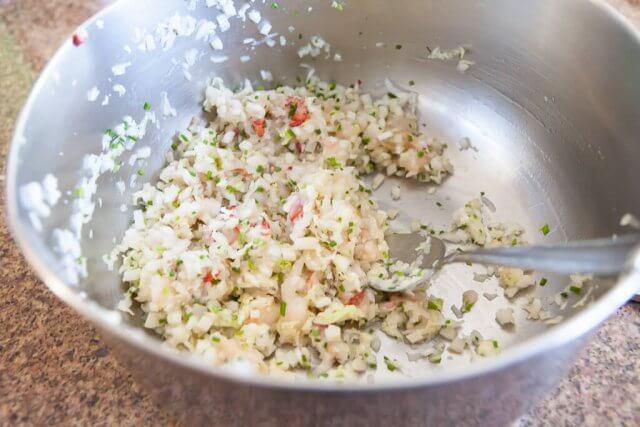
Put all of the filling ingredients into the bowl with the cabbage – ground meat, chives, ginger, mushrooms, water chestnut. Mix it up good. (Tip: instead of ground meat, you can use finely minced raw shrimp. I would caution against using expensive lobster in potstickers – you won’t be able to taste the lobster. Lobster is best used in steamed dumplings.)
(Tip: Remember that the cabbage is already salty, so be careful of adding too much soy sauce or additional salt to the filling. Also, remember that potstickers are served with a dipping sauce too. I like to heat a small frying pan, add a drop of oil and fry a spoonful of the filling for a taste. I can always adjust the flavor – many times, I will add more grated ginger or a touch more soy sauce, if needed.)
How to Fold Perfect Potstickers
Hey, remember the dough? It’s been resting now, all relaxed and ready to go.
Turn out the dough onto lightly floured work surface. Don’t expect the dough to rise (there is no yeast), but it will be come more smooth, soft and elastic.
Divide the ball in half. Keep one half covered in the bowl, or under the damp paper towel while you work with the other half.
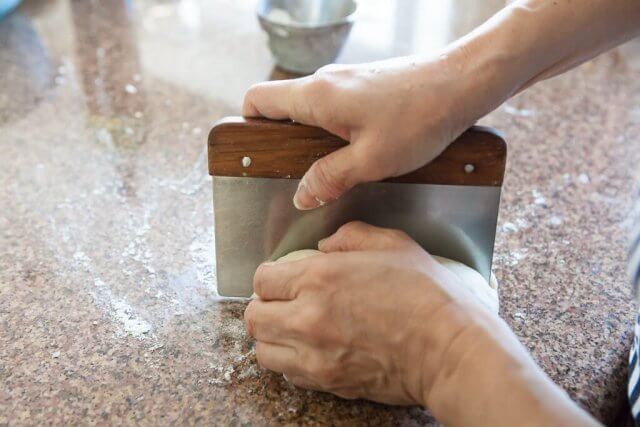
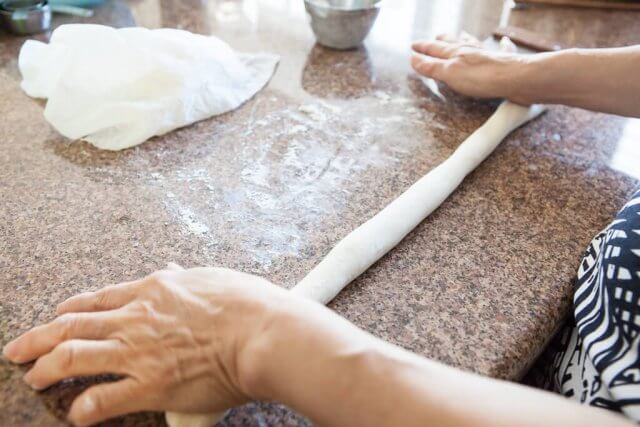
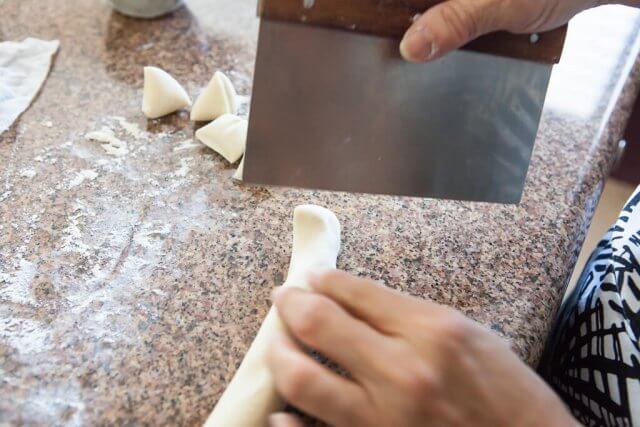
Roll out the dough half into a sausage shape.
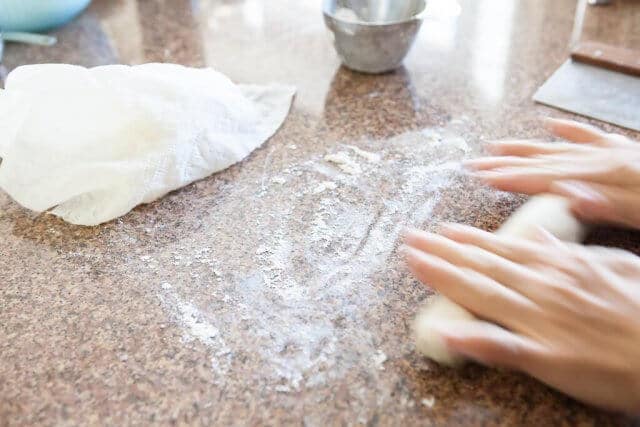
As you roll, move your hands wider apart to create a long snake, about 1-1/4 inches in diameter. (Tip: If you find this hard to do, you can cut the dough ball into quarters and work with a smaller piece. Another way to roll out to a long snake is to take a piece of dough, rub your hands together like you’re trying to start a fire with a stick. Use gravity to help elongate the snake.)
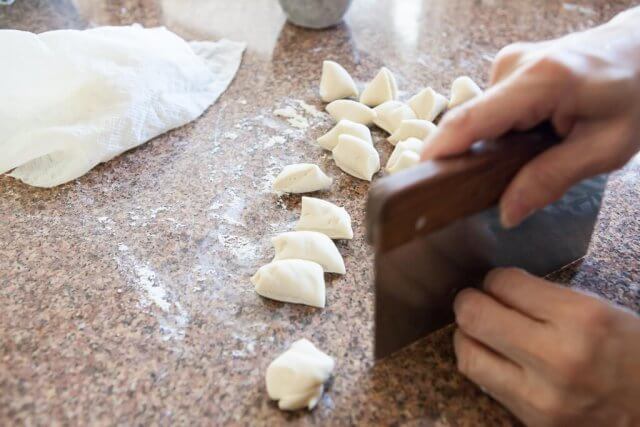
Now, it’s time to cut. You’ll be cutting this snake into 20 pieces (for a total of 40 pieces using both halves of the dough ball.)
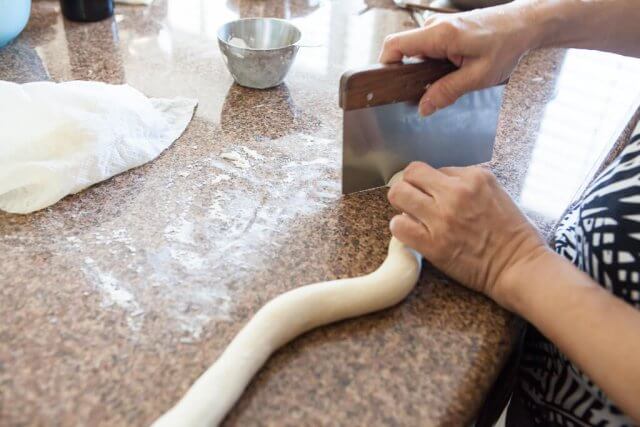
(Tip: with each cut, my Mom likes to roll the snake forward 1/4 turn. This creates pieces that are more uniform in size and easier to roll out into round dumpling wrappers. Cut, roll snake forward a bit, cut.)
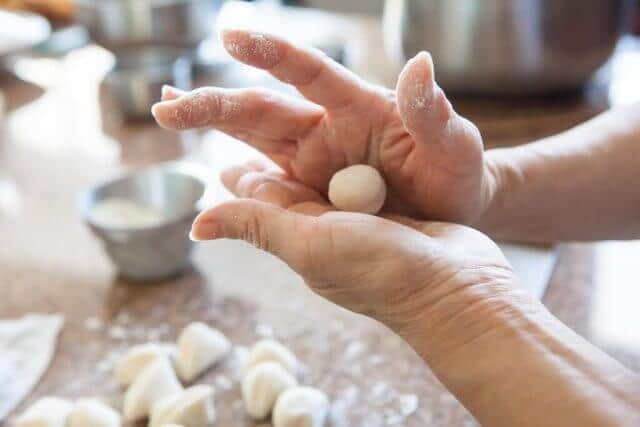
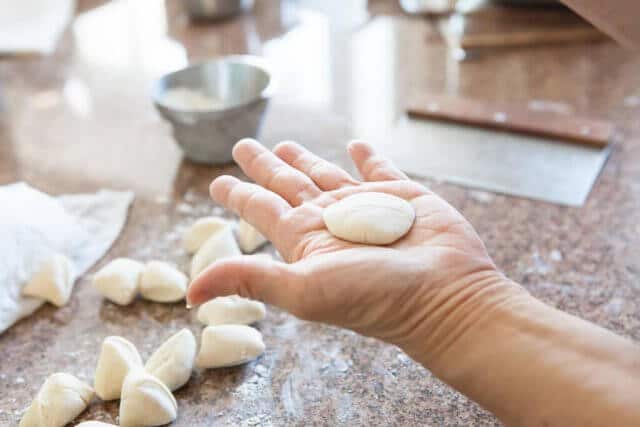
Once you’ve cut 20 pieces, it’s time to roll them out. Take one piece and pull up the edges of the dough and pinch together to create a tight, taut surface to begin. This will help create a evenly round ball.
Roll the piece in the palms of your hands to create a smooth, round ball.
Smash the ball in between the palms of your hands to flatten the ball.
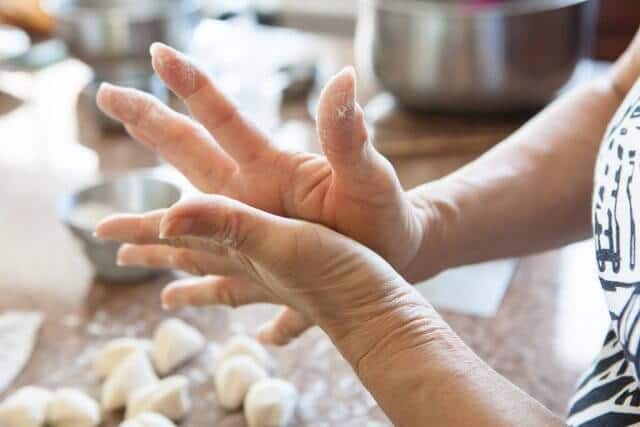
Just like this.
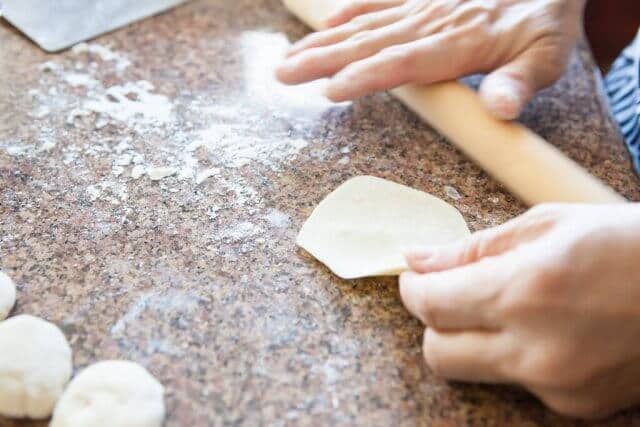
Use a small rolling pin to flatten. Chinese rolling pins for dim sum and dumplings are small in diameter (about 1 1/2 inches wide) and even in thickness – just like the end of a broomstick. In fact, I’ve known people who have cut the end of a new broomstick to use as a dumpling roller! Having a small, light rolling pin makes creating the wrappers so much easier and faster. You’ll be holding the dough with one hand, while you use the rolling pin with the other. No Chinese rolling pin? Just use whatever rolling pin you have, it just will take you a tad bit longer to make the wrappers.
Once your wrapper is about 2-1/2 inches wide, it’s time to focus the rolling on the outside edges of the wrapper.
(Tip: Handmade potsticker wrappers are thinner on the outside and slightly thicker in the middle. This is because the edges of the wrapper will be pleated and pinched together when you are making the potsticker. If your outer edges are too thick, the pleats will be too thick – resulting in undercooked, chewy, doughy skins at the pleats.)
Your potsticker wrapper doesn’t have to be perfectly round. Round-ish is just fine. The wrapper should be about 3-1/4 to 3-1/2 inches in diameter.
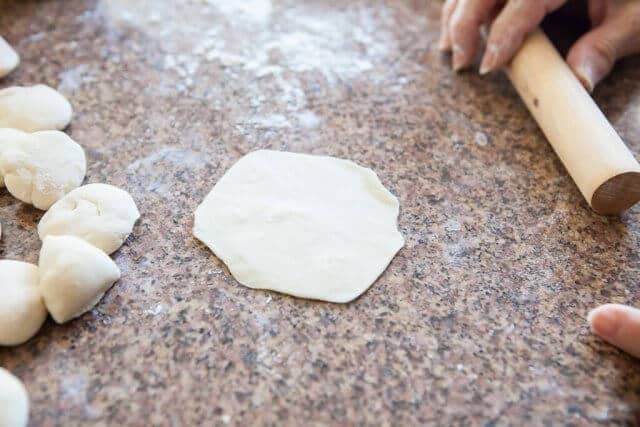
We’ll learn how to fold the potsticker dumplings.
How to Fold Potsticker Dumplings
When you are using store-bought wrappers, you need a little cornstarch slurry to act as the “glue” hold the the pleats together. But when you are making fresh wrappers by hand, there’s enough stickiness that no slurry is needed. (Tip: If using store bought wrappers – in a small bowl, whisk together 1/3 cup water + 1 teaspoon cornstarch. “Finger Paint” the outside edge of the wrapper with this slurry before folding the dumpling. This will hold the pleats together.)
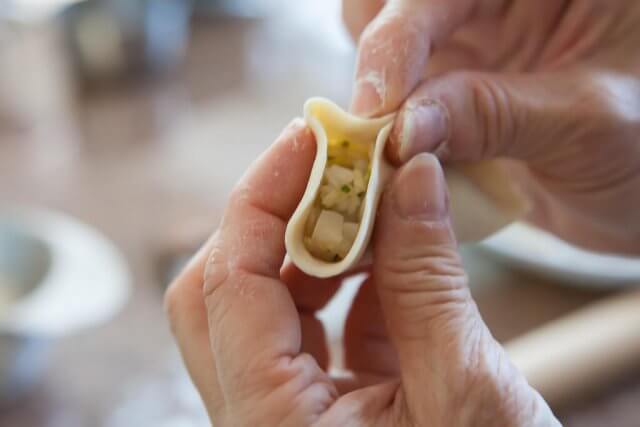
The key to folding beautiful potstickers is to not put too much filling into each potsticker. Use a heaping teaspoon of filling for each dumpling.
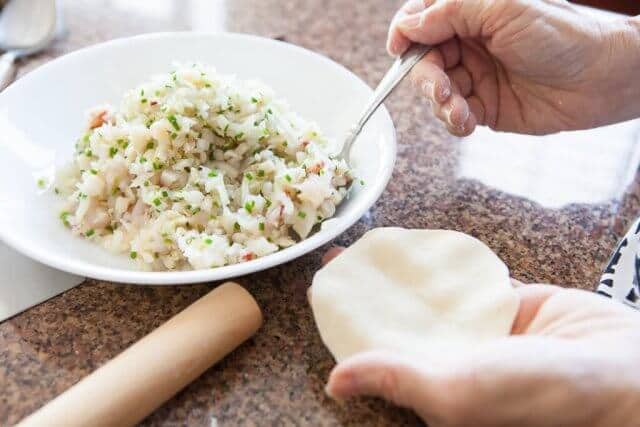
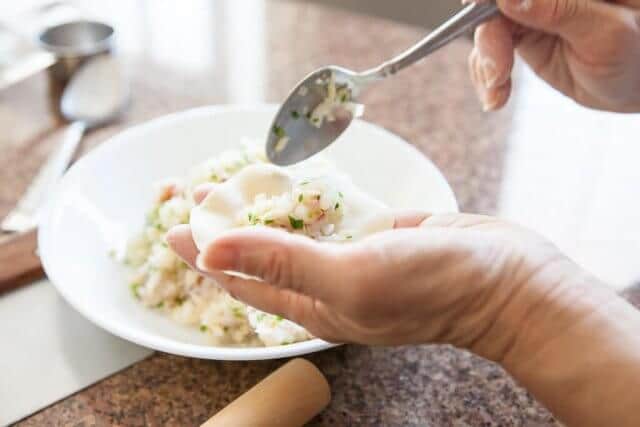
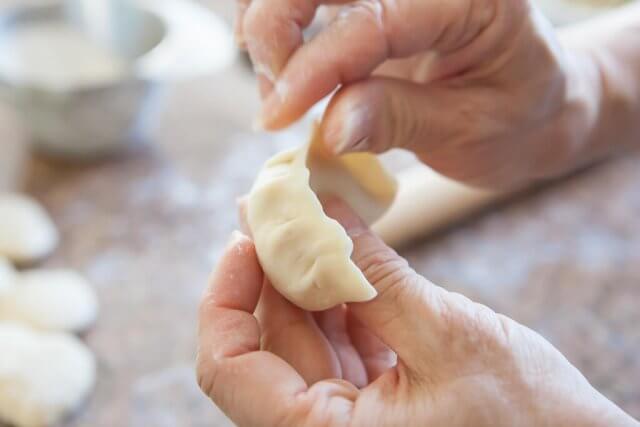
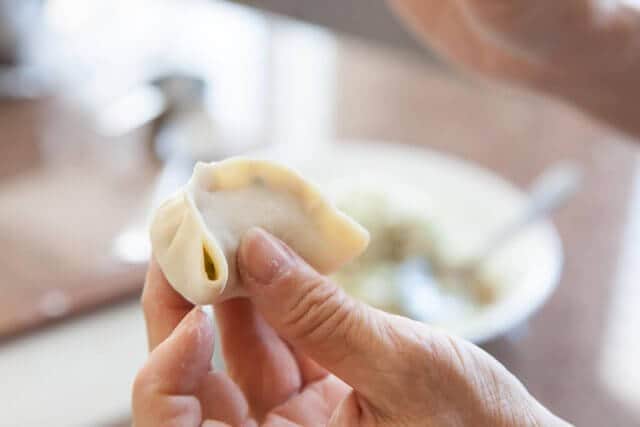
Place the filling in the middle of the wrapper and fold over.
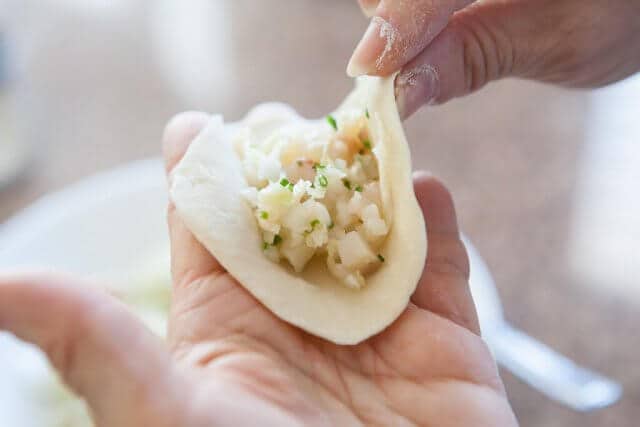
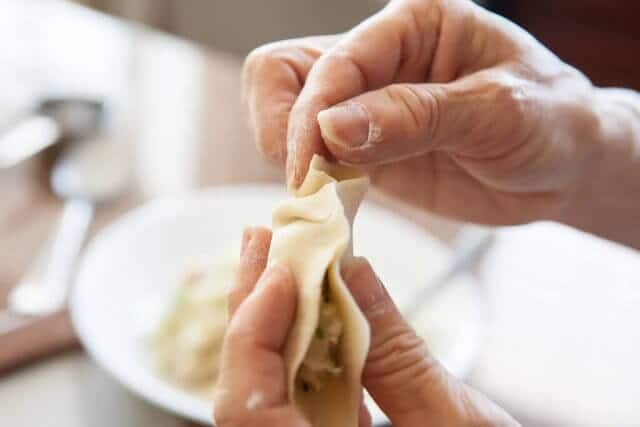
Pinch the middle. We’ll work one side at a time, pleating towards the center.
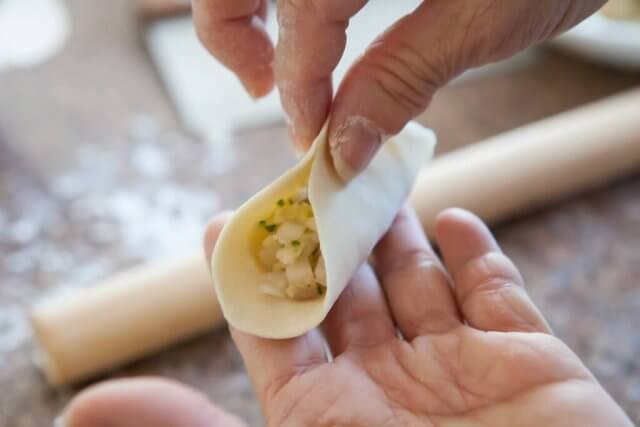
Mom like to work the right side first. Pleat just one side of the wrapper and fold TOWARDS the middle. This is what will make the crescent shape. Notice that you are only pleating ONE edge of the wrapper – or as my son likes to say, “Just pleat one side of the taco!”
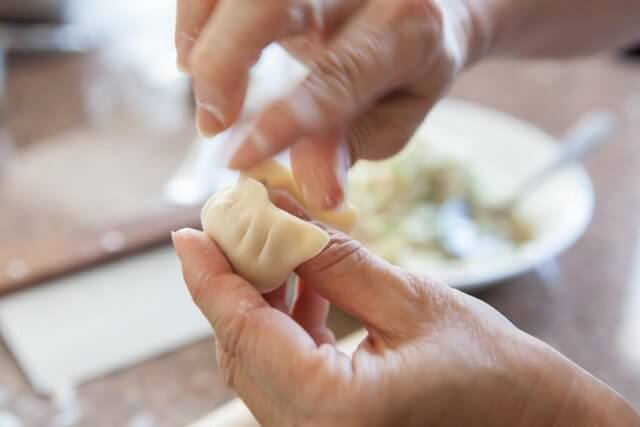
Do this 2 more times, for a total of 3 pleats on the right side.
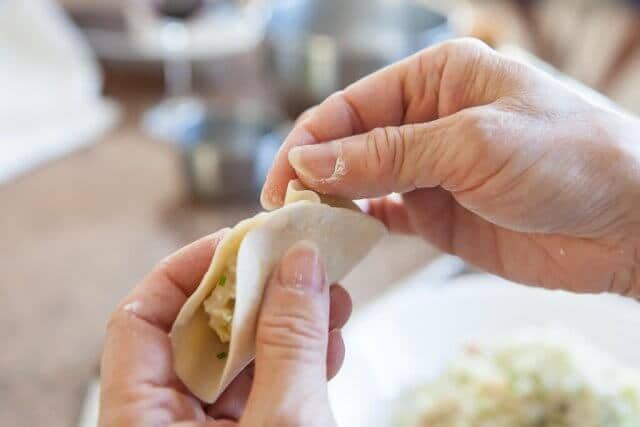
Now, we’ll do the same for the left side. Pleat towards the middle.
Repeat for a total of 3 pleats on the left side.
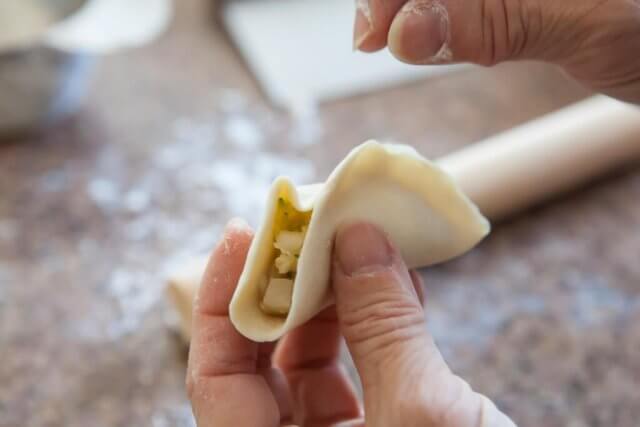
Little holes are bad. it causes the filling to spill out and the potsticker to break. If you can fit one more pleat to close the hole, feel free to make one more.
Or just squeeze it shut.
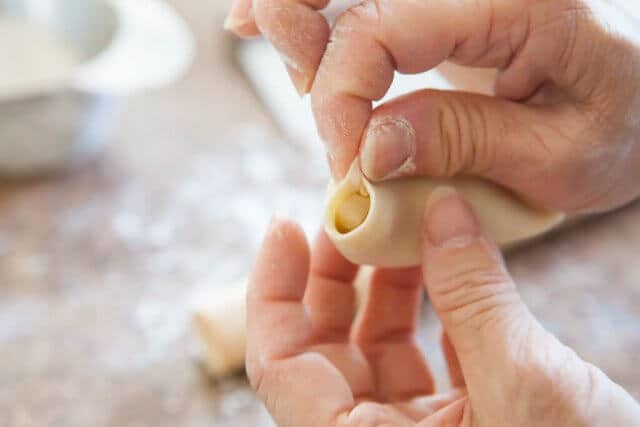
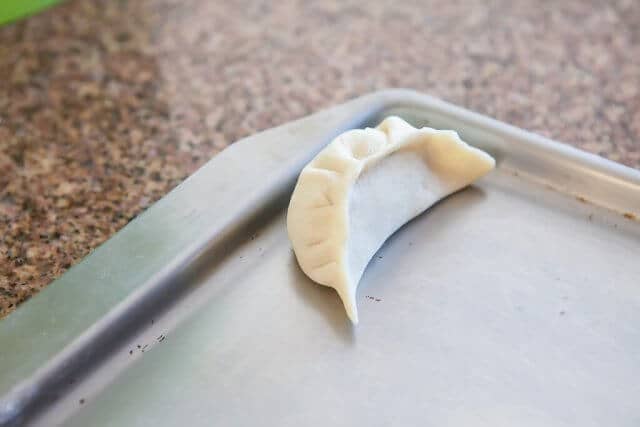
The last step is important – pinch all around one more time. Holes are bad. The pleats should be pinched tight.
See? Bad hole! Pinch to seal.
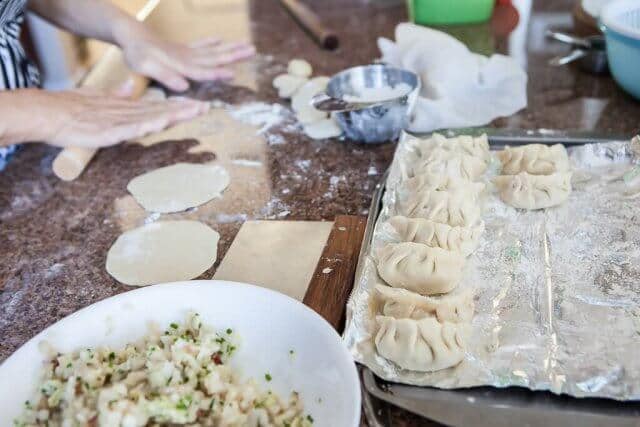
Place your potsticker on a baking sheet. (Tip – if you are not cooking the potstickers right away, you must line the baking sheet with a sheet of tin foil or parchment paper dusted with flour. Freshly made wrappers stick very easily. You’ll have a really hard time lifting the potstickers off a baking sheet if you’ve let it rest too long.)
Want a different angle?
Sometimes, it helps to see this in motion from a different angle. My brother took these photos over my shoulder. Literally, over my shoulder and included my shoulder in the shot.
Add a heaping teaspoon of filling in the middle.
Pinch the middle tight.
While my Mom likes to work the right hand side first, I prefer starting with the left. Not sure why! Either is fine. Pleat the outer edge towards the middle. Repeat 2 more times for a total of 3 pleats on this side.
Now pleat the right side. Make 3 pleats towards the center.
Final step, pinch the entire edge tight.
My Mom rolled out the wrappers, I folded dumplings. Notice the tin foil lined sheet with a good dusting of flour to prevent the potstickers from sticking. Make sure there’s plenty of place between each potsticker. If they touch each other on the baking sheet, they’ll stick to each other. Fresh dough is sticky.
Next page, we’ll fry the dumplings.
How to Cook the Potstickers
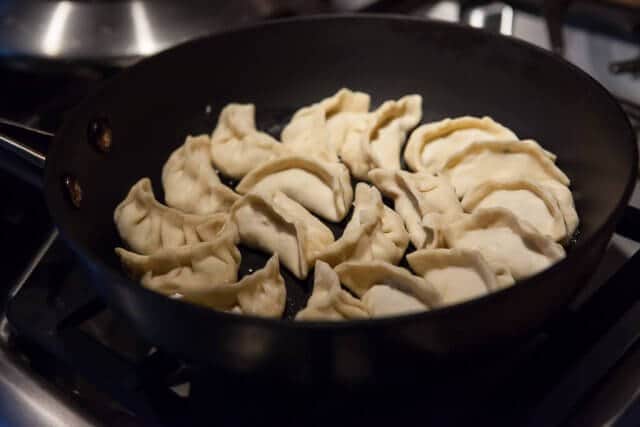
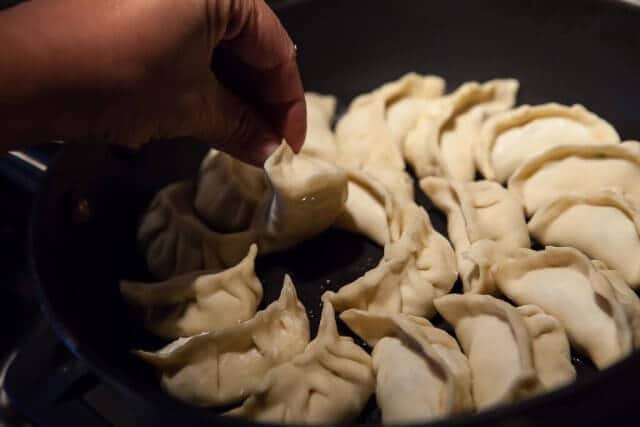
Heat a nonstick frying pan (or saute pan) over medium heat. Swirl in a little cooking oil, not too much, just enough to swirl and coat the bottom of the pan. Once the oil starts to get hot, lay the potstickers in a single layer.
They can touch, but don’t overcrowd – the dumplings will expand as they cook and you want to give them plenty of space so that the bottoms can brown properly.
Let cook for 1-2 minutes. While they are browning, get 1/4 cup of water and the pan’s lid ready – you’ll need these at your side shortly. Peek underneath a dumpling to give it a look. Not brown yet. Cook a little longer!
This is good.
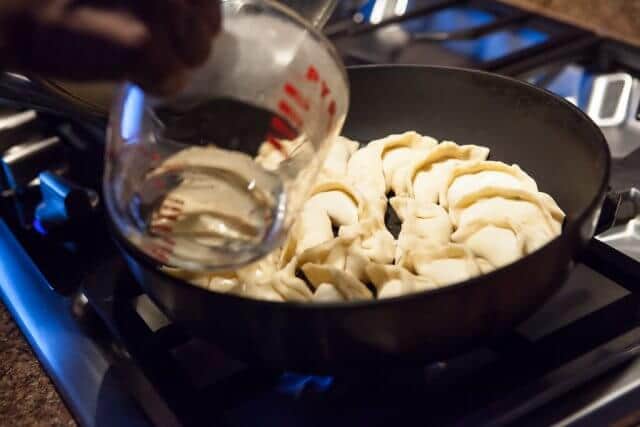
Check a couple of different dumpling bottoms – sometimes your pan can cook unevenly. When the bottoms are browned, grab your 1/4 cup of water in one hand, and the lid in the other. Carefully and slowly pour in the water (it might splatter a bit) and immediately cover with the lid to trap the steam.
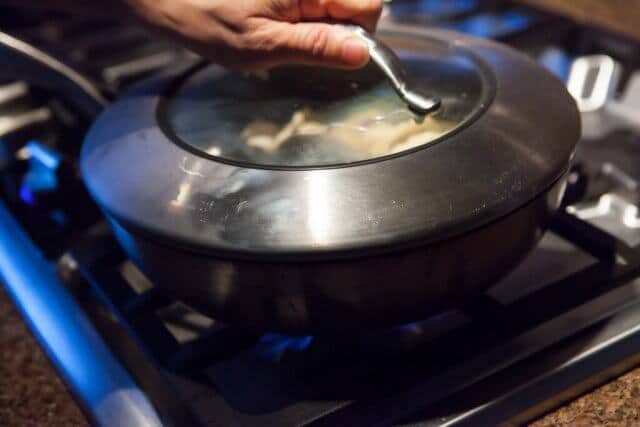
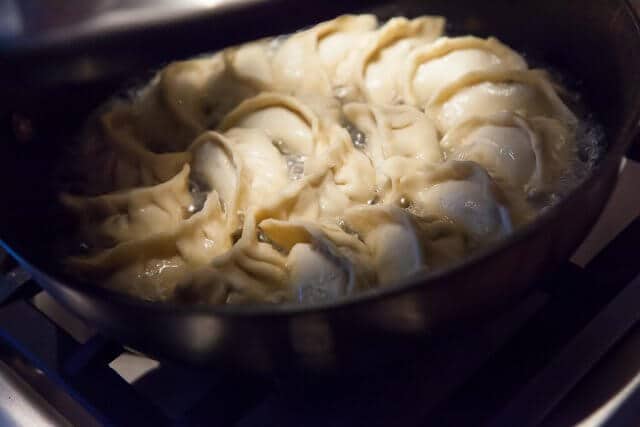
Let cook for 2 minutes. Then, open the lid. There should be lots of water bubbles as the water heats up and steams. The steam cooks the dumplings on the inside. Keep the lid off and let the water continue to cook and evaporate.
(Tip: While the dumplings brown in the first step, frying in the pan, the most important browning actually happens as the water evaporates. When almost all of the water is gone, the extra starch from the dumpling wrappers will begin browning again and really give good crust on the bottoms of the potstickers.)
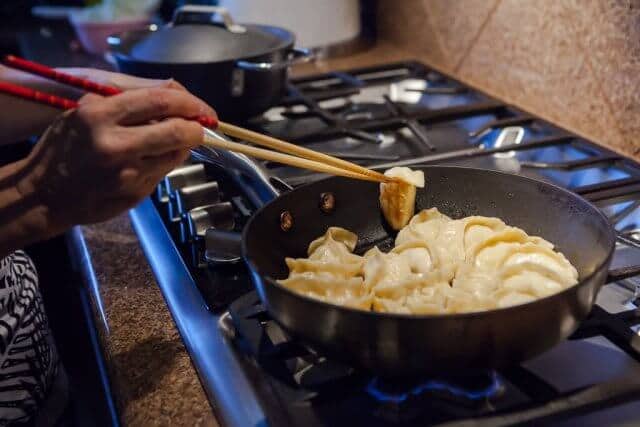
Cook, uncovered, until all water has evaporated and the bottoms are now crisp and browned.
Like this.
(Tip: If you find that the bottoms aren’t browning well enough, you can dribble in a little more cooking oil. Shake the pan back and forth to let the oil reach the bottoms of the potstickers, and to loosen the the potstickers from the pan.)
(Tip: I highly recommend a non-stick pan. Unless your pan is really well seasoned, it’s very difficult to prevent the potstickers from sticking. You can use a cast iron pan if you wish, but because the cast iron retains heat so well, I’ve had problems with controlling the heat (and burning/overcooking the potstickers.)
Repeat with the remaining potstickers. In between batches, just wipe down the pan with a paper towel – there’s no need to wash the pan – but make sure there’s no water in the pan.
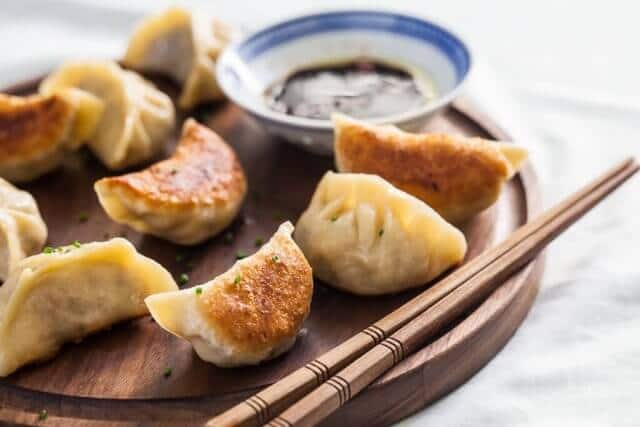
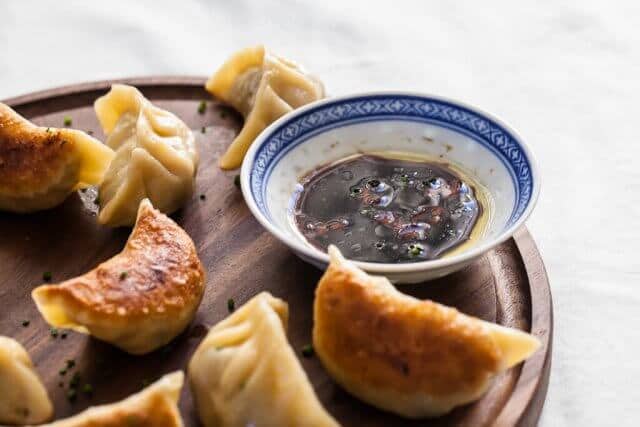
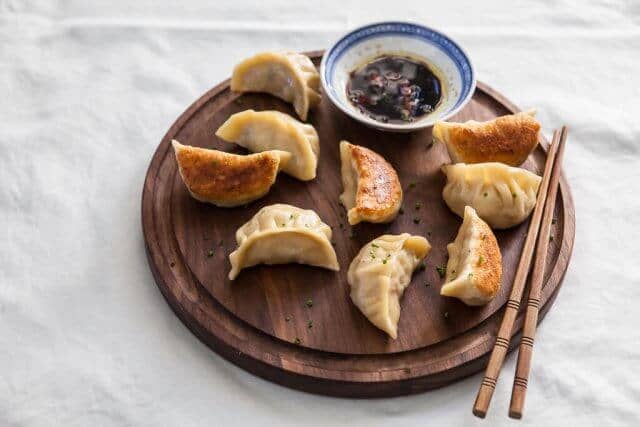
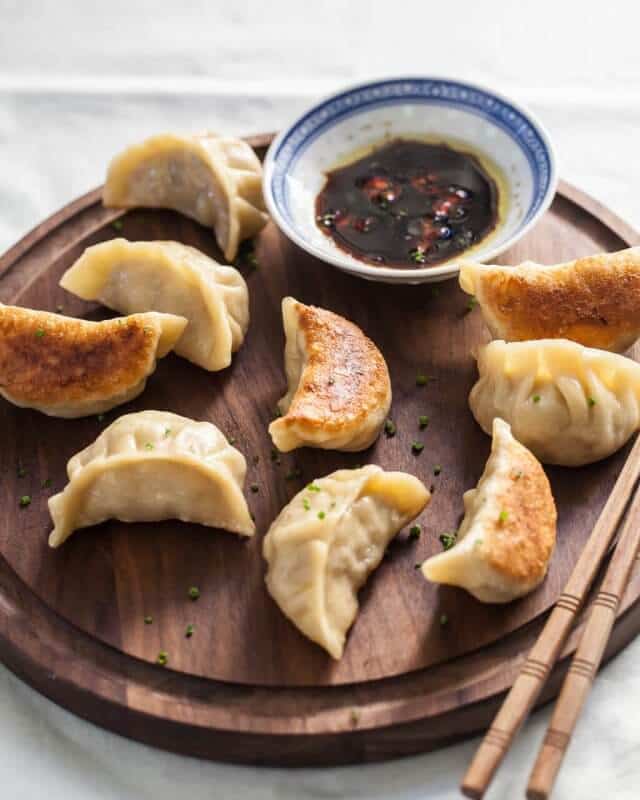
Perfectly pleated, beautifully cooked potstickers with a crisp bottom that stays crispy!
The dipping sauce – there are so many options!
My Dad loves Chinese black vinegar with soy sauce, slivers of fresh ginger and a little sesame oil. My kids like soy sauce, a little sugar, sesame oil. My husband loves Thai sweet chili sauce, straight from the bottle (I like Mae Ploy brand or Trader Joe’s brand – I’ve linked to Amazon so you can see what they look like but their prices are outrageous. Just go to your supermarket and get Sweet Chili Sauce). My brother loves spicy – we add chopped fresh hot chili peppers or a dollop of Chinese garlic-chili sauce or a squirt of sriracha.
Dad’s Chinese Black Vinegar Sauce
Dad likes to use a mixture of Chinese black vinegar, soy sauce and the thinnest slivers of fresh ginger. The most famous Chinese black vinegar is Chinkiang Black Vinegar, though Koon Chun brand is easier to find and will do just fine. What works just as well (and I often use) is cheap balsamic vinegar. Not the expensive, thick, sweet kind (save that for the strawberries!), but just regular ol’ supermarket balsamic vinegar.
Why black vinegar? It’s aged vinegar, so it provides an earthy, smoky, mellow zip and tang that goes well with Chinese dumplings and egg rolls.
Fresh ginger
2 tablespoons Chinese Chinkiang black vinegar
1 tablespoon soy sauce
1/2 teaspoon Asian sesame oil
Peel the ginger skin off and discard. Use a vegetable peeler and peel thin slices of ginger. Use a chef’s knife to further cut these thin slices into slivers. You’ll need about a teaspoons worth of ginger. In a small dipping bowl, mix together the black vinegar, sesame oil and ginger. To enjoy, dip your potsticker into the sauce. Use your chopsticks to pick up a few slivers of ginger and eat together with your potsticker.
Potsticker Dipping Sauce
2 tablespoons soy sauce
2 teaspoons rice vinegar (sub with cider vinegar, white vinegar)
1/2 teaspoon sugar
1 small clove garlic, very finely minced
minced fresh chili peppers (optional)
1/2 teaspoon Asian sesame oil

Best Potsticker Dumpling Recipe
Servings: Makes 40 potstickers
Prep Time:60 minutes
Cook Time:20 minutes
Ingredients:
2 1/2 cups all-purpose flour (300 gr) plus more for dusting
1/4 teaspoon salt
2/3 cup just-boiled hot water
1/3 cup iced cold water
FOR THE FILLING
8 ounces minced or finely shredded cabbage (Napa or regular)
8 ounces ground pork (ground meat of your choice)
1/2 teaspoon soy sauce
freshly ground white pepper (or black)
1/2 teaspoon cornstarch
1/2 teaspoon Chinese rice wine (optional)
1/2 teaspoon Asian sesame oil
2 tablespoons minced chives (Chinese or regular)
4 ounces diced water chestnuts (canned is fine)
3-4 large fresh shiitake mushrooms, finely diced
1/2 teaspoon grated fresh ginger
Directions:
PREPARE THE WRAPPER DOUGH:
To a large bowl, measure in the flour and the salt. Pour in the boiled water and stir the flour immediately and vigorously with a large wooden spoon until the flour resembles loose crumbles (about 30 seconds). Pour in the iced-cold water (discard the ice first, but make sure you have correct measurement of water). Stir vigorously again for 30 seconds or until a shaggy dough begins to form. Set aside spoon and use your hands to knead the dough in the bowl, while picking up flour/dough on the sides of the bowl. Knead for 2 minutes in the bowl. Turn out the dough onto a clean work surface. No need to dust the work surface with flour - unless the dough really sticks). The dough should be soft and elastic enough that kneading is very easy. Continue to knead your dough for another 3-5 minutes. As you knead the dough, it should become more smooth. In a medium sized bowl, plop in the dough ball, cover dough loosely with a barely damp paper towel and then cover bowl tightly with plastic wrap. Let rest for 20 minutes while you prepare the filling.
PREPARE THE FILLING
In a bowl, mix the shredded cabbage with 1/4 teaspoon of salt (1/2 teaspoon kosher or sea salt, if using.) Set aside while you move on to next step of recipe.
In a separate bowl, mix the ground pork with soy sauce, ground pepper, cornstarch, rice wine (if using) and sesame oil. Add in the chives, water chestnuts and mushrooms.
Back to the cabbage - grab a handful of cabbage, squeeze hard to expel the water into the sink. Add the dry cabbage into the bowl with the rest of the filling ingredients. Mix well. You can cook a spoonful of filling in a small frying pan for a taste, if you'd like.
PREPARE THE WRAPPER
Turn out the rested dough onto a lightly floured surface. Cut the dough in half, keep unused half under the damp paper towel to prevent from drying out. Roll out the other half into a long snake, about 1-1/4 inches in diameter. Cut into approximately 20 even pieces. Take 1 piece, gather up the edges and pinch together, forming a taut, round surface. Roll between palms to form ball. Squash between flat palms to flatten into disk. Use rolling pin to roll out to 3-1/2 inch diameter. Try to make the edges of wrapper thinner than the center. Repeat for remaining dough. If you don't have a helper on hand to fold the potstickers, keep wrappers under cover (plastic wrap or barely damp paper towel) to prevent drying out. Fill and fold potstickers according to the instructions and photos above in the post. Place folded potstickers on a floured piece of parchment or tin foil-lined baking sheet to prevent sticking.
COOK THE POTSTICKERS
Have 1/4 cup water and a tight-fitting lid for your pan at the ready, by your stove. Heat a large, nonstick frying or saute pan over medium heat. When hot, swirl in a little cooking oil, just enough to swirl around. Carefully lay potstickers into the pan, they can touch a little, but do not overcrowd. Cook for 1-2 minutes, then peek under one or two potstickers to see if the bottoms have lightly browned. Adjust your heat if needed.
When lightly browned, it's time for the steaming. In one hand, have the lid ready. In the other, carefully pour in 1/4 cup of water into the pan. It will splatter, so please be careful. Immediately cover pan with the lid to trap the steam. Let cook for 2 minutes, then open the lid. Continue cooking for another 2 minutes, until all of the water has evaporated. Take a peek under the potsticker. You can add a little more cooking oil if it has trouble browning (but only after all the water has evaporated, otherwise it will splatter.) Shake the pan to loosen the potstickers, swirl in the oil and tilt pan to distribute the oil. When bottoms are nicely browned, plate and serve with dipping sauces (dipping sauce ideas and recipes are in the post.)
Thank you for your support of Steamy Kitchen!
More Potsticker Recipes
Pork and Shrimp Potsticker Recipe
Mushroom Tofu Potsticker Recipe

- 2 1/2 cups all-purpose flour 300 gr plus more for dusting
- 1/4 teaspoon salt
- 2/3 cup just-boiled hot water
- 1/3 cup iced cold water
- 8 ounces minced or finely shredded cabbage Napa or regular
- 8 ounces ground pork ground meat of your choice
- 1/2 teaspoon soy sauce
- freshly ground white pepper or black
- 1/2 teaspoon cornstarch
- 1/2 teaspoon Chinese rice wine optional
- 1/2 teaspoon Asian sesame oil
- 2 tablespoons minced chives Chinese or regular
- 4 ounces diced water chestnuts canned is fine
- 3-4 large fresh shiitake mushrooms finely diced
- 1/2 teaspoon grated fresh ginger
- 3 tablespoons soy sauce
- 3 teaspoons rice vinegar or cider vinegar, white vinegar
- 1 teaspoon sugar
- 2 cloves garlic very finely minced
- 1 teaspoon Asian sesame oil
- minced fresh chili peppers optional
To a large bowl, measure in the flour and the salt. Pour in the boiled water and stir the flour immediately and vigorously with a large wooden spoon until the flour resembles loose crumbles (about 30 seconds). Pour in the iced-cold water (discard the ice first, but make sure you have correct measurement of water). Stir vigorously again for 30 seconds or until a shaggy dough begins to form. Set aside spoon and use your hands to knead the dough in the bowl, while picking up flour/dough on the sides of the bowl. Knead for 2 minutes in the bowl. Turn out the dough onto a clean work surface. No need to dust the work surface with flour - unless the dough really sticks). The dough should be soft and elastic enough that kneading is very easy. Continue to knead your dough for another 3-5 minutes. As you knead the dough, it should become more smooth. In a medium sized bowl, plop in the dough ball, cover dough loosely with a barely damp paper towel and then cover bowl tightly with plastic wrap. Let rest for 20 minutes while you prepare the filling and the dipping sauce.
- In a bowl, mix the shredded cabbage with 1/4 teaspoon of salt (1/2 teaspoon kosher or sea salt, if using.) Set aside while you move on to next step of recipe.
- In a separate bowl, mix the ground pork with soy sauce, ground pepper, cornstarch, rice wine (if using) and sesame oil. Add in the chives, water chestnuts and mushrooms.
- Back to the cabbage - grab a handful of cabbage, squeeze hard to expel the water into the sink. Add the dry cabbage into the bowl with the rest of the filling ingredients. Mix well. You can cook a spoonful of filling in a small frying pan for a taste, if you'd like.
- Turn out the rested dough onto a lightly floured surface. Cut the dough in half, keep unused half under the damp paper towel to prevent from drying out. Roll out the other half into a long snake, about 1-1/4 inches in diameter. Cut into approximately 20 even pieces. Take 1 piece, gather up the edges and pinch together, forming a taut, round surface. Roll between palms to form ball. Squash between flat palms to flatten into disk. Use rolling pin to roll out to 3-1/2 inch diameter. Try to make the edges of wrapper thinner than the center. Repeat for remaining dough. If you don't have a helper on hand to fold the potstickers, keep wrappers under cover (plastic wrap or barely damp paper towel) to prevent drying out. Fill and fold potstickers according to the instructions and photos above in the post. Place folded potstickers on a floured piece of parchment or tin foil-lined baking sheet to prevent sticking.
Mix together dipping sauce ingredients. Set aside until ready to serve.
- Have 1/4 cup water and a tight-fitting lid for your pan at the ready, by your stove. Heat a large, nonstick frying or saute pan over medium heat. When hot, swirl in a little cooking oil, just enough to swirl around. Carefully lay potstickers into the pan, they can touch a little, but do not overcrowd. Cook for 1-2 minutes, then peek under one or two potstickers to see if the bottoms have lightly browned. Adjust your heat if needed.
When lightly browned, it's time for the steaming. In one hand, have the lid ready. In the other, carefully pour in 1/4 cup of water into the pan. It will splatter, so please be careful. Immediately cover pan with the lid to trap the steam. Let cook for 2 minutes, then open the lid. Continue cooking for another 2 minutes, until all of the water has evaporated. Take a peek under the potsticker. You can add a little more cooking oil if it has trouble browning (but only after all the water has evaporated, otherwise it will splatter.) Shake the pan to loosen the potstickers, swirl in the oil and tilt pan to distribute the oil. When bottoms are nicely browned, plate and serve with dipping sauce.

Ahhhhhhhhh . I don’t know what you meant by “retiring” the board. Being a wood worker of sorts I have refurbished old cutting boards by running them through a planer to get “MOST” of the cuts out. Getting them ALL out may make the board a bit thin. I have engraved them with designs using eggshells, black walnut, purple heart and brass dust, and even glass to get colors I normally would not be able to get with wood. The design is cut in, the wood dust, eggshells, brass dust and glass are all held in with super glue. (the really good stuff will soak deep and hold everything together. I use a wood scraper to scrape the design smooth. Two words of caution. DO NOT PUT THE BOARD IN THE DISH WASHER. The temperature will melt the super glue and could wash away the design. DO NOT USE OLIVE OIL TO PROTECT THE BOARD. Olive oil is food and can turn rancid. Instead use mineral oil. Clean the board with WARM, not HOT, water and some soap. I use the design side for serving and the plain side for cutting. I also use plastic boards for meat. they can go in the dishwasher quite safely.
Great tips Mark! Thank you! Jaden
Not only did I find a meal-prep that I will actually eat all week (I have a leftover aversion), I will never have to buy potstickers again!
I had half a yam I needed to cook so I boiled and mashed that to add to the filling. Also used fresh ground beef from my farmer’s market. Hopefully the ones I put in the freezer will retain their independence, because I left a few in the fridge for the next day and they were stuck together.
Do you generally dust them with more flour if you’re storing them?
Thanks for the recipe. Mae Ploy dipping sauce is a lot cheaper at Asian Grocery stores than at Amazon.
A large bottle 32oz is around $2-3.
You say to use 2.5 cups if flour(300g), officially there are 350g in 2.5 cups, this leaves me with how much water to use, the official conversion is 225ml per cup, can you confirm how many ml of hot @ cold water you use. Thanks
Wayne, 300 grams of flour is 2 1/2 cups is correct. https://www.kingarthurflour.com/learn/ingredient-weight-chart.html
I can’t remember the last time I was soooo excited to try a recipe! I always love being able to make things that I usually would have to run to the store for. Never thought about making my own wrappers before, so I’m totally stoked! Bookmarking this to try some time this week, thank you!
Thanks Hilda! – jaden
We made these tonight and they were AMAZING! Thank you for sharing your recipe Jaden and the detailed instructions. Our whole family joined in and even my 5 and 3 yr old girls were folding dumplings. Will definitely make them again, everyone loved it!!
WOW, that’s fantastic! Happy New Year to you an your girls 🙂 jaden
Hi, this recipe looks great! I wanted to make it with Christmas but I was wondering if
I can prepare the dough and stuffing the day before and refrigerate it (stuffed and all) so I just have to cook them the day after.
Or maybe just that I have to fill them?
I’ll hear from you.
Hi there! Filling can be prepared ahead of time and refrigerated until ready to use. For the best result, stuff/wrap the SAME day that you will cook. If you wrap the dumplings and then refrigerate overnight, the filling can make the wrapper soggy (and break apart).
If you want to wrap ahead of time: Wrap the dumplings, then FREEZE them. When ready to cook, cook the dumplings while still frozen (don’t defrost).
1. Wrap dumplings, freeze in single layer in freezer bag (don’t overcrowd in bag).
2. When ready to cook, heat oil in pan. When hot, add frozen dumplings in single layer into pan (please be careful, ice crystals may splatter in the oil)
3. Cook until bottoms are browned.
4. Add 1/4c water to pan and cover. Turn the heat to medium. Cook 4 minutes (instead of 2 minutes, since the dumplings are still frozen).
5. Uncover, let rest of water evaporate. Check one dumpling for doneness, is it cooked through? If not, you splash a tablespoon or so of water into pan, cover, cook an additional minute then check again.
Good luck!
Can the dumplings be boiled like actual dumplings? I want to make both potstickers and dumplings with one recipe.
Yes they can!
My 15-year-old son and I gave these a go yesterday. We rolled out and stuffed half of the dough and then fried them up. I used ground chicken in place of the pork and they were delicious, but next time I think I’ll add a little more seasoning to the filling.
Anyhow, it was getting late and we didn’t have time to roll out and cook the rest, so I simply kept the dough covered with a wet paper towel and a damp towel over the bowl and let it set overnight. The filling went into the fridge. The dough was still perfect this morning, though it was a little stickier – I had to use a lot more flour on the rolling pin. Still, they turned out just as well and I was really pleased. We’ll definitely be making these again and will experiment with filling ingredients. Thanks for sharing your recipe!
Thank you so much Wendy!!
made them tonite….they were great! i bought the wraps though…
Jaden, we made this tonight for dinner and they were a HUGE hit!!! Thank you so much for a great recipe with seamless instructions. My husband is already planning our next potsticker night! Thanks again!
Thank you so much Myra!! – jaden
Wow! Everyone at my house loves potstickers, but we rarely get them because there are like 10 of us and it’s too expensive. The store-bought wrappers are a fun alternative, but still a lot of work and not cheap. So I thought I’d look up a from-scratch recipe. This is the first I found and man was it a hit! Had to tweak it a bit with what we had (bell-peppers instead of cabbage) but everyone loved them and said they were “amazing” (actual quote) and way better than any of the frozen ones we usually get. The dough was super-cool (and I love dough). Really why I looked it up. The hot+cold water trick was great! I’ve never heard of that. Worked like a charm. Seemed a little dry when I made them, but was way easier to work with and cook, and the texture was just– yum! Not sure why anyone would have trouble with it, was so easy! (Maybe they added too much water?) And the cooking technique was killer. Far different than I would have guessed, based on other directions I have read, and way more controllable as to balance between crispiness and chewiness. The salt-technique worked like a charm even with the bell-peppers! For those who read this though and are nervous of raw pork, don’t be. It will cook plenty well. Any of the bags you buy pre-made are almost always raw, and they are _frozen_! Trust, this is a great recipe for any potsticker connoisseur, and rivals or beats any I’ve had in a restaurant. You may have changed my life, only I can’t tell the kids where I learned this, because now I have some real ammo for when I need them to get something done! LoL Thank you so much for sharing you and your mom’s family secret. Now it is a part of our family too. We are much blessed to have been so lucky, and we wish many blessings to you and yours. Thank you, once again.
Thank you so much Jerry! – jaden
OK, I bought myself a big fancy steel steamer pot and tried your potstickers again. This time I did not precook the pork. I knew that if i steam the dumplings for 15-20 minutes, the meat will be cooked properly. The filling was really great. But I was overzealous in rolling my poor wrappers. i rolled them paper thin and too large. As a result my potstickers were big, fat and ugly. I called them ” crocodiles.” However, my husband, who claims that he does not care how my food looks, but how it tastes (good man!), was praising me and my crocodiles to high heaven. He loved them! I was surprised how tasty they were. Jaden, your tip for salt in Napa cabbage, worked like a charm. All I have to do now is to relax, before I attack my wrappers again. I will get them looking nice, you will see! Thank you again!
Hi Elizabeth! Thanks so much. I love that your husband cares more about how they taste haha! – jaden
I made these today and the filling was wonderful. I’ll keep using that part of the recipe.
The dough on the other hand was too much of a pain to do for the end product. It dried out too fast even though I only worked a quarter of the dough at a time. It’s great for chefs but not worth the time for beginners. The taste of the wrapper wasn’t good enough to justify putting in the work instead of buying the wrappers.
Thanks for posting. The filling was awesome.
Well, Jaden, I did it! I made your potstickers today, using my Polish pierogi dough. Considering that this was my first potstickers dish ever, I declare it a success.
First, I used regular cabbage because the food store Napa cabbage looked wilted. Then, I chickened out and precooked the pork. I just do not feel comfortable using uncooked pork. I also sautéed shiitake mushrooms. It is also possible that I grated a bit more ginger than stated in your recipe. Last night, I put the filling in the fridge, because it was very late and I was too tired to make the dough.
Today, I tried the filling and it was cold and bland. OK, I warned my husband about my impending disaster but he was wonderfully supportive and promised to eat my dumplings no matter how they tasted.
My potstickers looked weird. They were not the same shape and size. Some of them I made from 2 rounds, looking like flying saucers. Some of them looked like Polish pierogi and a few of them had nice folds, looking like your mom’s dumplings. I am very clumsy and my food never looks pretty. I was getting tired again and I decided just to boil the dumplings in salted water. (I will do the steaming procedure some other time.)
Then a miracle happened. I tried one hot potsticker and the little guy was just delicious!
I gave some to my neighbor and she liked them. My husband said that they were great! I stuffed my face with 8 little potstickers and did not even feel guilty.
I feel empowered now! Thank you and your mom for your recipe and your instructions.
Elizabeth
PS. I am still curious about the weight in grams of your 2 and ½ cups flour, please.
Hi Elizabeth! So happy you love the recipe! Folding potstickers takes practice. 🙂 It took me many tries to get mine looking like Mom’s too!
I use King Arthur flour, which is 120 grams per cup. So, we used 300 grams of flour (plus more for dusting). -jaden
Why isn’t there a share on here so I can save this thanks just got a head of cabbage too
Jaden, your instructions are wonderfully detailed, except those 2 and 1/2 cups flour. Could you please weigh your flour and tell me the result in grams?
The wrapper recipe is very similar to Polish pierogi dough. I do not use salt, but I do put a bit of oil. I struggled with the proportion of water to flour for years. Now I would use 400 g of all-purpose flour with 2 Tbs of oil to 1 cup of boiling water.
Your 2 and 1/2 cups flour can be about 350 g flour (I think). The trick is in measuring flour. One person can measure flour in cups as in for baking cakes (dense cups) or as in for pancakes (light cups).
I messed up my measuring cups so many times that now I just want all my flour measurements in grams. Please, please, measure your flour in grams or else I will have to make Polish pierogi dough with your Chinese filling. Thank you so much!
Hi Elizabeth! Absolutely! We’ll get measurements in weight up shortly.
Hi Jaden
Apologies for this, is the filling not cooked Seperately and the cooled and filled? Just afraid to put raw fillng in the wrapper
Hi there – the filling cooks INSIDE the wrapper.
Jaden can they be done in advance and reheated? thanks
Hi Marie -yes, they can! You can either reheat in microwave (bottoms will be soggy), or turn up your frying pan to medium-low, with a little cooking oil. Fry the bottoms for a couple of minutes until they re-crisp (but be careful not to burn), and add just a couple tablespoons of water, cover and let re-steam for a couple of minutes.
Idk of this lady is trolling or just a crazy person but this dough recipe is a joke. It’s impossible to work with, it sticks to everything, you can’t roll it, can’t work it, it’s just not possible. Pictures are probably all fake and its just awful. Ended up cooking the pork mixture in with some rice. Threw out all the ” dough” such a waste. DO NOT FOLLOW THIS RECIPE. You’ll end up wasting your ingredients.
I don’t know what you are talking about. i just tried this and it worked out great. i’m a crappy baker and if i can do it, anyone can. too easy
Me too. I couldn’t have done it without the step by step instructions. Yummy!
I had no issues. It worked very well for me and produced some very nice wrappers. I would suggest trying again and following the recipe carefully.
I followed the dough recipe exactly using boiling water and ice-cold water in the written amounts, but my dough came out really soft and was hard to work with. I kneaded it for the specified amount of time, too.
Was your dough tacky after the resting period? Does the texture change depending on how long you rest it for? I’m trying to figure out what went wrong. I’m pretty good wrapping dumplings using the store-bought wrappers, so I don’t think it was a question of whether or not I know how to wrap the dumplings. I’m looking for a nice homemade wrapper for times I don’t feel like going to the store!
It worked perfectly for me. Maybe you made a measuring error? I’m sorry you wasted 20 cents of flour.
Hi Jaden,
I’m making these for dinner tonight along with Hot and sour soup. Yumm
I’m excited and ready to start cooking and it is only 11:00.
Thanking for sharing your recipe
Thanks Dee!
Made these last night with my daughter and they came out *perfect* — thank you so much for the recipe and excellent instructions!! We used store-bought skins this time, and omitted the mushrooms, but otherwise followed every step and loved them.
Two requests: the amount of white pepper isn’t specified (I assume it’s just a sprinkle/to taste?) and the directions in the printable area forget to list the ginger (I assume it should be added to this sentence: “Add in the chives, water chestnuts and mushrooms.”)
Thank you again to Jaden and Jaden’s mom!
Hi Jaden! I’m a college student, so I can’t exactly make these in my dorm, but as soon as I get home for break I am DEFINITELY making these!
If I use ground chicken, what other ingredients go with?
Keep the rest of the ingredients same — or experiment. I like making ground chicken with diced mango, cabbage and ginger.
Yessss, I have been looking for the perfect potsticker wrapper recipe for ages! Love this!
Sorry if this is a silly question, but does the pork cook fully during the 6 minute cooking process? Or should I pre-cook it a bit? You start with raw pork, correct?
They look delicious and I’m excited to make them! 😀
It will be cooked! Raw pork.
I’ve made these twice now, first time was my first time and the recipe is so clear and perfect it was brilliant!! Everyone, even my fussy 2 year old loved them! Thanks for sharing going to make a huge double batch next time so I have enough left over to freeze 🙂 well I hope I will xx
Thank you so much Paula! Jaden
Love the wrapper recipe. I wanted real potstickers, not made with wonton wrappers and these turned out great .
Thank you
I was a professional cook and this dough recipe is really amazing. The dough was easy to make and easy work with. Once cooked, the potstickers were crispy and soft at the same time. Your instructions and pictures are detailed and very helpful. Definitely a keeper! Thanks!!!
I look forward to trying your recipes, especially the Pot Stickers. After taking a look through your book and your blog, I am impressed by the breadth of recipes you present. Thank you for sharing!
Recipe I grew up with. I use the cutting blade on my food processor to knead the dough. Thanks. Your advice eitherconfirmed or tweaked my recipe.
I made these tonight with my 12 year old daughter – THANKS so much for detailed instructions. They were absolutely delicious!!
Totally excited about this. First had these at Joe’s Shanghai in NYC about 20 years ago. The funny thing is that I’ve had them in Shanghai, but they were nowhere near as good. The other best place I’ve had them was a little Chinese joint in Uijeongbu, S. Korea. I am looking forward to making these on my own. Oh, what you are describing on the cabbage is generally called a rib.
Hi Jaden ,
Absolutely fabulous potstickers and are dangerously scrumptious , YIKES ! I am wondering if one could use the same dough recipe for wonton soup . If not do you have a wonton skin recipe ?
I divided the dough and used half for potstickers, half for wonton. Wonton skins are thinner but otherwise the same dough works fine. I used a pasta roller and rolled out to the #8 setting. Note: the roller makes sheets that are too wide for 1, but too narrow for 2 skins. So I rolled out to the #3 setting, cut the dough in half lengthwise, then
continued rolling each piece. Perfect width! Cut into squares and you’re ready to go. Oh, and I got this tip from another website: using cornstarch instead of flour to dust the work surface helps keep the dough tender. Have fun!
Jaden,
This post epitomizes what I most treasure from your website and your book: your (and your mom’s) commitment to teaching. Thank you for sharing. Last week I went to an oriental grocery store with a list of ingredients I copied from your book including a note on which brand of black vinegar I was going to buy and which brand of fish sauce not to buy. Again, thank you.
Hi Jasmine! Thanks so much for your comment! I’m sending your note to my Mom, who’s in China currently 🙂
Jaden, looks super tasty. I made some a few months ago and I noticed the the filling shrunk from cooking and was like a pork marble rattling around in the wrapper! What am I doing wrong? They tasted fine though. The homemade wrappers look great , the dumpling sisters blog had a clever donut technique in making equal sized wrappers (mine is lazier I buy them). I think there is a missed business opportunity here in America that we don’t have dim sum as a readily available as a breakfast mcmuffin. Something like “Jaden’s dim sum dumplingettes” Whaddaya think?
Hi Ann! So great to hear from you! For your filling, did you have enough vegetables? The pork will shrink when cooked!
Several years ago, I thought of running a food truck for dumplings – maybe one day! Jaden
I’ll give it a try. I think when last I made it I just used canned water chestnuts and green onion I don’t recall cabbage. Thanks!
Hi Jaden,
It’s amazing how similar this recipe is to one I got back in the late 1970’s!!! I took a Chinese cooking class from this guy whose wife ran a small Chinese grocery here in Richmond (VA). The lessons were in the back of their store. The guy was actually a professor at Longwood College and taught this for fun. I wish I could remember his name and where he is!! The classes were for 4 weeks, we did hands on cooking, 3 recipes per class.
When I made the dumplings from that recipe my friends told me that they rated Chinese restaurants on their ability to make dumplings as good as these. And THESE tasted like the ones from the NY restaurants (I’m orig from NYC suburbs). Since your recipe is almost identical I can only imagine these are as good or better!
Your recipe differs slightly from his:
His recipe:
2 cups ground pork
3 cups Chinese cabbage, chopped
3 slices ginger root, chopped
5 TB soy
2 scallions
2 TB sesame oil
The dough ingredients were nearly identical. Though, I never rolled out each piece. I rolled out all the dough into one large ‘sheet’ and used a glass with a 3″ diameter like a cookie cutter.
The cooking instructions were basically the same.
Now I’ve got the ‘fever’ to make these!
Dave
Dave – Dumpling Fever! I think potstickers are calling your name this weekend 😉 jaden
Do you cook the ground pork before adding to the filling, or is it added raw?
Can these be frozen? What stage can I freeze them. Cooked or uncooked?
Hi Jo – Freeze the dumplings right on the baking sheet. Once frozen, you can gather them up and put them in a freezer bag to store. If you don’t have a lot of room in your freezer to accommodate a baking sheet, place the dumplings on a paper plate. Make sure they aren’t overcrowded. Place entire paper plate into a gallon freezer bag and freeze. Try to keep them flat in the freezer until they are completely frozen.
When ready to cook, take them from freezer directly to pan. Add an extra 3 minutes of cooking time to account for the frozen dumplings. Don’t try to defrost before cooking, they’ll just end up as a soggy mess.
Wow!! What a treasure trove, just in this one recipe! Thank you, Jaden, for the amazing recording, both in writing and photos. Much love and many hugs to your mom, for sharing (and having what I imagine would have been some real patience, in order to help get the best photos, and for accurate recipe measurements). A huge “thank you”!
Thank you for a such detailed step by step recipe on how to make those potstickers dumplings.
You made me want to go to the kitchen and try them out.
Thanks again.
Thank you for a such detailed step by step recipe on how to make those potstickers.
You made me want to go to the kitchen and try them out.
Thanks again.
Thank you so much for this detailed article. I have a question regarding the cabbage: does regular (green) cabbage require salting and squeezing like the napa one?
Yes it does – you won’t get as much water from regular green cabbage, but it’s still a necessary step.
what I just saw was 40 years of generous love, now being carried on with sincerity not just legacy.
Those dumplings look like to die for and you explained everything so well, I don’t think I’ll have problems making these.
Oh my gosh. This is a wonderful tutorial! I am definitely going to have to try because I LOVE pot stickers! These look so yummy!
Wow, Jaden! Holy smokes! When you said you were making these potstickers from scratch, I assumed you meant you were making the filling from scratch! The wrappers too, though?! Madness. Madness in the best possible way. I cannot even imagine how delicious these are, although my mind is racing with the possibilities. This is actually the cooking I enjoy the most: Huge projects that fill an entire day with delicious results. Thank you so much for sharing so much love and effort through this recipe.
Now I want potstickers!!! These look absolutely delicious!! Sadly, I don’t have the patience to make the wrappers even though homemade is the best. How long did it take your mom for the entire process – start to finish?
Thank you so much for this, Jaden. Potstickers are one of my top five favorite foods in the world, and I’ve always wanted to try my hand at dough from scratch. This will get saved/printed out and go into the permanent file!
Thank you! I was drooling the entire time I was reading this.
OMG!! Posticker dumplings are my all time fav!!! haven’t done so for such a long time! Really miss !! Love the step by step instruction!! the touch part is how to make a perfect dough!!
thx for sharing!!
http://www.teabeyond.com
I have tried to read this recipe five or six times now. The ads make the page jump to the bottom repeatedly and I have to keep scrolling back to the top. I’m giving up.
It seems that quite recently I’ve become addicted to Potstickers. The Market where I’ve been buying them has stopped selling them, so I’ve been going through major withdrawals. Thanks to you, I won’t have to go without my new fave food “potstickers”.
Thanks for sharing your family recipe Jaden.